
Raider V6-3.7L SOHC (2006)
4. Raise the RH wiper blade off the glass.
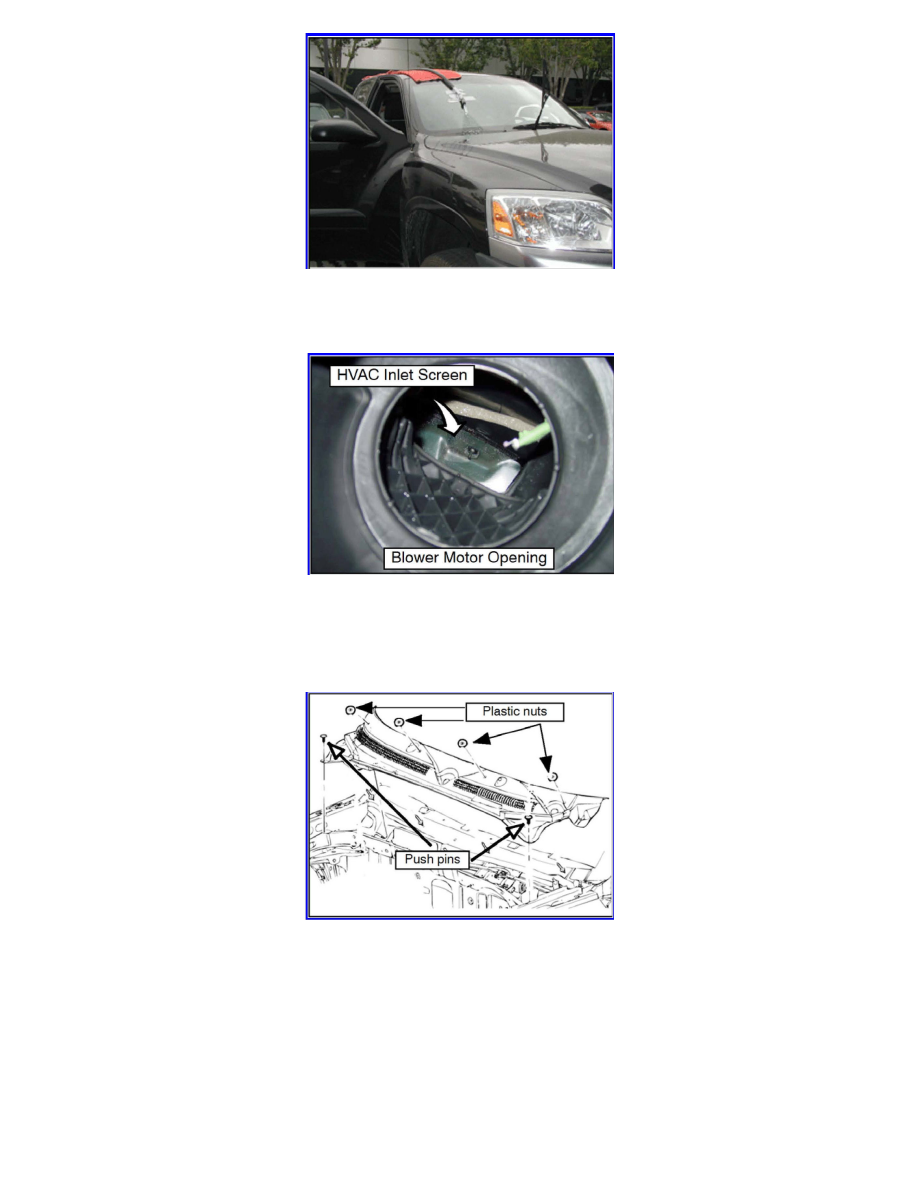
5. Flood the RH side of the cowl with a steady stream of water.
6. Looking up from the passenger's floorboard into the blower motor area, check for leaking water.
a. If water is leaking into the blower motor area, repair the condition using the instructions that begin in step 5.
b. If no leak is seen, this TSB does not apply. Conduct further water leak diagnosis and repair as necessary.
7. Remove the windshield wipers. Refer to Group 51 - Exterior, for Wiper Arm removal steps.
8. Remove the cowl trim as follows:
a. Remove the weatherstrip along the forward edge of the trim.
b. Remove the 2 push pin clips (p/n 06030441) at the forward corners of the trim (these may require replacement during reassembly).
c. Remove the 4 plastic nuts (p/n 06508365AA) along the upper surface of the trim using a # 30 Torx bit. The nuts are reusable if not damaged
during removal.