
Raider V6-3.7L SOHC (2006)
Brake Drum: Adjustments
ADJUSTMENTS - REAR DRUM BRAKE
The rear drum brakes are equipped with a self adjusting mechanism. Under normal circumstances, the only time adjustment is required is when the
shoes are replaced, removed for access to other parts, or when one or both drums are replaced. Adjustment can be made with a standard brake gauge
or with adjusting tool. Adjustment is performed with the complete brake assembly installed on the backing plate.
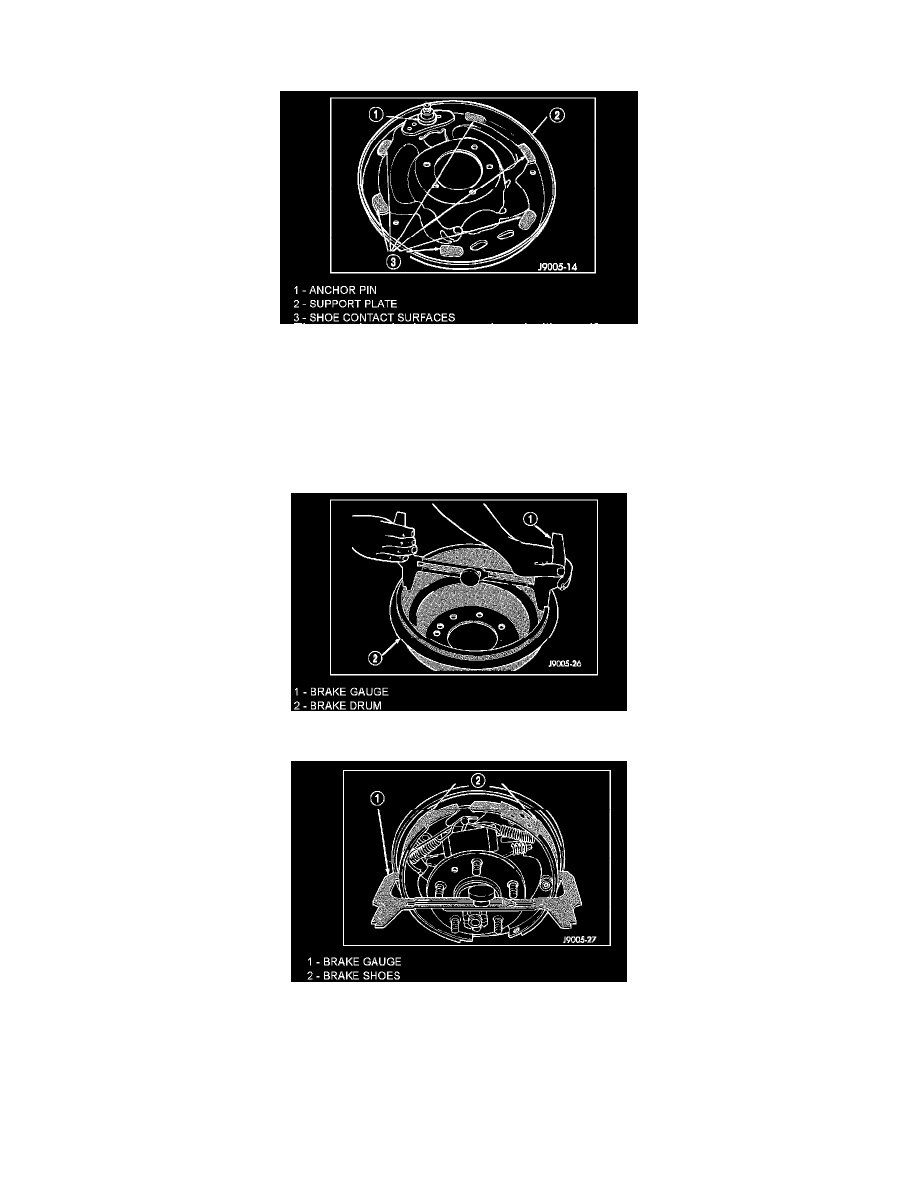
ADJUSTMENT WITH BRAKE GAUGE
1. Be sure parking brakes are fully released.
2. Raise rear of vehicle and remove wheels and brake drums.
3. Verify that left and right automatic adjuster levers and cables are properly connected.
4. Insert brake gauge in drum. Expand gauge until gauge inner legs contact drum braking surface. Then lock gauge in position.
5. Reverse gauge and install it on brake shoes. Position gauge legs at shoe centers as shown. If gauge does not fit (too loose/too tight), adjust shoes.
6. Pull shoe adjuster lever away from adjuster screw star wheel.
7. Turn adjuster screw star wheel (by hand) to expand or retract brake shoes. Continue adjustment until gauge outside legs are light drag-fit on shoes.
8. Install brake drums and wheels and lower vehicle.
9. Drive vehicle and make 8-10 forward stops to operate automatic adjusters and equalize adjustment.
NOTE: Bring vehicle to complete standstill at each stop. Incomplete, rolling stops will not activate automatic adjusters.