
Raider V6-3.7L SOHC (2006)
INSPECTION
As a general rule, riveted brake shoes should be replaced when worn to within 0.78 mm (1/32 inch) of the rivet heads. Bonded lining should be
replaced when worn to a thickness of 1.6 mm (1/16 inch). Examine the lining contact pattern to determine if the shoes are bent or the drum is tapered.
The lining should exhibit contact across its entire width. Shoes exhibiting contact only on one side should be replaced and the drum checked for
runout or taper.
Inspect the adjuster screw assembly. Replace the assembly if the star wheel or threads are damaged, or the components are severely rusted or
corroded. Discard the brake springs and retainer components if worn, distorted or collapsed. Also replace the springs if a brake drag condition had
occurred. Overheating will distort and weaken the springs. Inspect the brake shoe contact pads on the support plate, replace the support plate if any of
the pads are worn or rusted through. Also replace the plate if it is bent or distorted.
INSTALLATION
1. Clean and inspect individual brake components.
2. Lubricate where the brake shoe contacts the support plate with high temperature grease or Lubriplate.
3. Lubricate adjuster screw socket, nut, button and screw thread surfaces with grease or Lubriplate.
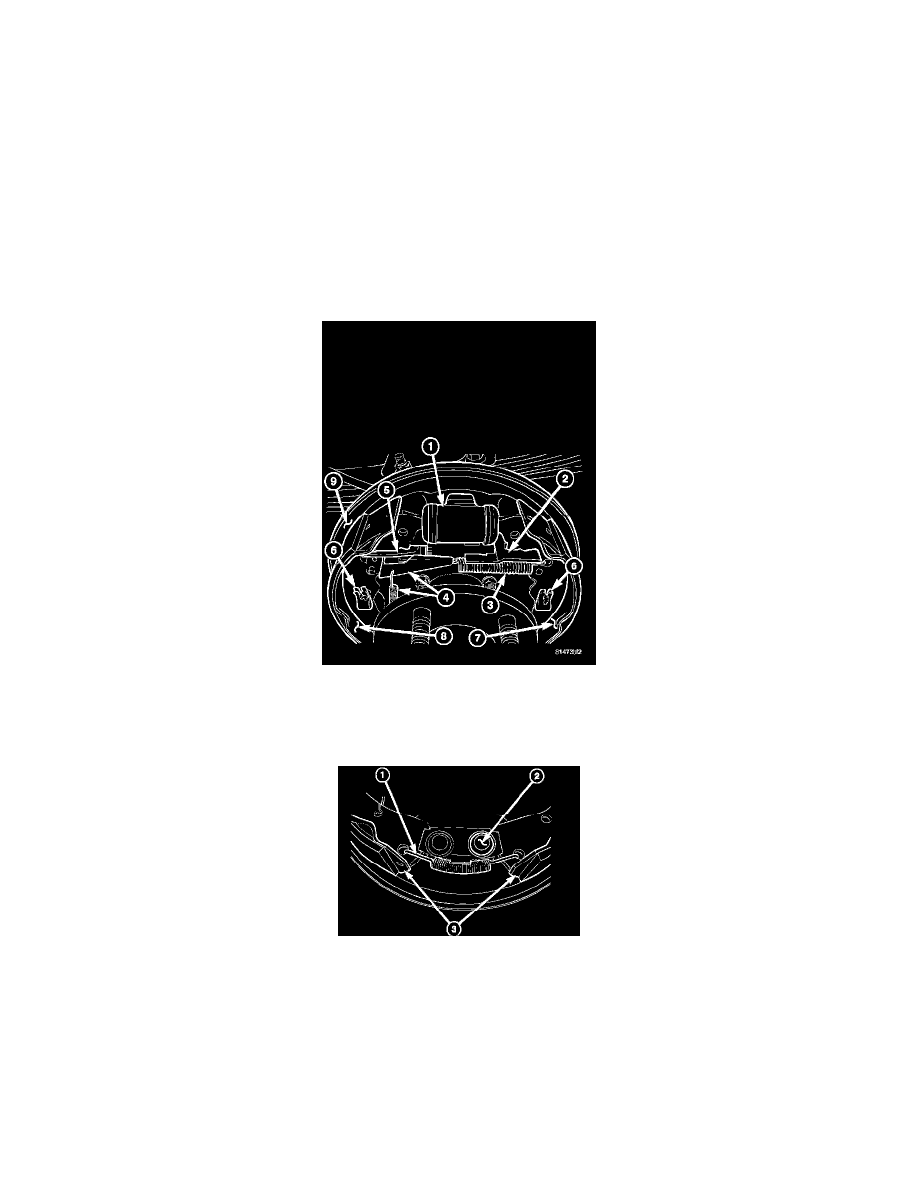
4. Install parking brake lever (2) to the rear shoe (7) and install the hold down clip (6).
5. Install the adjuster strut (5) onto the shoes and park brake lever (2).
6. Install the front shoe (8) on support plate (9), and install the hold down clip (6).
7. Install the adjuster spring and lever (4) in the slot in the adjuster strut (7).
8. Install the lower return spring (1) to the shoes (3).