
Raider V6-3.7L SOHC (2006)
Crankshaft: Service and Repair
CRANKSHAFT
REMOVAL
NOTE: To remove the crankshaft from the engine, the engine must be removed from the vehicle.
1. Remove the engine.
2. Remove the engine oil pump.
CAUTION: DO NOT pry on the oil pan gasket when removing the oil pan, The oil pan gasket is mounted to the cylinder block in three locations
and will remain attached to block when removing oil pan. Gasket can not be removed with oil pan.
3. Remove the bedplate mounting bolts. Note the location of the two stud bolts for installation.
4. Remove the connecting rods from the crankshaft.
CAUTION: The bedplate to cylinder block mating surface is a critical sealing surface. Do not pry on or damage this surface in anyway.
NOTE: The bedplate contains the lower main bearing halves. Use care when handling bedplate as not to drop or damage bearing halves.
Installing main bearing halves in the wrong position will cause severe damage to the crankshaft.
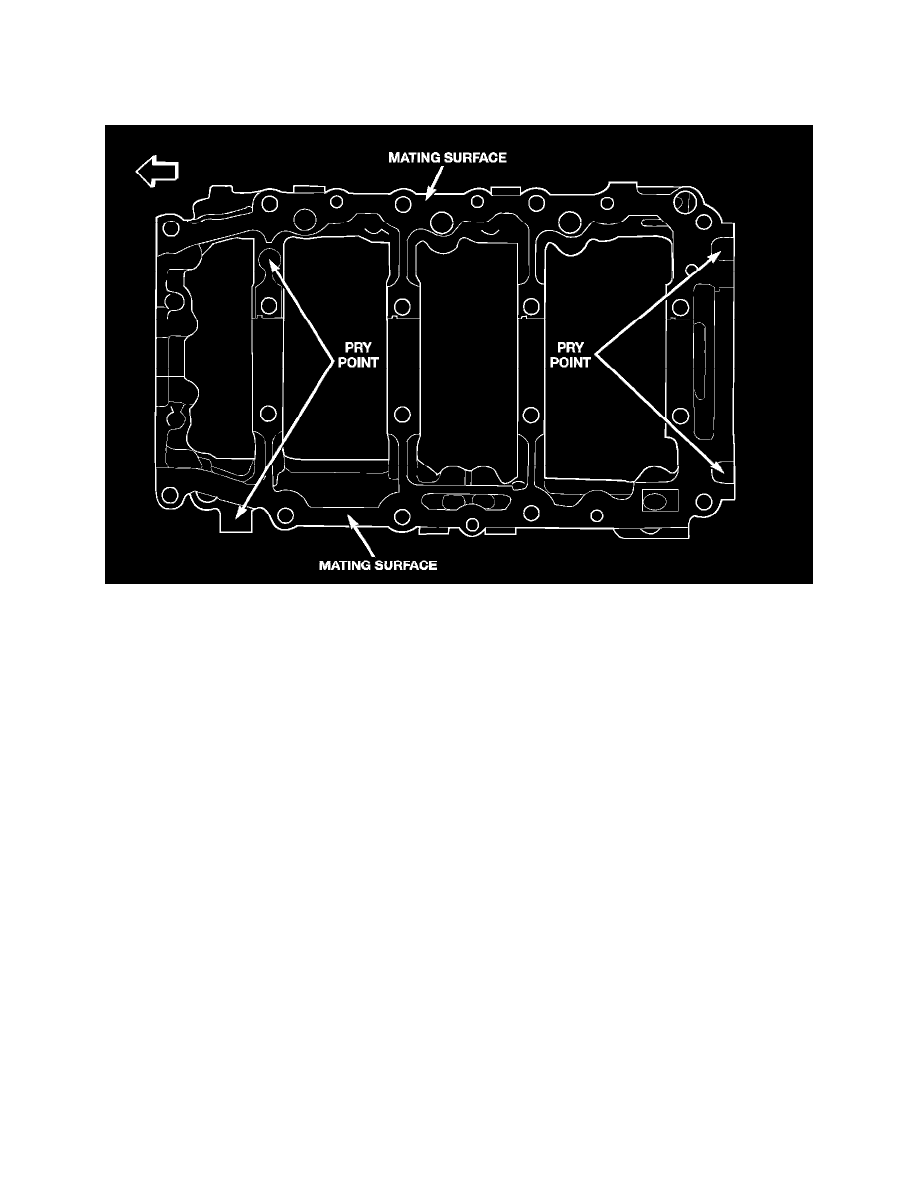
NOTE: The bedplate has pry points (1) cast into it. Use these points only.
5. Carefully pry on the pry points (1) to loosen the bedplate then remove the bedplate.
CAUTION: When removing the crankshaft, use care not to damage bearing surfaces on the crankshaft.
6. Remove the crankshaft.
7. Remove the crankshaft tone wheel.
INSPECTION
NOTE: Thoroughly inspect the connecting rod bearing bores and main bearing bores for scoring, blueing or severe scratches. Further disassembly
may be required.
If connecting rod bearing bores show damage, the cylinder heads must be removed to service the piston and rod assemblies. If the bedplate or the
cylinder block main bearing bores show damage the engine must be replaced.