
Raider V6-3.7L SOHC (2006)
Oil Pan: Service and Repair
PAN - ENGINE OIL
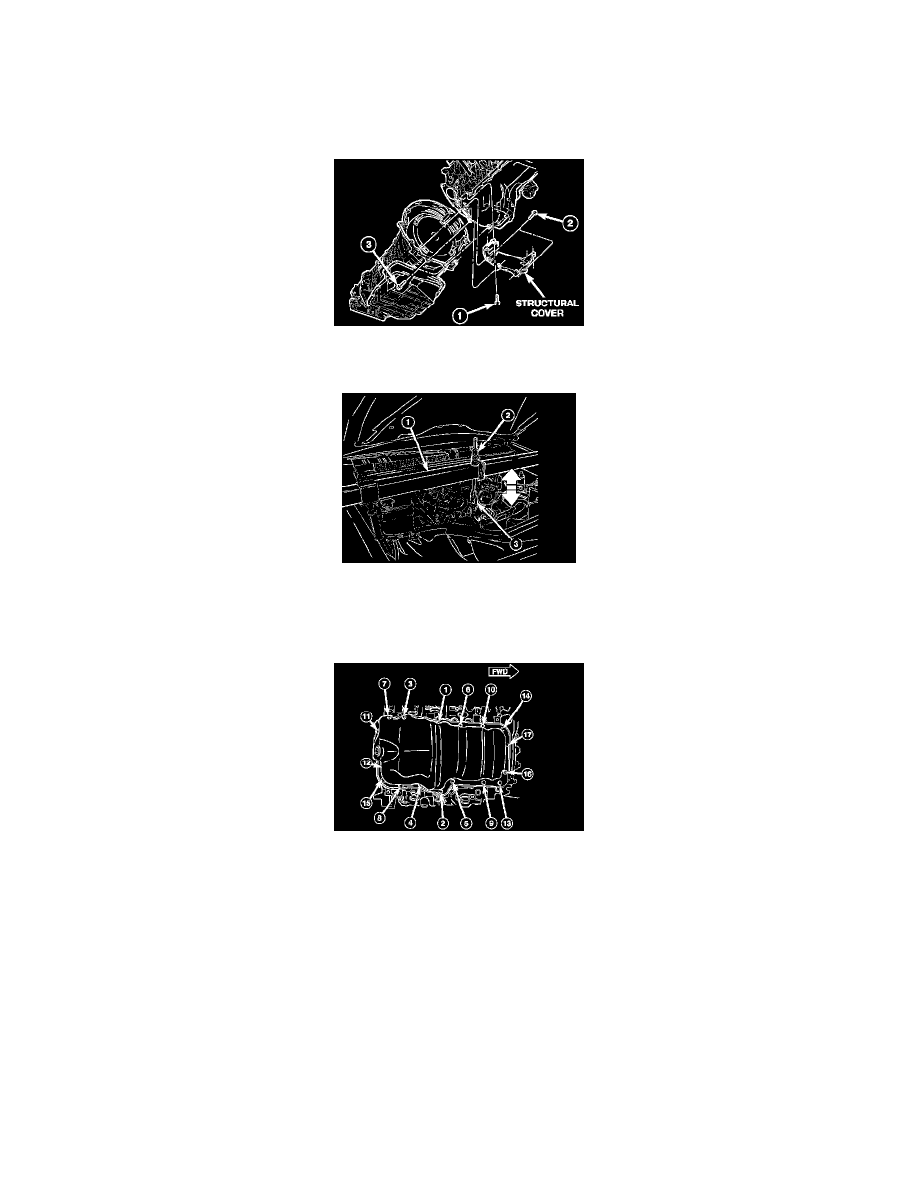
REMOVAL
1. Disconnect the negative battery cable.
2. Install engine support fixture (1) special tool #8534. Do not raise engine at this time.
3. Remove both left and right side engine mount through bolts.
4. Remove the structural dust cover.
5. Drain engine oil.
CAUTION: Only raise the engine enough to provide clearance for oil pan removal. Check for proper clearance at fan shroud to fan and cowl to
intake manifold.
6. Raise engine using special tool (1) # 8534 to provide clearance to remove oil pan.
NOTE: On 4WD vehicles, the front axle must be lowered, to provide clearance for oil pan removal. It is not necessary to remove the front axle
from the vehicle, or remove the axle shafts.
7. For 4WD Vehicles Remove the pinion bracket.
8. For 4WD Vehicles Disconnect the front driveshaft at the front axle.
9. For 4WD Vehicles Remove the front axle mounting bolts.
10. For 4WD Vehicles Lower axle using suitable jack enough to provide clearance to remove oil pan.
NOTE: Do not pry on oil pan or oil pan gasket Gasket is integral to engine windage tray and does not come out with oil pan.
11. Remove the oil pan mounting bolts and oil pan.
12. Unbolt oil pump pickup tube and remove tube.
13. Inspect the integral windage tray and gasket and replace as needed.
CLEANING