
Raider V6-3.7L SOHC (2006)
26. Install the lever and linkage rod onto the blend door pivot shaft (2).
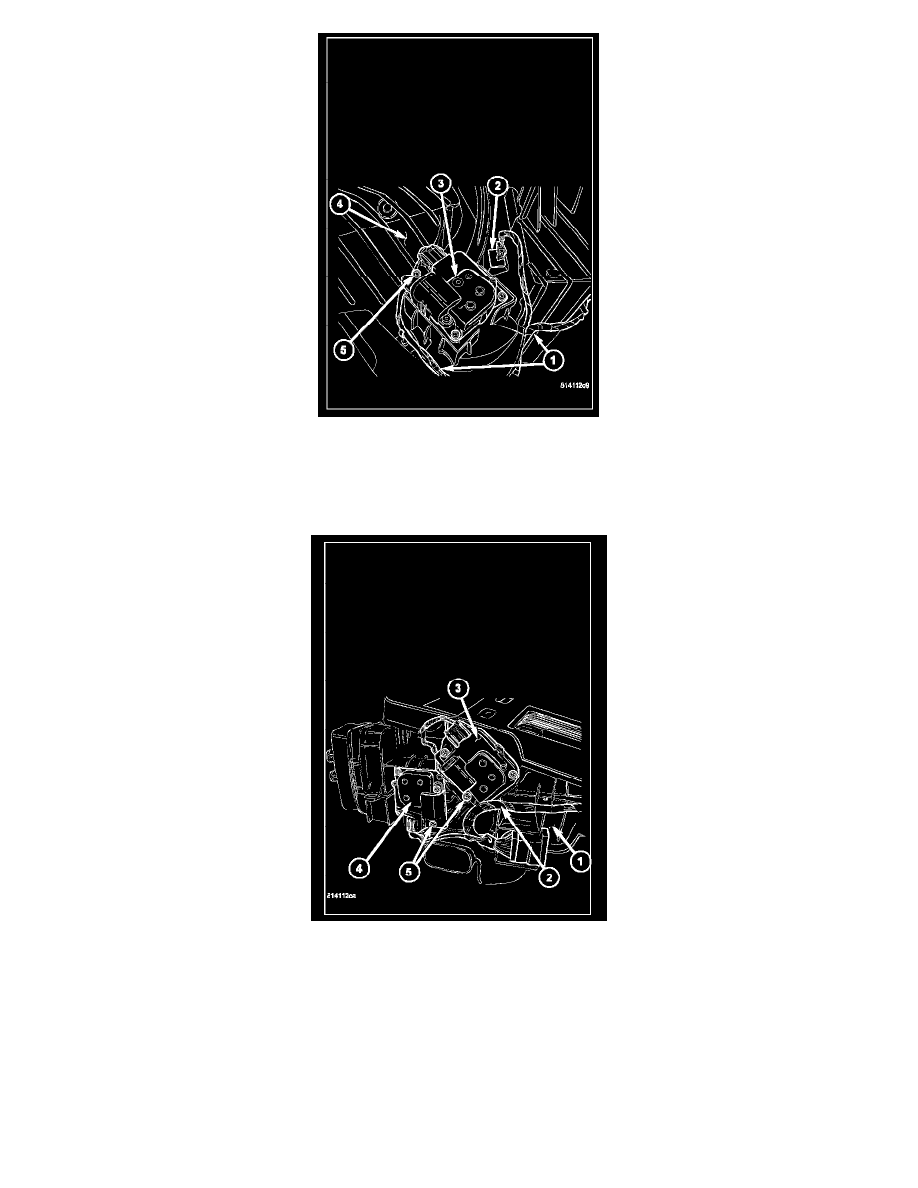
27. Install the evaporator temperature sensor (2) into the opening located at the top of the HVAC housing (4).
28. Position the blend door actuator (3) onto the HVAC housing. If necessary, rotate the actuator slightly to align the splines on the actuator output
shaft with those on the blend-air door linkage.
29. Install the three screws (5) that secure the blend door actuator to the HVAC housing. Tighten the screws to 2 N.m (17 in. lbs.).
30. Connect the HVAC wire harness (1) to the evaporator temperature sensor and the blend door actuator.
31. Position the mode door actuators (3 and 4) onto the driver side end of the HVAC housing (1). If necessary, rotate the actuators slightly to align the
splines on the actuator output shafts with those on the mode-air doors.
32. Install the three screws (5) that secure the mode door actuators to the HVAC housing. Tighten the screws to 2 N.m (17 in. lbs.).
33. Connect the HVAC wire harness (2) to the mode door actuator.
34. Install the HVAC housing assembly.
Air Inlet Housing
AIR INLET HOUSING
NOTE: The air inlet housing must be removed from HVAC housing and disassembled for service of the recirculation-air door.