
Raider V6-3.7L SOHC (2006)
a. If your MEDIC-II is at the most current download number, go to the Reprogramming Procedure.
c. If your MEDIC-II is at the most current download number, update your MEDIC-II as follows.
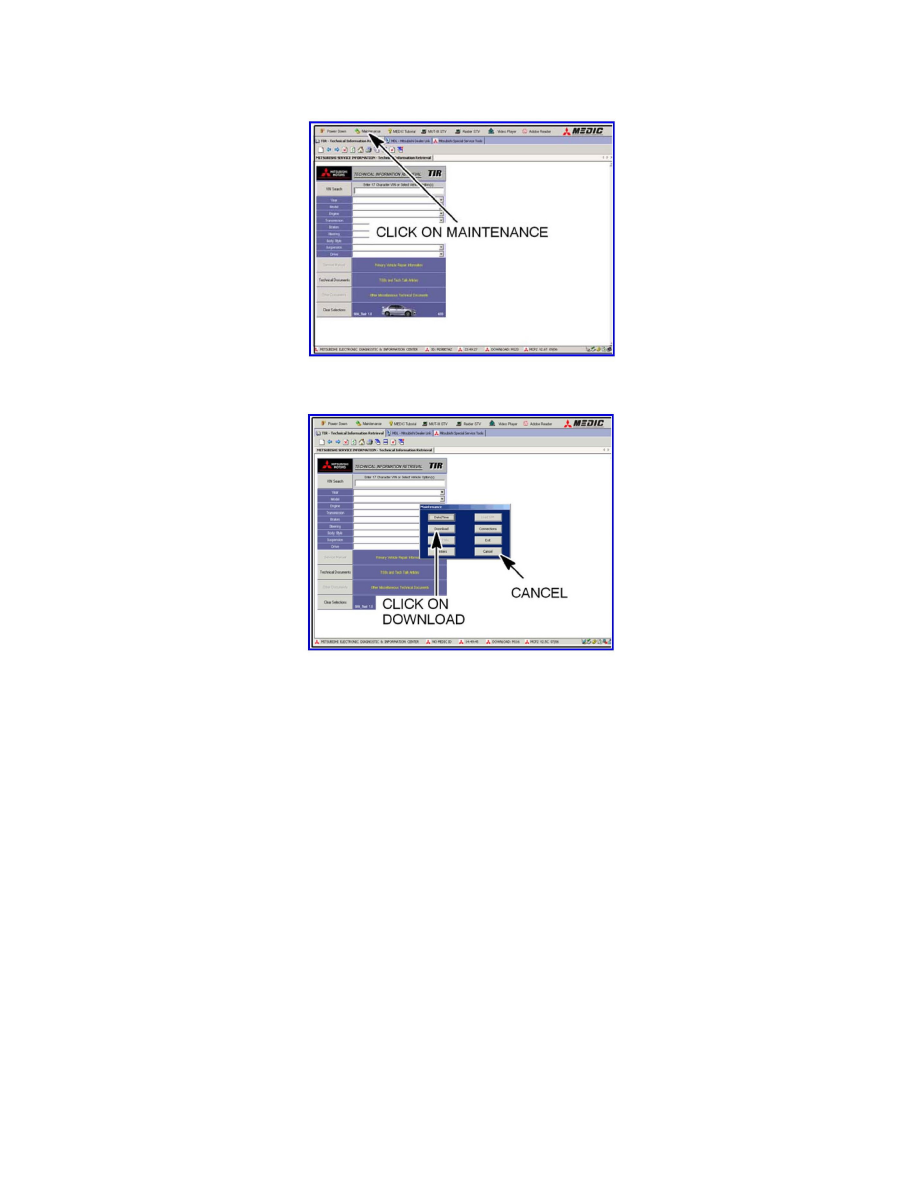
On the MEDIC-II main screen, click on Maintenance.
Click on Download. After the download completes, click on Cancel to exit the "Maintence" window.
GO TO THE REPROGRAMMING PROCEDURE.
For Stand-alone MUT-III users only:
If you have a stand alone Scan Tool (MUT-III), transfer the reprogramming data from the Reflash Update CD to your MUT-III laptop as follows:
a. With the MUT-III laptop on, close the Raider STV and MUT-III STV.
b. Install Reflash Update CD 10/08 into the laptop.
c. Follow the instructions displayed on-screen for loading the database onto your laptop.
REPROGRAMMING PROCEDURE
1. Connect a battery charger to the vehicle's battery.
BATTERY VOLTAGE MUST BE MAINTAINED BETWEEN 13.2 AND 13.5 VOLTS. CHECK THE CONDITION OF THE BATTERY AND
CHARGE IT IF NECESSARY. CONNECT A BATTERY CHARGER SET TO CONTINUOUS CHARGE, TO THE BATTERY. DO NOT ALLOW
THE CHARGER TO "TIME OUT" DURING THE REPROGRAMMING PROCESS.
DO NOT ALLOW THE CHARGING VOLTAGE TO EXCEED 13.5 VOLTS DURING THE PROCESS.
2. Connect the reprogramming equipment as follows:
a. Start the laptop computer.