Raider V6-3.7L SOHC (2006)

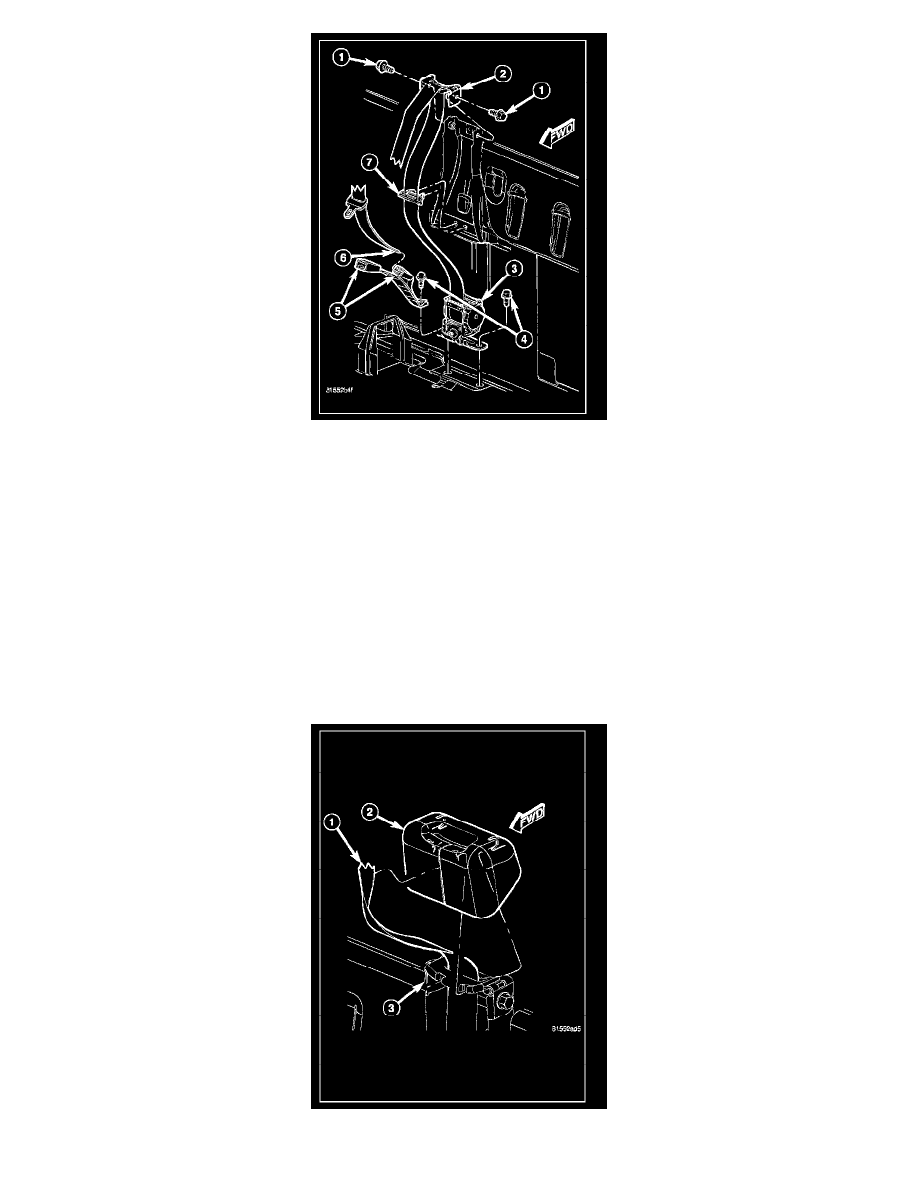
1. Position the mounting bracket of the rear center seat belt retractor (3) to the rear floor panel near the base of the cab back panel.
2. Align and loosely install a screw (4) through the left side of the retractor mounting bracket.
3. Position and align the buckle unit (5) onto the right side of the retractor mounting bracket.
4. Install and tighten the screw that secures the buckle unit anchor brackets and the right side of the retractor mounting bracket to the rear floor panel.
Tighten the screw to 39 Nm (29 ft. lbs.).
5. Tighten the screw that secures the left side of the retractor mounting bracket to 39 Nm (29 ft. lbs.).
6. Position the belt bracket (2) onto the cab back bracket. Be certain that the seat belt webbing between the retractor and the top of the cab back
bracket is not twisted.
7. Loosely install the two screws (1) that secure the belt bracket to the cab back bracket.
8. Tighten the screws that secure the belt bracket to the cab back bracket to 20 Nm (15 ft. lbs.).
9. Engage the two integral retaining clips of the belt web guide (7) into the holes in the cab back panel.
10. Reinstall the rear seat into the vehicle.
11. Engage the head of the right outboard seat belt buckle through the elastic strap on the rear edge of the right rear seat cushion.
12. Reach between the rear seat cushion and the rear seat back to engage the rear center seat belt lower anchor latch plate (6) to the unique, keyed
lower anchor center buckle. Be certain that the seat belt webbing between the top of the seat back and the anchor buckle and the webbing between
the anchor buckle and the retractor mounting bracket is not twisted.
13. Lower the right rear seat cushion to its normal seating position.
