
Raider 2WD V6-3.7L (2008)
4. Remove the A-pillar trim panels.
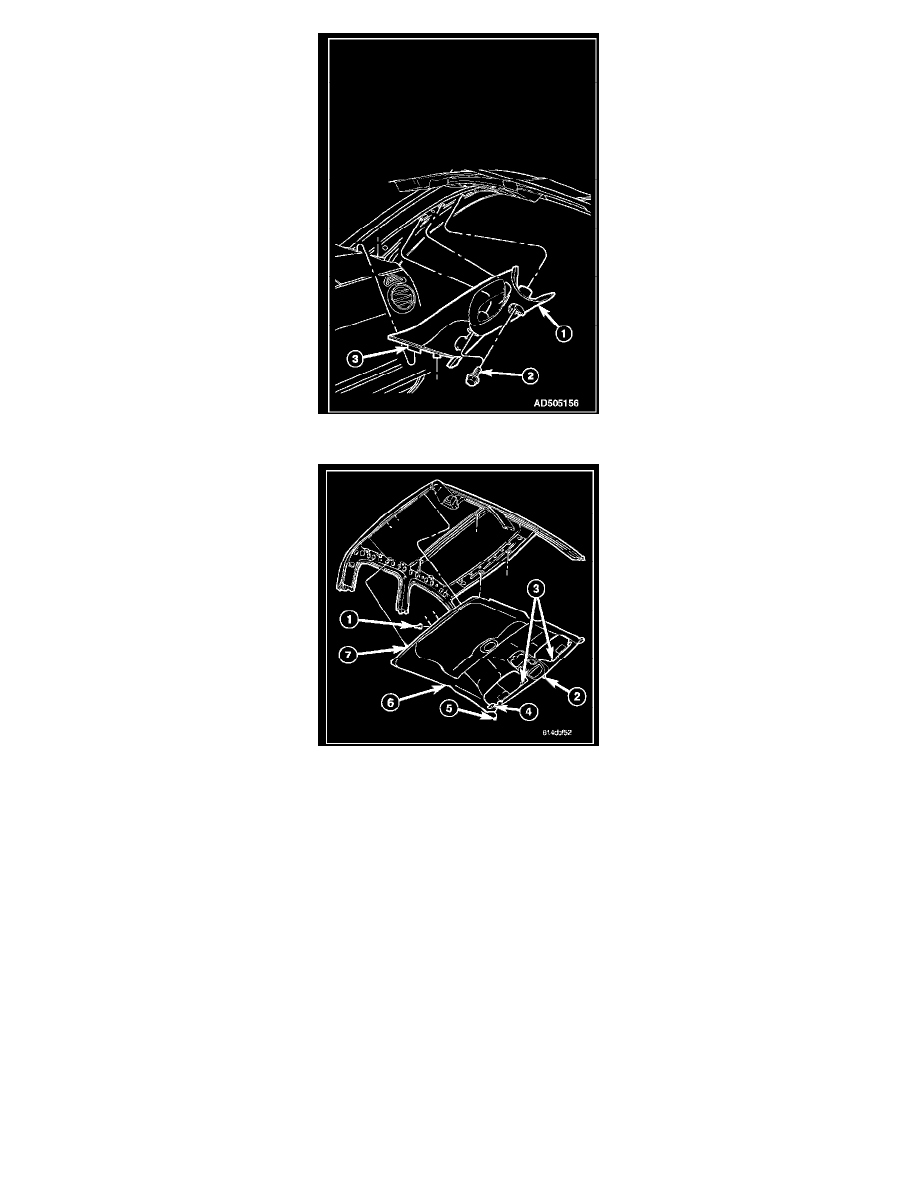
5. Disconnect the wire harness connector (5) located at the right A-pillar.
6. If equipped, disconnect the headliner wire harness connector (2) from the inside rear view mirror.
7. If equipped, remove the overhead console.
8. Remove the sun visors (4).
9. Remove the sun visor supports (3).
10. If equipped, remove the front dome lamp.
11. If equipped, remove the rear dome lamp.
12. Remove the two coat hooks
14. Recline the right front seat.
15. Remove the left front seat.
16. Lower the rear of the headliner (7) and disconnect the headliner wire harness connector (1) from the center high mounted stop lamp.
CAUTION: Be careful not to crease the headliner.
17. Lower the front of the headliner and remove the headliner through the left door opening.
INSTALLATION
Extended Cab, Without Rear Jumper Seats