
Raider 2WD V6-3.7L (2008)
2. Trim 3 mm (0.125 in.) from edges of pattern so patch will have a gap between connecting surfaces.
3. Using the pattern as a guide, cut the patch to size.
4. Cut scrap pieces of patch material into 50 mm (2 in.) squares to use as patch supports to sustain the patch in the cutout.
5. Drill 4 mm (0.160 in.) holes 13 mm (0.5 in.) in from edge of cutout hole.
6. Drill 4 mm (0.160 in.) holes 13 mm (0.5 in.) away from edge of patch across from holes drilled around cutout.
7. Drill 3 mm (0.125 in.)holes in the support squares 13 mm (0.5 in.) from the edge in the center of one side.
8. Scuff the backside of the body panel around the cutout hole with a scuff pad or sandpaper.
9. Mix enough adhesive to cover one side of all support squares.
10. Apply adhesive to cover one side of all support squares.
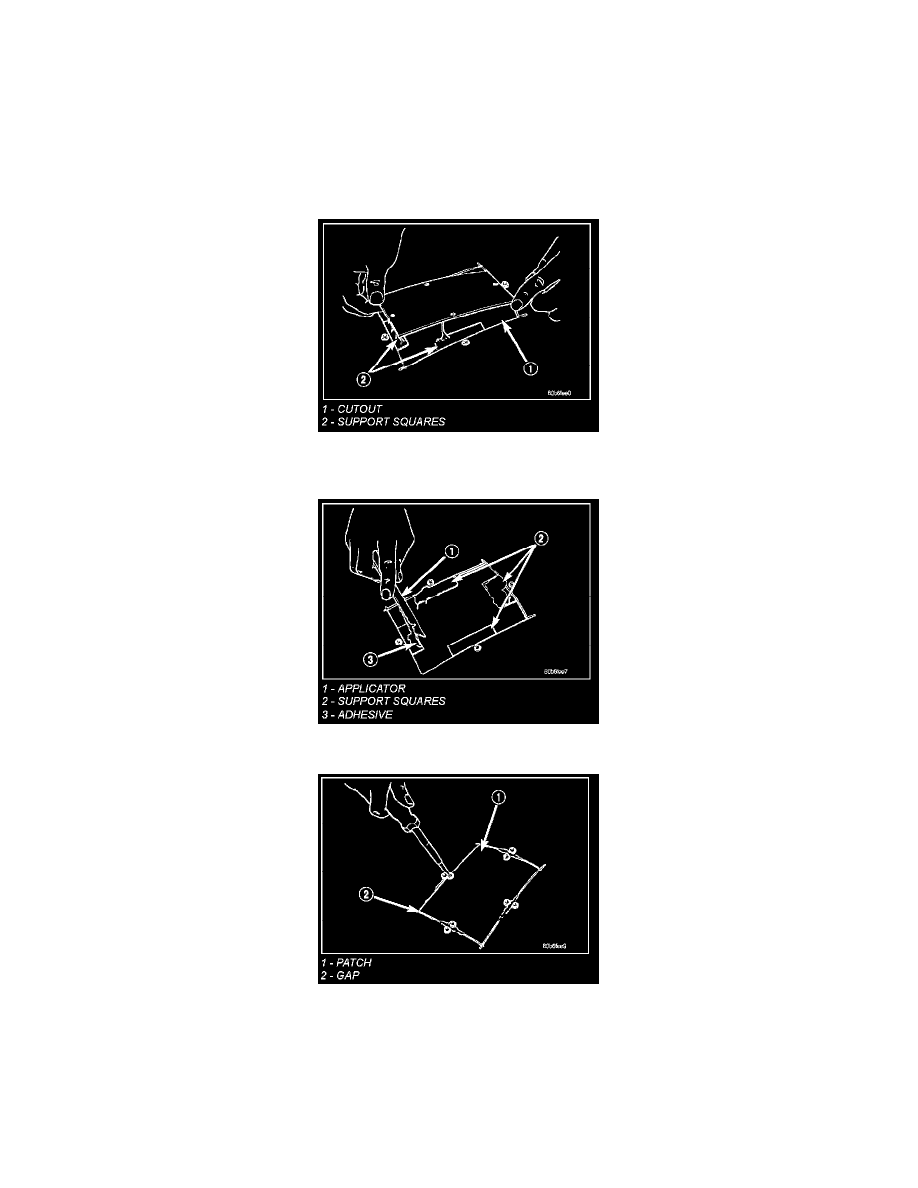
11. Using number 8 sheet metal screws, secure support squares to back side of body panel with adhesive sandwiched between the panel and squares.
12. Position patch in cutout against support squares and adjust patch until the gap is equal along all sides.
13. Drill 3 mm (0.125 in.) holes in the support squares through the pre-drilled holes in the patch.
14. Apply a coat of adhesive to the exposed ends of the support squares.
15. Install screws to hold the patch to support squares. Tighten screws until patch surface is flush with panel surface.
16. Allow adhesive to cure, and remove all screws.