
Raider 2WD V6-3.7L (2008)
CAUTION: Keep the inner bottom end of the upper C-pillar trim panel away from the cab back trim panel when removing the upper
C-pillar trim panel to prevent scratching the back trim panel.
2. Using a trim stick C-4755 or equivalent, disengage the retaining tabs (3) that secure the upper C-pillar trim panel (2) to the C-pillar. Pull the outer
bottom end of the trim panel outward toward the door opening so that the inner bottom end of the trim panel doesn't touch the cab back trim panel.
While maintaining the outward pressure, pull the trim panel away from the C-pillar and remove the trim panel.
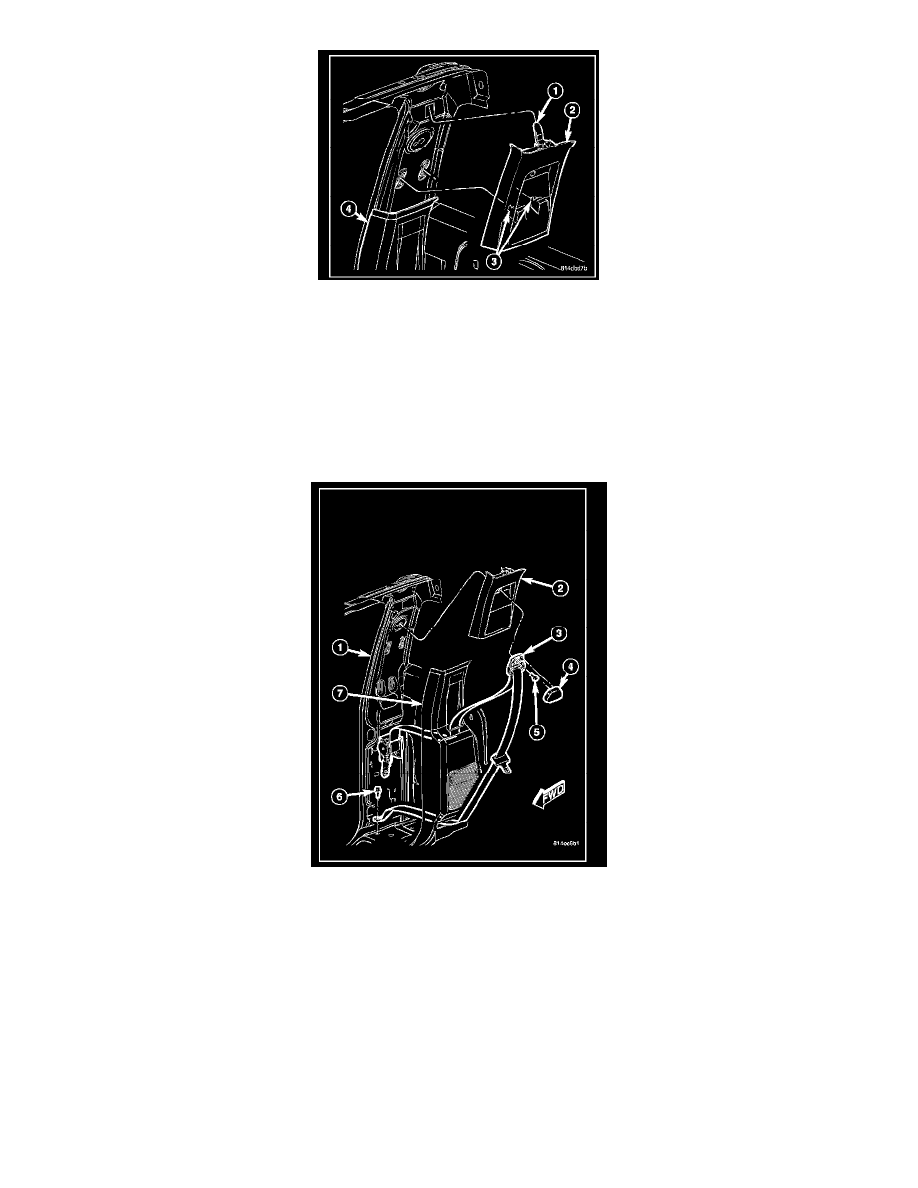
Extended Cab, With Rear Jumper Seats
1. Adjust the front seat to its most forward position.
2. Unsnap the trim cover (4) from the rear seat belt turning loop (3).
3. Remove the screw (5) that secures the seat belt turning loop to the upper C-pillar (1).
4. Remove the seat belt turning loop from the C-pillar.
CAUTION: Keep the inner bottom end of the upper C-pillar trim panel away from the cab back trim panel when removing the upper
C-pillar trim panel to prevent scratching the back trim panel.
5. Using a trim stick C-4755 or equivalent, disengage the retaining tabs that secure the upper C-pillar trim panel (2) to the C-pillar. Pull the outer
bottom end of the trim panel outward toward the door opening so that the inner bottom end of the trim panel doesn't touch the cab back trim panel.
While maintaining the outward pressure, pull the trim panel away from the C-pillar and remove the trim panel.
Double Cab