
Raider 2WD V6-3.7L (2008)
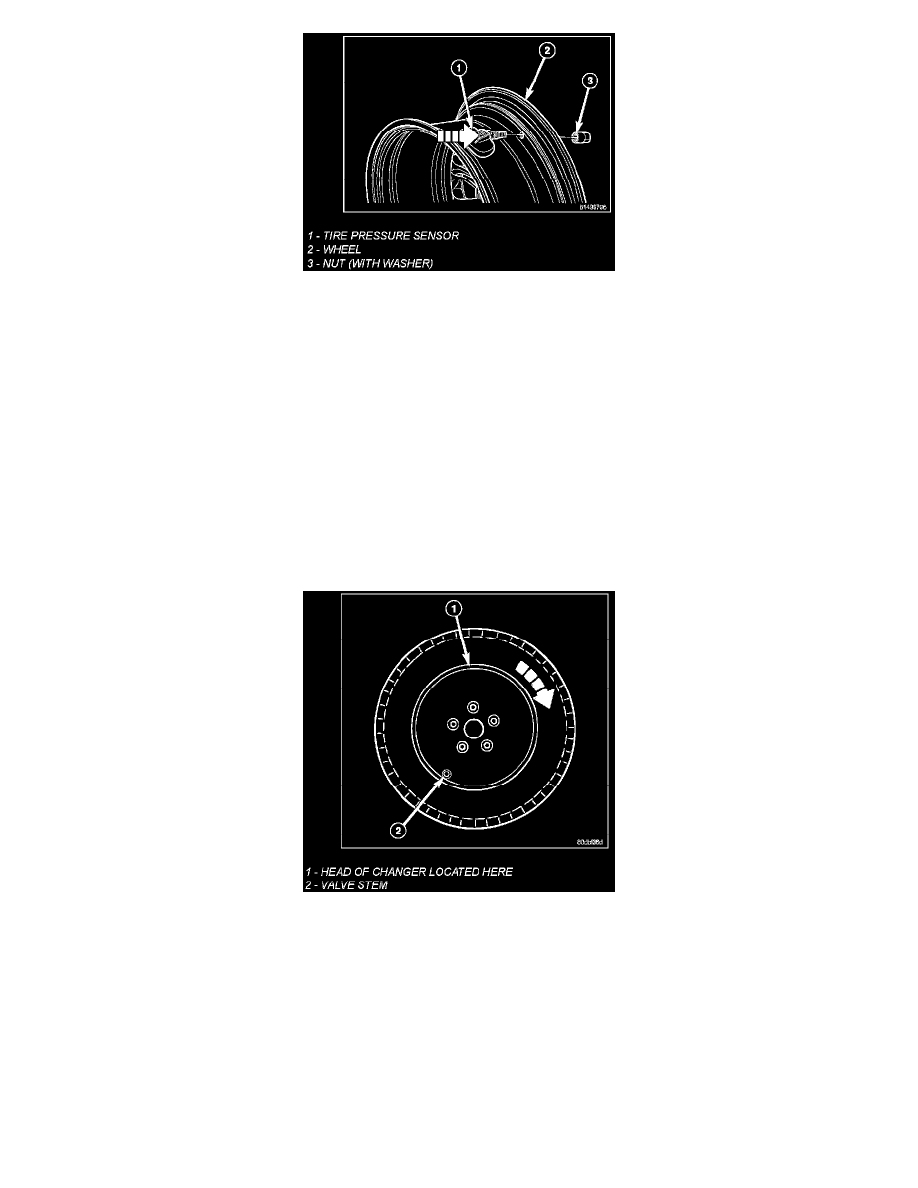
2. Insert sensor (1) through wheel (2) as shown keeping pressure against rear of metal valve stem (See Arrow). Potted side of sensor is to be
positioned toward wheel. Damage to the sensor may occur if the sensor is installed incorrectly.
NOTE: A flat on the seal seat is used to key the seat to the sensor housing. The notch/flat should be lined up together and facing towards the
wheel during installation.
3. Install sensor nut (3) and hand tighten.
NOTE: Before tightening sensor nut, push downward on sensor housing (2) in an attempt to make it flush with interior contour of wheel (1).
4. While holding sensor in position, tighten sensor nut to 6 Nm (53 in. lbs.).
CAUTION: Over-tightening the sensor to as much as 10 Nm (88 in. lbs.) may result in sensor separation from the valve stem. Under this
condition, the sensor may still function, however, the condition should be corrected immediately.
5. Mount tire on wheel following tire changer manufacturer's instructions, paying special attention to the following to avoid damaging tire pressure
sensor:
1) Rotating Wheel Tire Changers - Once the wheel is mounted to the changer, position the sensor valve stem (2) approximately 180° from the
head of the changer (located at 1) in a clockwise direction before rotating the wheel (also in a clockwise direction) to mount the tire. Use this
procedure on both the upper and lower tire beads.