Raider 2WD V6-3.7L SOHC (2007)

to access the turning loop screw.
2. Remove the screw (5) that secures the seat belt turning loop to the upper C-pillar (1).
3. Remove the seat belt turning loop from the C- pillar.
4. Remove the upper trim 2. from the inside of the C-pillar.
5. Loosen and move the lower trim 7. away from the inside of the C-pillar far enough to access the lower seat belt anchor.
6. Remove the screw 6. that secures the lower anchor to the floor panel near the base of the C- pillar.
7. Disengage the seat belt, lower anchor, latch plate and turning loop from the clearance holes in the lower C-pillar trim and set the lower C-pillar
trim aside.
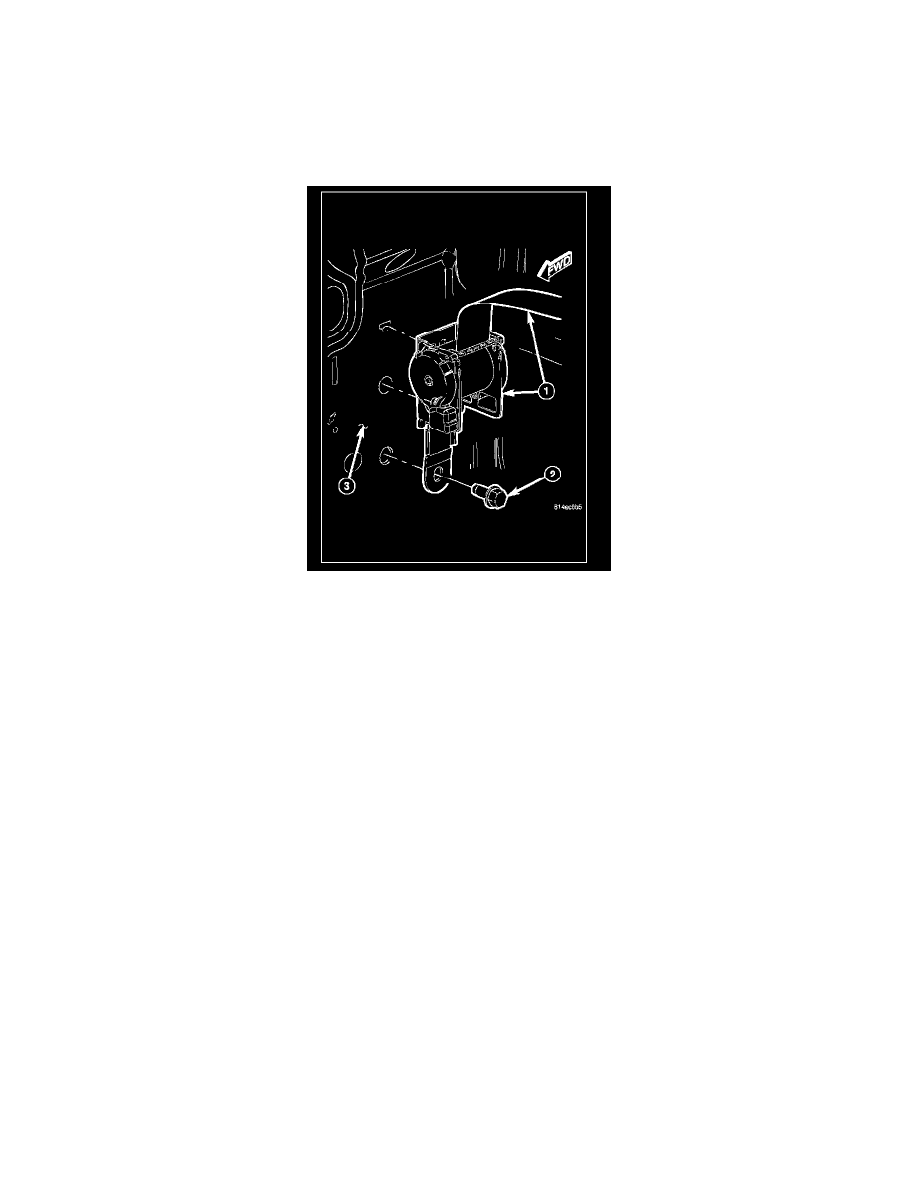
8. Remove the screw (2) that secures the retractor (1) to the inner C-pillar (3).
9. Lift the retractor upward far enough to disengage the tab on the back of the retractor from the T-slot in the inner C-pillar.
10. Remove the rear seat belt and retractor from the vehicle as a unit.
REAR OUTBOARD - DOUBLE CAB
WARNING: To avoid personal injury or death, during and following any seat belt or child restraint anchor service, carefully inspect all seat
belts, buckles, mounting hardware, retractors, tether straps, and anchors for proper installation, operation, or damage. Replace any belt that is
cut, frayed, or torn. Straighten any belt that is twisted. Tighten any loose fasteners. Replace any belt that has a damaged or inoperative buckle
or retractor.
Replace any belt that has a bent or damaged latch plate or anchor plate. Replace any child restraint anchor or the unit to which the anchor is
integral that has been bent or damaged. Never attempt to repair a seat belt or child restraint component. Always replace damaged or faulty
seat belt and child restraint components with the correct, new and unused replacement parts listed in the Mitsubishi Parts Catalog.
