
Raider 4WD V6-3.7L SOHC (2007)
1. Using a vise, lightly compress the secondary chain tensioner piston until the piston step (5) is flush with the tensioner body. Using a pin or suitable
tool, release ratchet pawl (4) by pulling pawl back against spring force through access hole on side of tensioner. While continuing to hold pawl
back, push ratchet device to approximately 2 mm from the tensioner body. Install Special Tool 8514 lock pin (2) into hole on front of tensioner.
Slowly open vise to transfer piston spring force to lock pin.
2. Position primary chain tensioner over oil pump and insert bolts into lower two holes on tensioner bracket. Tighten bolts to 28 Nm (250 in. lbs.).
3. Install right side chain tensioner arm. Install Torx® bolt. Tighten Torx® bolt to 28 Nm (250 in. lbs.).
CAUTION: The silver bolts retain the guides to the cylinder heads. The black bolts retain the guides to the engine block.
4. Install the left side chain guide. Tighten the bolts to 28 Nm (250 in. lbs.).
5. Install left side chain tensioner arm, and Torx® bolt. Tighten Torx bolt to 28 Nm (250 in. lbs.).
6. Install the right side chain guide. Tighten the bolts to 28 Nm (250 in. lbs.).
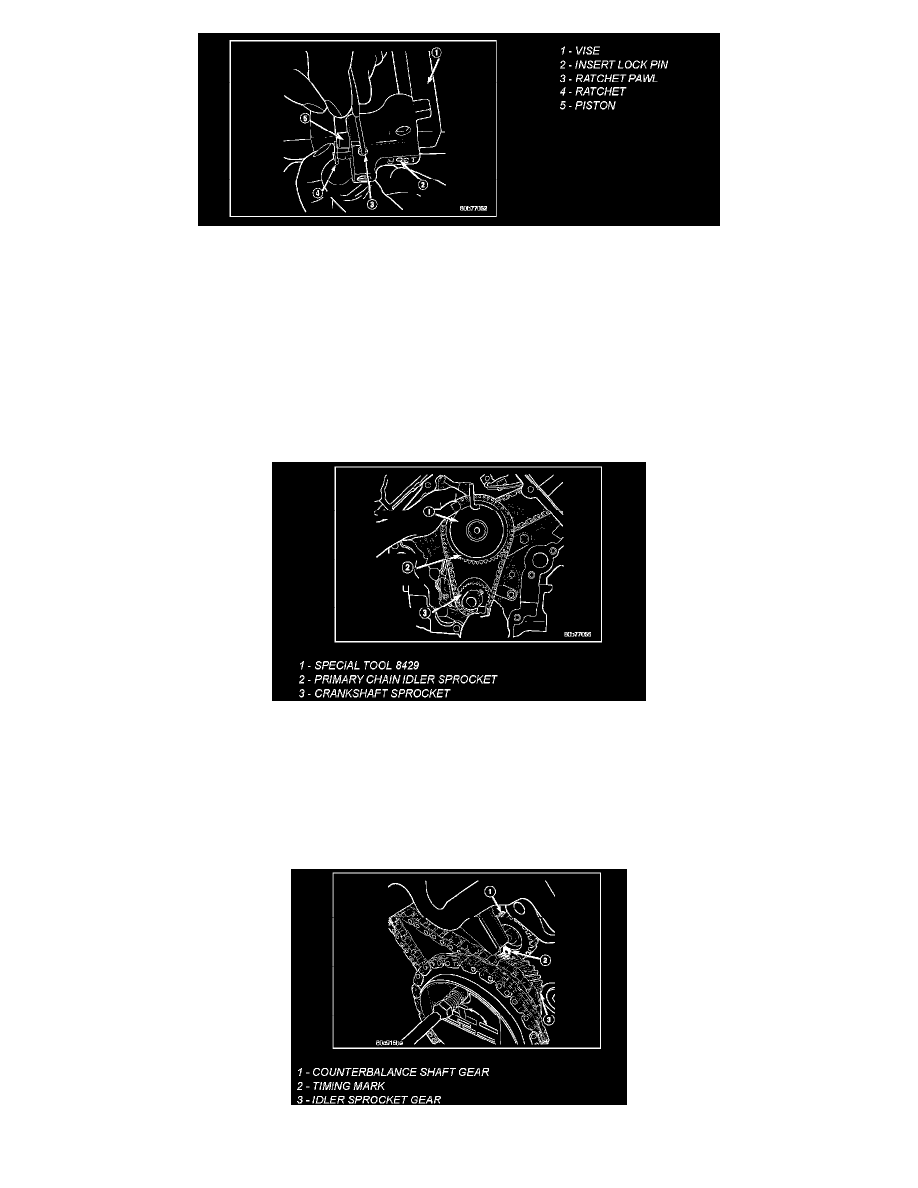
7. Install both secondary chains onto the idler sprocket (2). Align two plated links on the secondary chains to be visible through the two lower
openings on the idler sprocket (4 o'clock and 8 o'clock). Once the secondary timing chains are installed, position special tool 8429 (1) to hold
chains in place for installation.
8. Align primary chain double plated links with the timing mark at 12 o'clock on the idler sprocket. Align the primary chain single plated link with
the timing mark at 6 o'clock on the crankshaft sprocket.
9. Lubricate idler shaft and bushings with clean engine oil.
NOTE: The idler sprocket must be timed to the counterbalance shaft drive gear before the idler sprocket is fully seated.
10. Install all chains, crankshaft sprocket, and idler sprocket as an assembly. After guiding both secondary chains through the block and cylinder head