
Raider 4WD V6-3.7L SOHC (2007)
12. Position the seat belt (1) lower anchor to the mounting hole on the outboard side of the front seat cushion frame (2). Be certain that the seat belt
webbing between the turning loop and the lower anchor is not twisted.
13. Install and tighten the screw (3) that secures the lower anchor to the seat. Tighten the screw to 39 N.m (29 ft. lbs.).
14. Do not reconnect the battery negative cable at this time. The supplemental restraint system verification test procedure should be performed
following service of any supplemental restraint system component.
REAR OUTBOARD - EXTENDED CAB
WARNING: To avoid personal injury or death, during and following any seat belt or child restraint anchor service, carefully inspect all seat
belts, buckles, mounting hardware, retractors, tether straps, and anchors for proper installation, operation, or damage. Replace any belt that is
cut, frayed, or torn. Straighten any belt that is twisted. Tighten any loose fasteners. Replace any belt that has a damaged or inoperative buckle
or retractor. Replace any belt that has a bent or damaged latch plate or anchor plate. Replace any child restraint anchor or the unit to which
the anchor is integral that has been bent or damaged. Never attempt to repair a seat belt or child restraint component. Always replace damaged
or faulty seat belt and child restraint components with the correct, new and unused replacement parts listed in the Mitsubishi Parts Catalog.
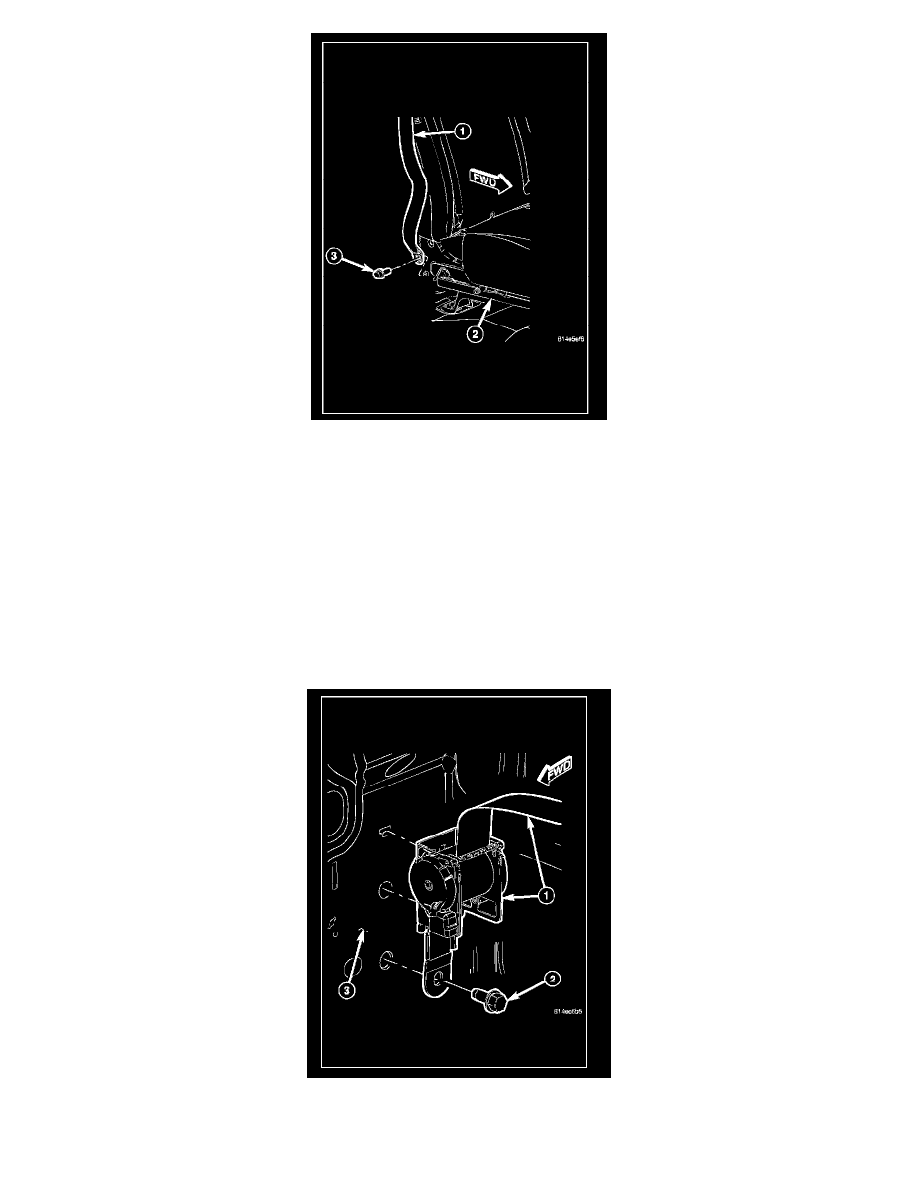
1. Position the rear seat belt and retractor (1) to the inner C-pillar (3).
2. Engage the tab on the back of the retractor into the T-slot in the inner C-pillar.
3. Install and tighten the screw (2) that secures the retractor to the inner C-pillar. Tighten the screw to 39 N.m (29 ft. lbs.).