
Raider 4WD V6-3.7L SOHC (2007)
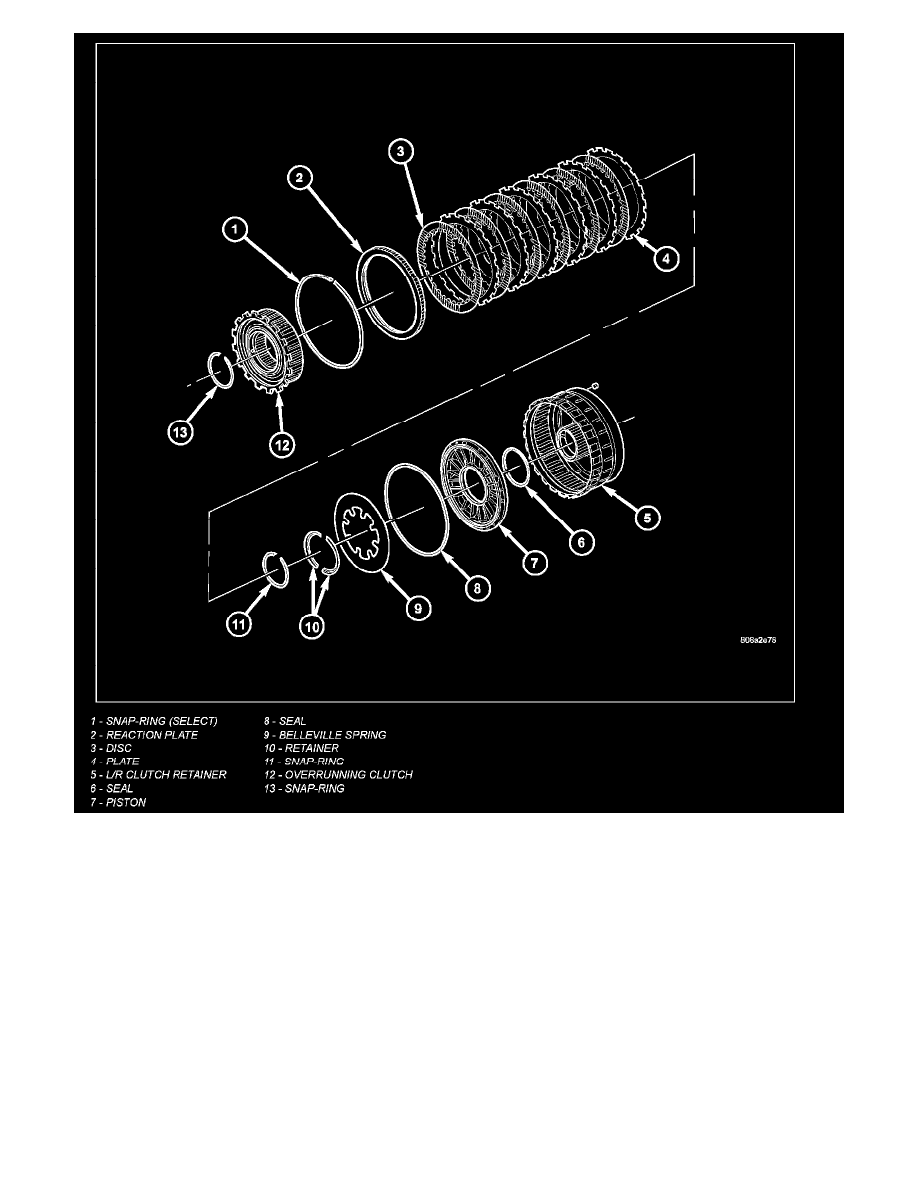
10. Assemble and install the low/reverse clutch pack (3, 4) into the low/reverse clutch retainer (5).
11. Install the low/reverse reaction plate (2) into the low/reverse clutch retainer (5) The reaction plate is directional and must be installed with the flat
side down.
12. Install the low/reverse clutch pack snap-ring (1) The snap-ring is selectable and should be chosen to give the correct clutch pack clearance.
13. Measure the low/reverse clutch pack clearance and adjust as necessary. The correct clutch clearance is 1.00-1.74 mm (0.039-0.069 in.).
14. Install the overrunning clutch (12) into the low/reverse clutch retainer (5) making sure that the index splines are aligned with the retainer.
15. Install the overrunning clutch inner snap-ring (13).