
Starion L4-2555cc 2.6L SOHC Turbo (1988)
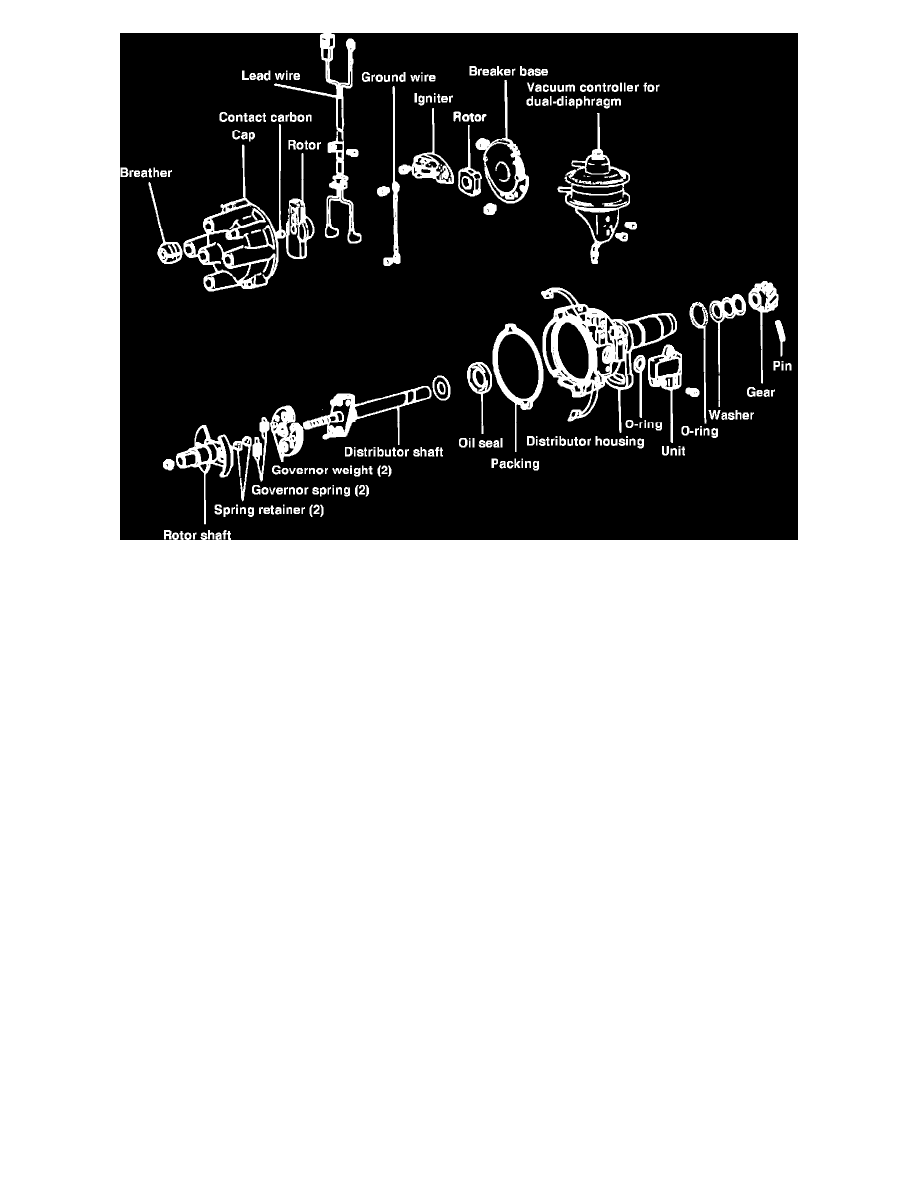
Fig. 10 Distributor disassembled view.
Disassembly
Refer to Figs. 9 and 10 distributor disassembled view and proceed as follows:
1.
Remove distributor from engine as described under ``Distributor, Replace.''
2.
Gently place distributor assembly into a soft jawed vise.
3.
Remove distributor cap from distributor.
4.
Pull rotor from rotor shaft, then, on 1986 Galant, remove unit attaching screws and unit.
5.
Remove vacuum controller attaching screws.
6.
Remove link from vacuum control pin on bracket base.
7.
Remove vacuum controller.
8.
Remove screws and igniter.
9.
Remove black lead wire.
10.
Remove signal rotor shaft attaching screw, then the 2 breaker plate retaining screws.
11.
Remove signal rotor shaft and breaker plate assembly.
12.
Remove signal rotor shaft from signal rotor.
13.
Using suitable pliers, remove governor spring retainers and governor springs.
14.
Remove governor weights.
15.
Mark location of drive gear on distributor shaft. Do not use a sharp tool to mark location of drive gear on distributor shaft.
16.
Place drive gear end of distributor shaft on a soft surface and remove drive gear roll pin.
17.
Remove drive gear and washer.
18.
Remove distributor shaft from housing.