
Starion L4-2555cc 2.6L SOHC Turbo VIN N FI (1985)
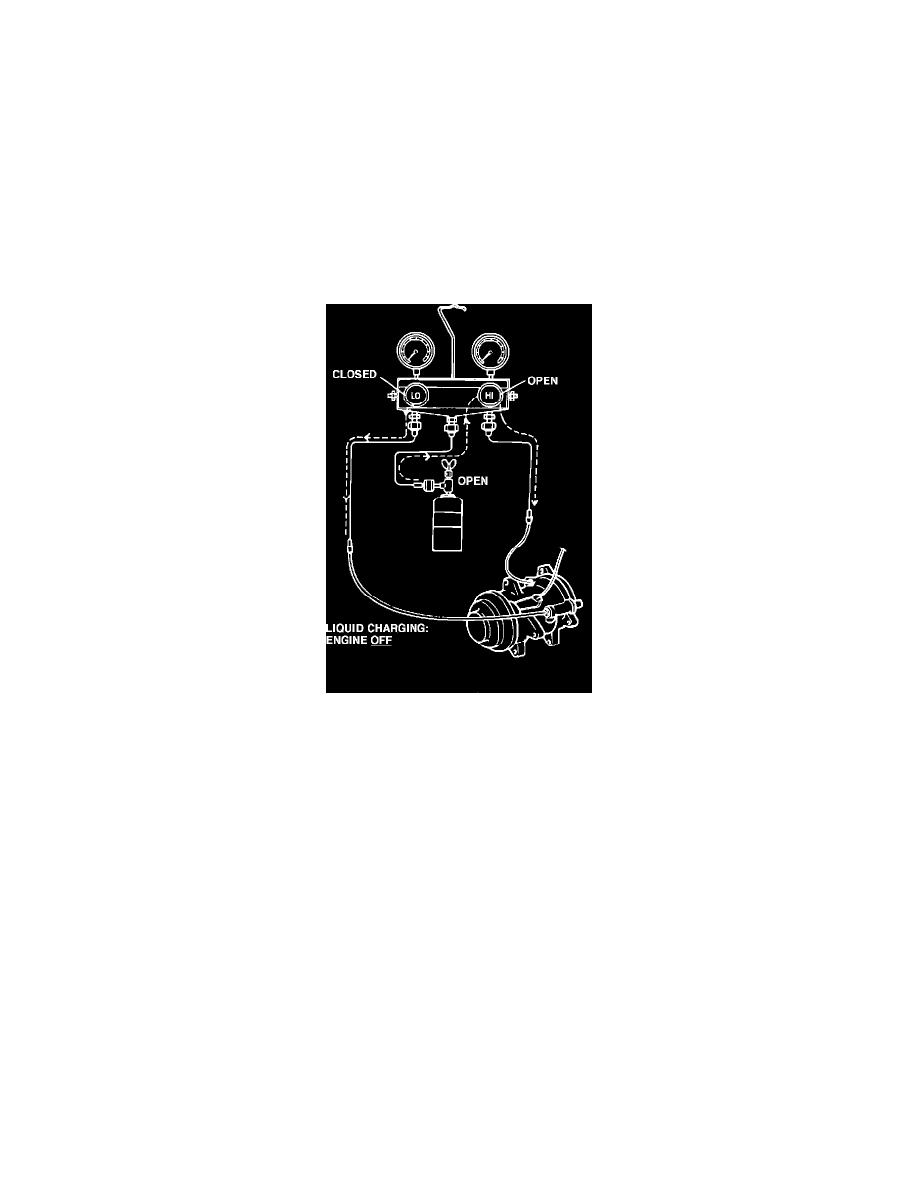
FIGURE 10
A VAPOR CHARGING, through the low side:
1.
Connect gauge set and refrigerant canister (right side up) as shown in Fig. 10 with gauge valves closed. Eliminate air from charging hose by
opening refrigerant valve, loosening center connector at gauge set, lefting it hiss for a few seconds and then tightening it.
2.
Open the Low gauge valve (low pressure should not exceed 60 psi). With valve open, allow a few seconds to activate low pressure switch before
starting engine.
3.
Start engine; run at idle with Air Conditioner fan on HIGH.
4.
Keep refrigerant canister right side up while charging to a quantity of 600-730 g (1.32-1.6 lb.), until sight glass is free of any bubbles, indicating a
full charge. Do not exceed 180 psi.
5.
When fully charged, close gauge valves and canister valve. Slowly disconnect refrigerant hose from center gauge connection to allow excess
refrigerant to escape. Quickly remove gauge hoses from service valve to minimize refrigerant loss.
FIGURE 11
B.
LIQUID CHARGING, through high side using charging station (Fig. 11):
CAUTION:
Do not run the car engine when performing liquid charge; compressor will be damaged.
1.
After the system is evacuated, close gauge valves, connect center hose to refrigerant supply. Loosen the center fitting at the gauge to blow any air
out of the hose and then retighten.
2.
Following charging station manufacturers instructions, charge the system until 600-730 g (1.32-1.6 lb.) of refrigerant is pumped into the system.
3.
When the system is fully charged, close the high gauge valve and refrigerant supply valve. Slowly detach the fitting from the refrigerant canister to
allow excess to escape; then quickly disconnect the gauge hoses from the service valves.