
Starion L4-2555cc 2.6L SOHC Turbo VIN N FI (1985)
Control Arm: Service and Repair
Rear
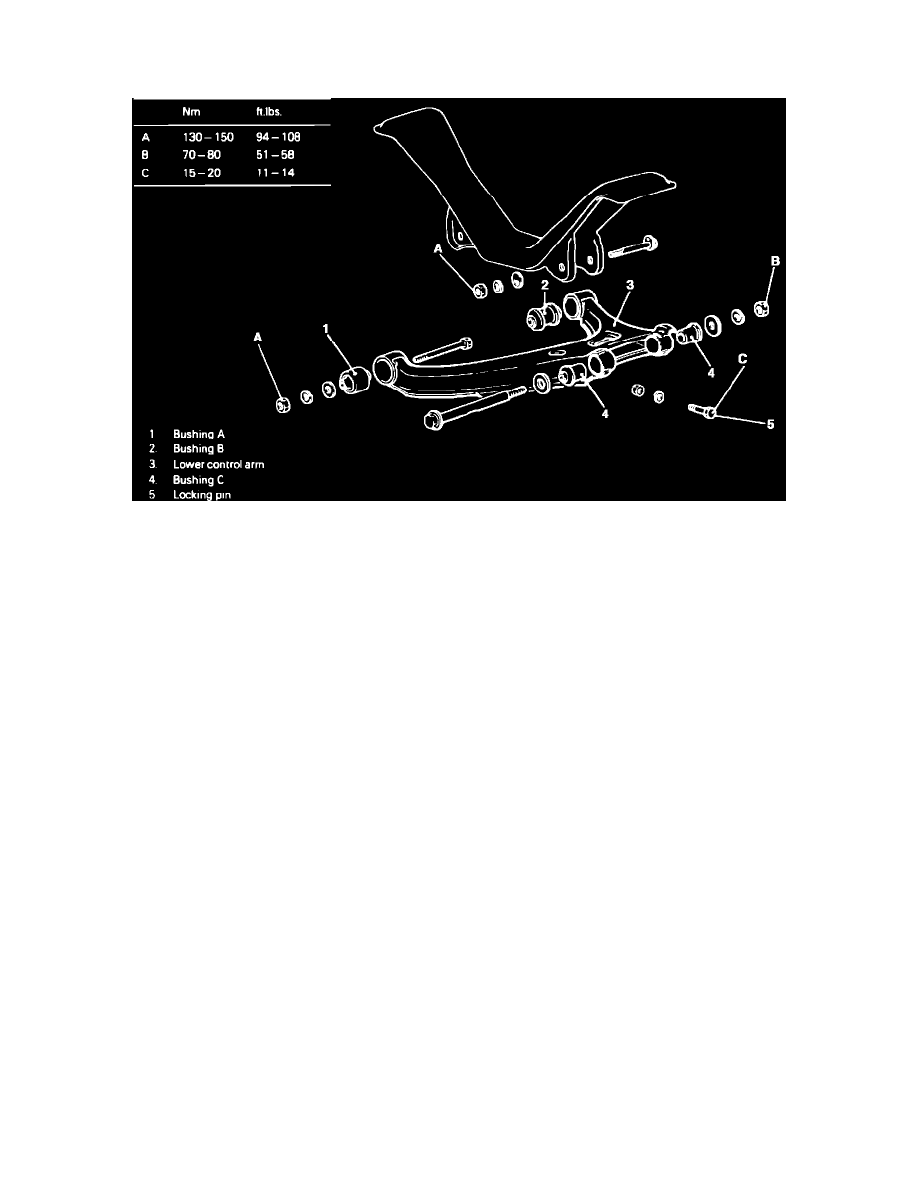
Fig. 27 Lower control arm.
Removal
1.
Disconnect parking brake cable from lower control arm, Fig. 27.
2.
Disconnect stabilizer bar.
3.
Remove nuts and bolts connecting lower control arm to axle housing.
4.
Remove nut and bolt connecting lower control arm to front support.
5.
Remove nut and bolt connecting lower control arm to crossmember.
6.
Remove lower control arm from vehicle.
7.
Check condition of control arm, bushings, and bolts and replace as necessary.
Installation
1.
Apply a thin coat of suitable grease to cut out section of shaft connecting lower control to axle housing, making certain not to get any grease on
bushings.
2.
Insert shaft with mark on its head facing downward.
3.
Install remaining nuts and bolts into lower control arm assembly as shown, Fig. 27.
4.
When installing lower control arm to crossmember, alignment mark on crossmember with reference line on plate.
5.
Check rear wheel alignment.