
Tredia L4-1795cc 1.8L SOHC Turbo (1984)
17.
Do not remove the screw driver once the correct timing is attained.
Fig. 21 Timing Belt "A" Tension Inspection Area
18.
Install the "A" timing belt (noting rotation direction marked on the belt, the belt rotates in the clockwise direction) with tension on the correct side.
Fig. 21.
Fig. 22 Adjusting Timing Belt "A" Tension
19.
Loosen the tensioner mounting bolts. The tensioner spring will move the tensioner towards the belt. Fig. 22.
20.
Recheck all timing marks on the sprockets, if they are correct proceed to the next step. If not re-align them before proceeding. Fig. 19.
NOTE:The next step is used to apply the correct tension on the "A" timing belt. DO NOT ROTATE THE ENGINE COUNTERCLOCKWISE.
Fig. 23 Rotating Crankshaft Two Teeth
21.
Turn the crankshaft clockwise by two (2) teeth on the camshaft sprocket. Fig. 23.
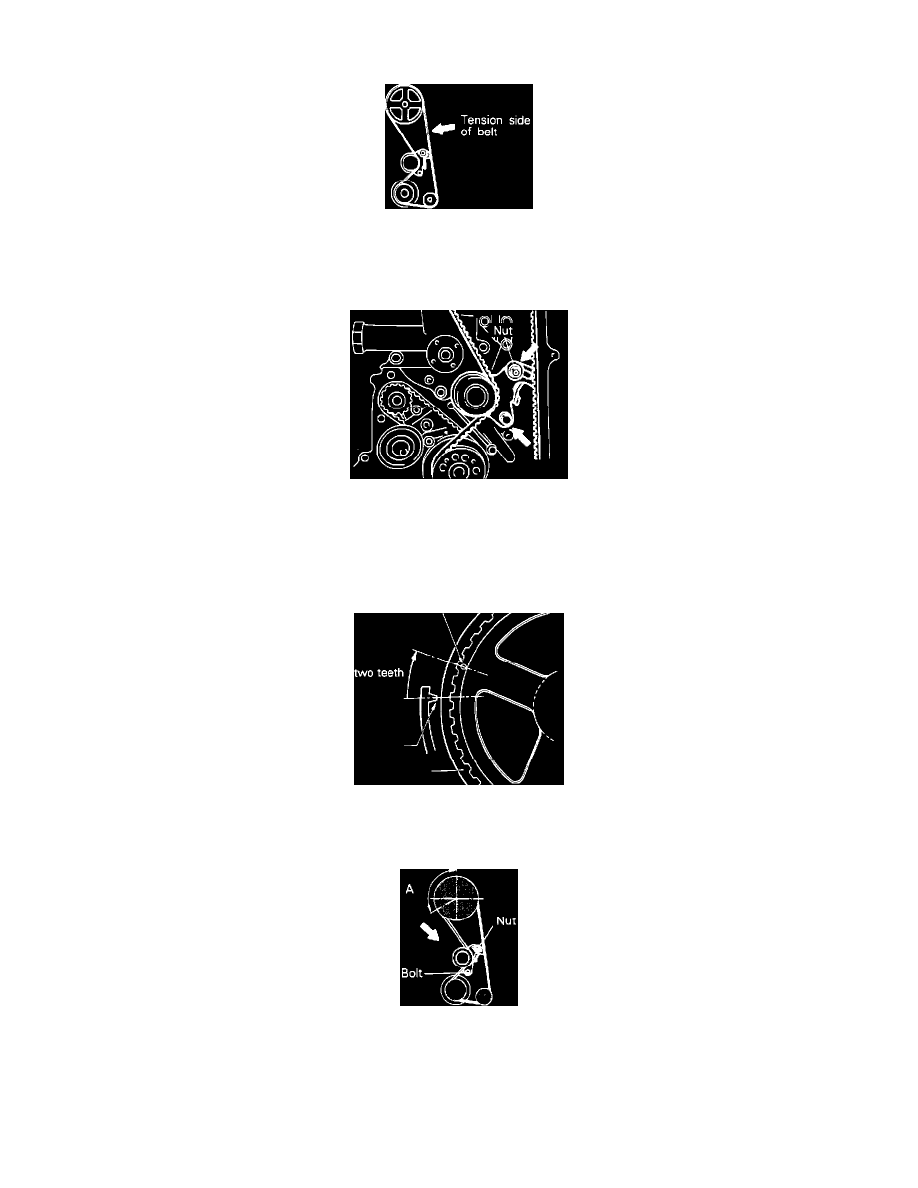
Fig. 24 Holding Tensioner In Position While Tightening
22.
Apply force to the tensioner in the direction shown so that no portion of the belt in the area indicated by the letter "A" raises off of the sprocket.
Fig. 24.
23.
Torque the top nut on the tensioner first and then the bottom bolt. (if the fasteners are not tightened in that order, the tensioner will rotate, allowing
the belt to be loose). Fig. 24.
Torque Value: