
Tredia L4-1795cc 1.8L SOHC Turbo (1984)
Lower Control Arm: Service and Repair
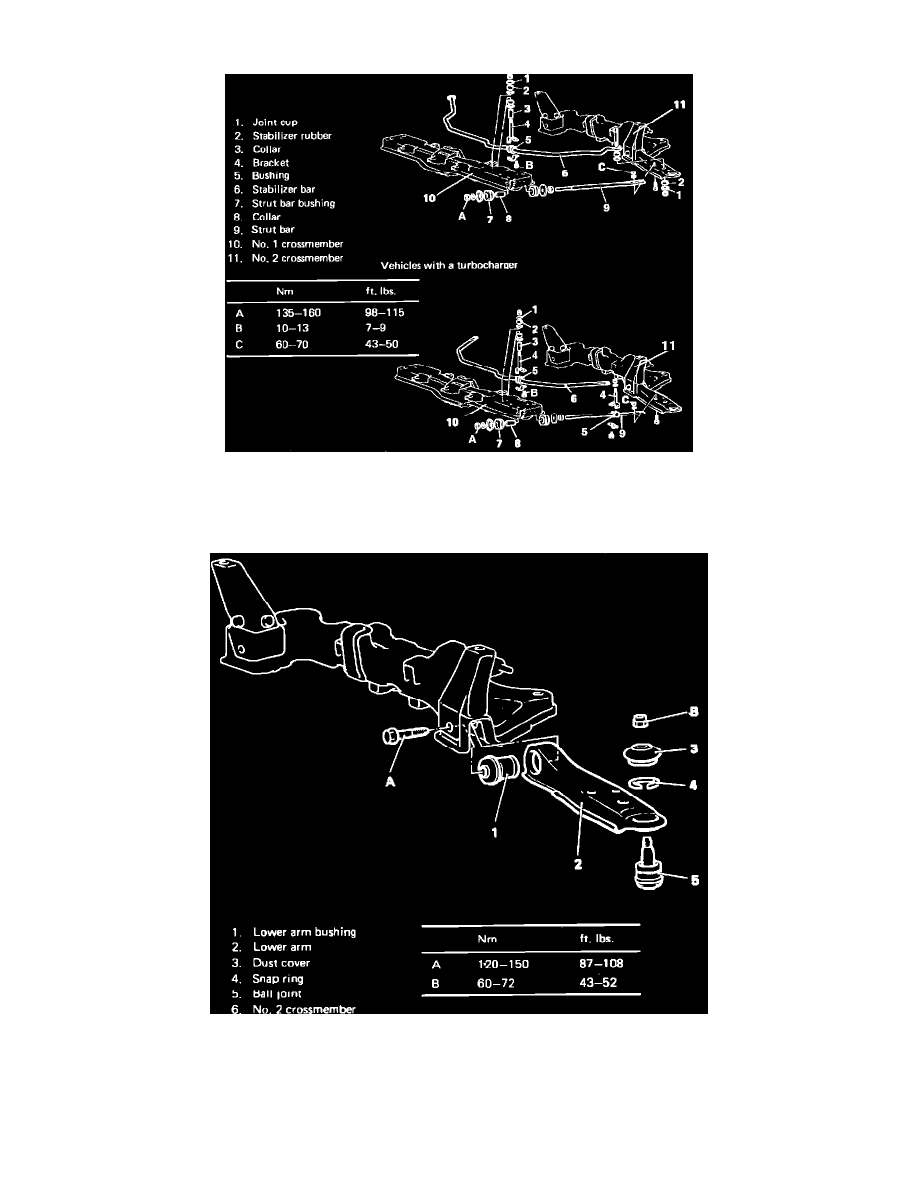
Fig. 1 Exploded view of stabilizer & strut bar assemblies.
1.
Disconnect stabilizer bar and strut bar from lower arm, Fig. 1.
2.
Loosen ball joint stud nut and disconnect ball joint, using tool MB990778 or equivalent, from knuckle.
Fig. 2 Exploded view of lower control arm assembly.
3.
Remove lower arm from No. 2 crossmember, Fig. 2.
4.
Inspect lower arm, bushings, and dust cover, replacing as necessary.
5.
Check ball joint starting torque, which should be 78.1 inch lbs.
6.
Install lower arm to crossmember, ensuring that it does not become twisted, and torque bolt to 87-108 ft. lbs.
7.
Loosely install strut and stabilizer bars.