
Tredia L4-1795cc 1.8L SOHC Turbo (1984)
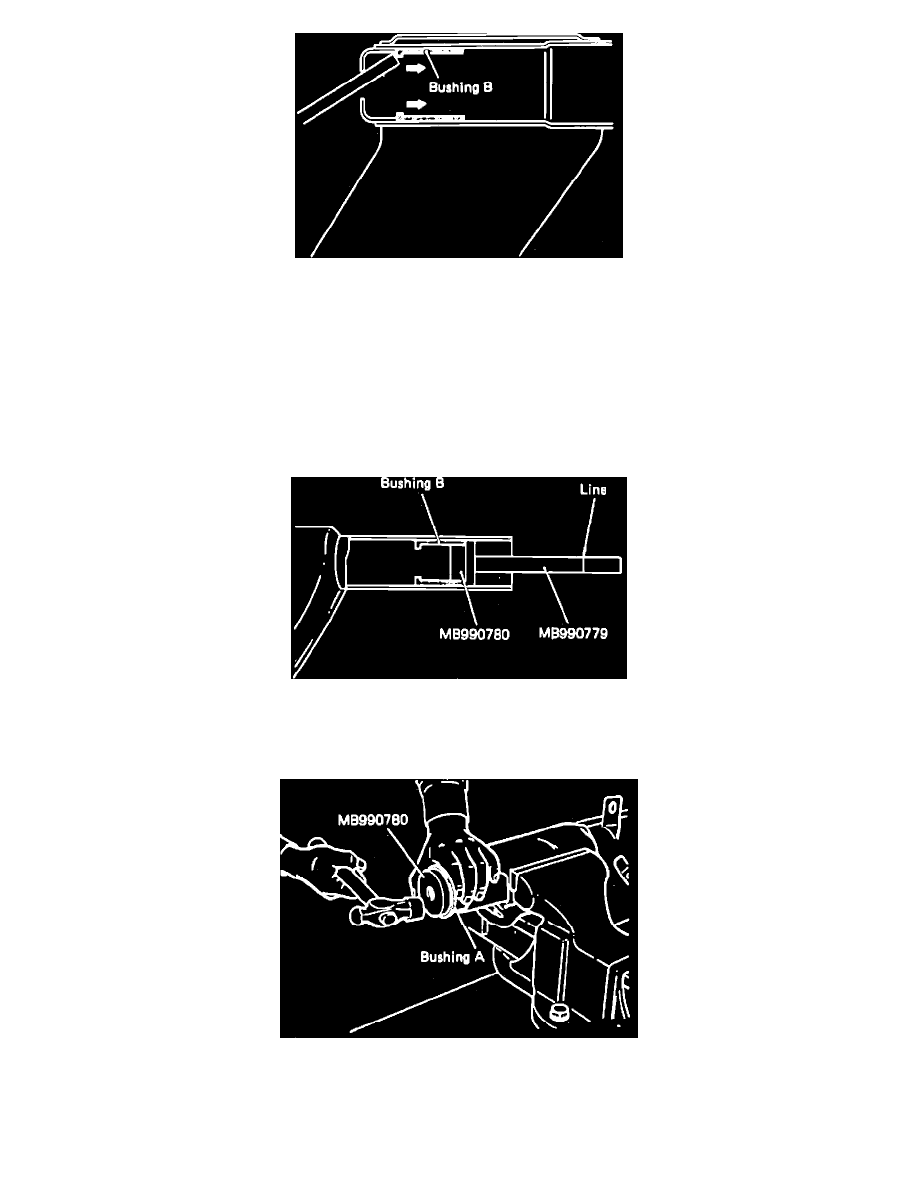
Fig. 6 Installing Bushing "B" Into Left Suspension Arm
5.
Using suitable drift, drive bushing ``B'' from left hand suspension arm, Fig. 20.
6.
Inspect all components for wear or damage, replacing as necessary.
Assemble
1.
Apply suitable grease to inside of left suspension arm and on outer edge of right suspension arm. If dust cover was replaced, push new dust cover
up to stopper positioned on right arm before applying grease.
2.
Install rubber stopper on right suspension arm.
3.
Apply suitable grease to inner edges of bushings ``A'' and ``B''.
Fig. 5 Removing Bushing "B" From Left Suspension Arm
4.
Using tools MB990779 and MB990780 or equivalents, press fit bushing ``B'' into left suspension arm until bushing reaches bottom of suspension
arm, Fig. 21.
Fig. 7 Installing Bushing "A" Into Left Suspension Arm
5.
Using tool MB990780 or equivalent, install bushing ``A'' on left suspension arm, Fig. 22.
6.
Wrap tape on threads of right suspension arm to prevent grease from getting on them and fit right and left suspension arms together, wiping away
any grease that comes out.