
Tredia L4-1795cc 1.8L SOHC Turbo (1984)
Axle Shaft Assembly: Overhaul
Disassemble
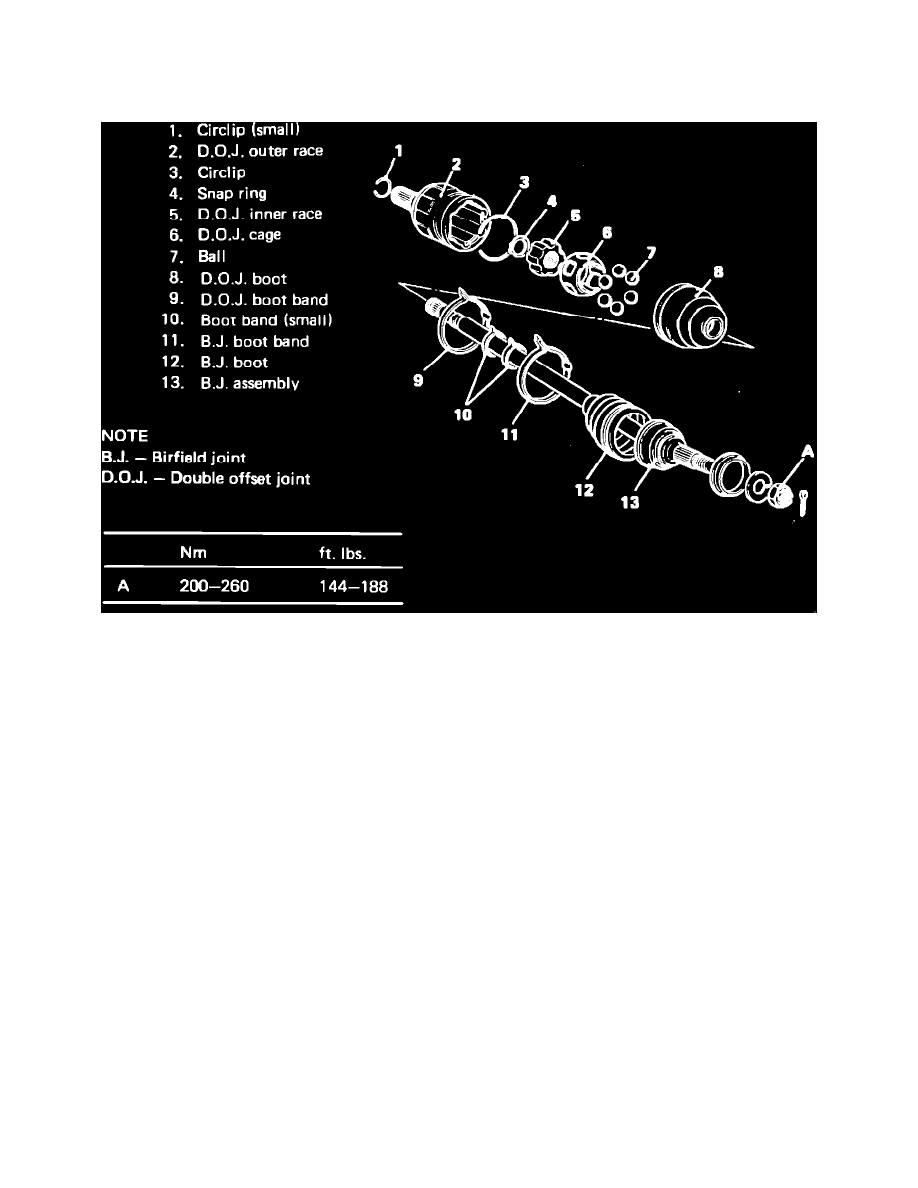
Fig. 9 Exploded view of front driveshaft.
1.
Remove double offset joint (DOJ) boot band, Fig. 9.
2.
Remove DOJ boot from DOJ outer race.
3.
Using screwdriver, remove circlip.
4.
Remove DOJ outer race and wipe off grease.
5.
Remove snap ring, then remove DOJ inner race, cage, and balls as an assembly and clean this assembly. If balls drop out of cage, press them back
in with inner race.
6.
Wipe grease off spline portion.
7.
Remove Birfield joint (BJ) boot band.
8.
Remove DOJ boot and BJ boot. If boots can be reused, wrap vinyl tape around driveshaft spline so that boots are not damaged as they are
removed.
9.
Wipe grease off BJ Do not disassemble BJ
10.
Inspect all components and replace as necessary.
Assemble
1.
Wrap vinyl tape around driveshaft spline, then install BJ and DOJ boots in that order.
2.
Fill inside of BJ and BJ boot with suitable grease.
3.
Place BJ boot over BJ, then use new BJ boot band and small boot band to secure boot.
4.
Using grease supplied with repair kit, lubricate DOJ cage, balls and inner race.
5.
Install DOJ cage, balls and inner race onto driveshaft, then fit snap ring securely into groove on driveshaft.
6.
Using grease supplied with repair kit, lubricate DOJ outer race and fit driveshaft into DOJ outer race, then apply more grease to DOJ outer race.
7.
Install new circlip on driveshaft.