
Tredia L4-2.0L SOHC (1985)
screw. The shim should be inserted between the plunger and the choke adjust screw.
CAUTION:
Do not turn the carburetor upside down, as this may disrupt the roll-over device in the float bowl.
C.
Remove the tool and confirm that the shim is still in place.
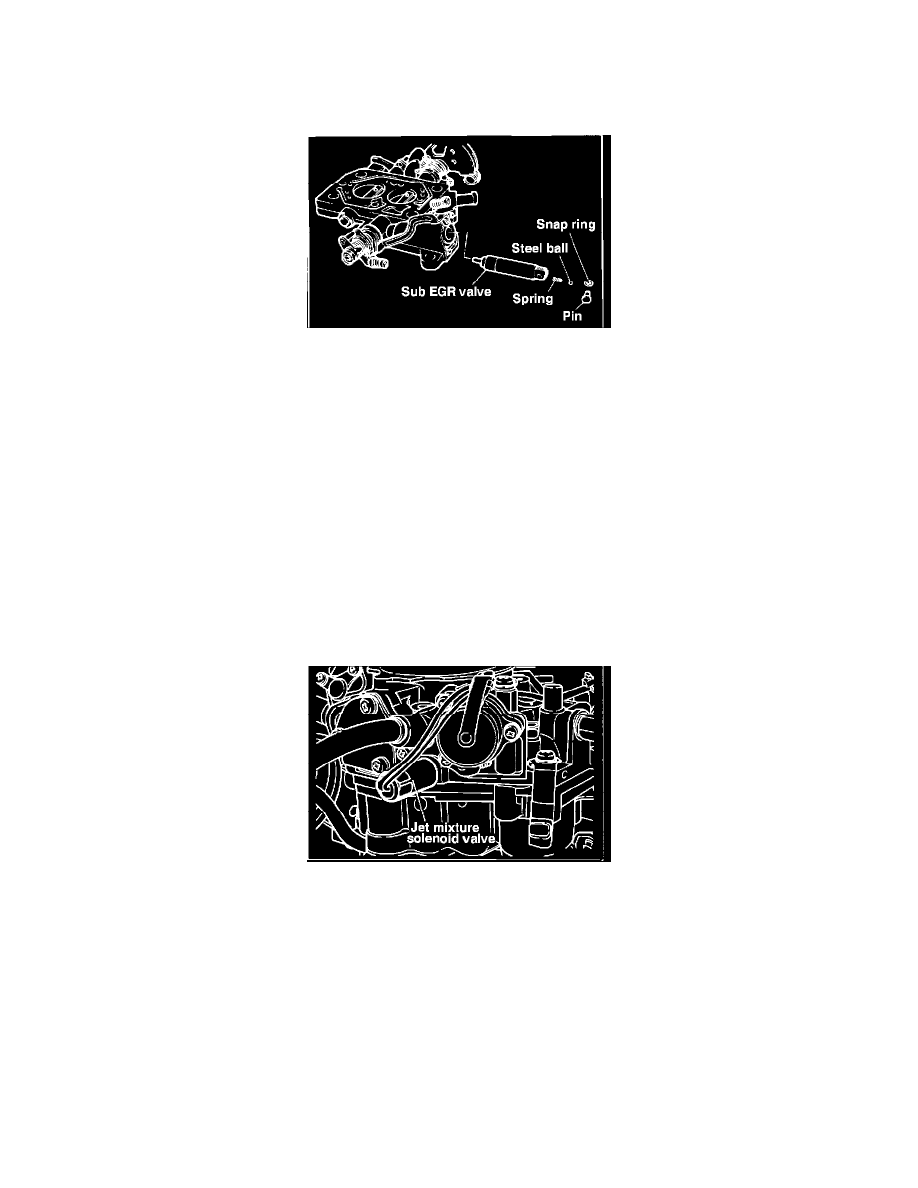
FIGURE 2
5.
While the carburetor is off the engine, remove and clean the sub-EGR valve from the carburetor as described below.
A.
Remove the snap ring from the sub-EGR valve pin (Figure 2). Then carefully remove the pin and the link, taking care not to lose the spring and
steel ball from the valve.
B.
Remove the valve ftom the carburetor.
C.
Wet a piece of fine emery cloth and cup it in the palm of your hand. Clean the valve by twisting it on the emery cloth.
NOTE:
Do not clean the valve with a wire brush as it may scratch the valve. The scratches will allow carbon to build up on the valve quickly.
D.
Clean the plunger hole in the carburetor with carburetor cleaner. You may want to use a small screwdriver to loosen any carbon deposits from the
holes in bottom side of the carburetor.
E.
Dry the valve and plunger hole thoroughly and reinstall the valve in the carburetor. Install the spring and steel ball, connect the linkage and install
the pin. Install a new snap ring ftom the service kit.
FIGURE 3
6.
Change the jet of the mixture solenoid valve as described below.
A.
Remove the jet mixture solenoid valve from the carburetor (Figure 3).