
Achieva L4-144 2.4L DOHC VIN T SFI (1996)
4. Install air box assembly.
5. Clip to engine compartment fuse/relay center.
6. Battery to vehicle.
7. Air cleaner duct clamps and electrical connections.
Motor Pack
CAUTION: To help avoid personal injury, due to a retained load on the ABS hydraulic modulator, the gear tension relief function of the Tech
1 must be performed prior to removal of the ABS hydraulic modulator/master cylinder assembly. Refer to "Gear Tension Relief Sequence".
NOTICE: Complete overhaul of the hydraulic modulator/master cylinder assembly is not authorized, only the following steps. These steps will break the
unit down into major components for replacement purposes.
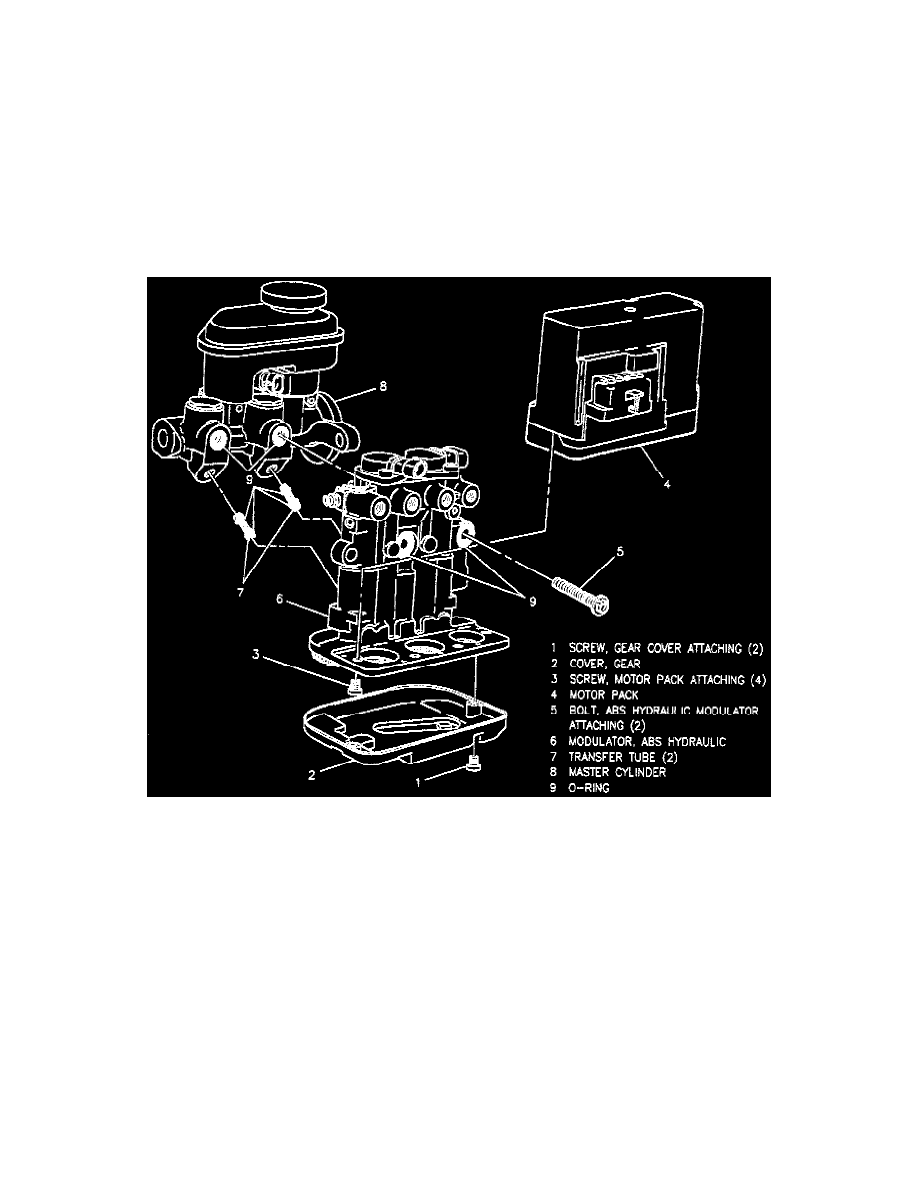
MOTOR PACK
Hydraulic Modulator/Master Cylinder Assembly
DISASSEMBLE
1. Air cleaner duct clamps and electrical connection.
2. Battery from vehicle.
3. Clip from engine compartment fuse/relay center.
4. Remove air box assembly.
5. Disconnect motor pack electrical connector.
6. Two (2) Torx head screws attaching gear cover.
7. Remove gear cover.
8. Four Torx head screws attaching motor pack to hydraulic modulator.
9. Motor pack from hydraulic modulator.
NOTICE: It is necessary to slightly bend brake pipes out of the way to allow for removal of motor pack.
IMPORTANT:
-
Use care when handling motor pack to ensure motor pack connector is not damaged, or accidental intrusion of brake fluid into the motor pack does
not occur. This may result in a premature failure of the motor pack.
-
Take care in handling the motor pack. If dropped or damaged during handling, the motor pack must be replaced.