
Achieva V6-3100 31L MFI VIN M Throttle Position Sensor - Component Diagram (Page 4300)
use staking-type pliers to crimp the splice securely in two places. For more details on splicing procedures, see SPLICING COPPER WIRE. Use
Crimp and Seal splices whenever possible.
To replace a damaged fusible link which feeds two harness wires, cut them both off beyond the splice. Use two repair links, one spliced to each
harness wire, Fig. 5.
Pull-to-Seat Connectors
NOTE: The following general repair procedures can be used to repair most types of connectors. Use the Pick(s) or Tools that apply to your
terminal. Use Terminal repair kit J 38125 or equivalent.
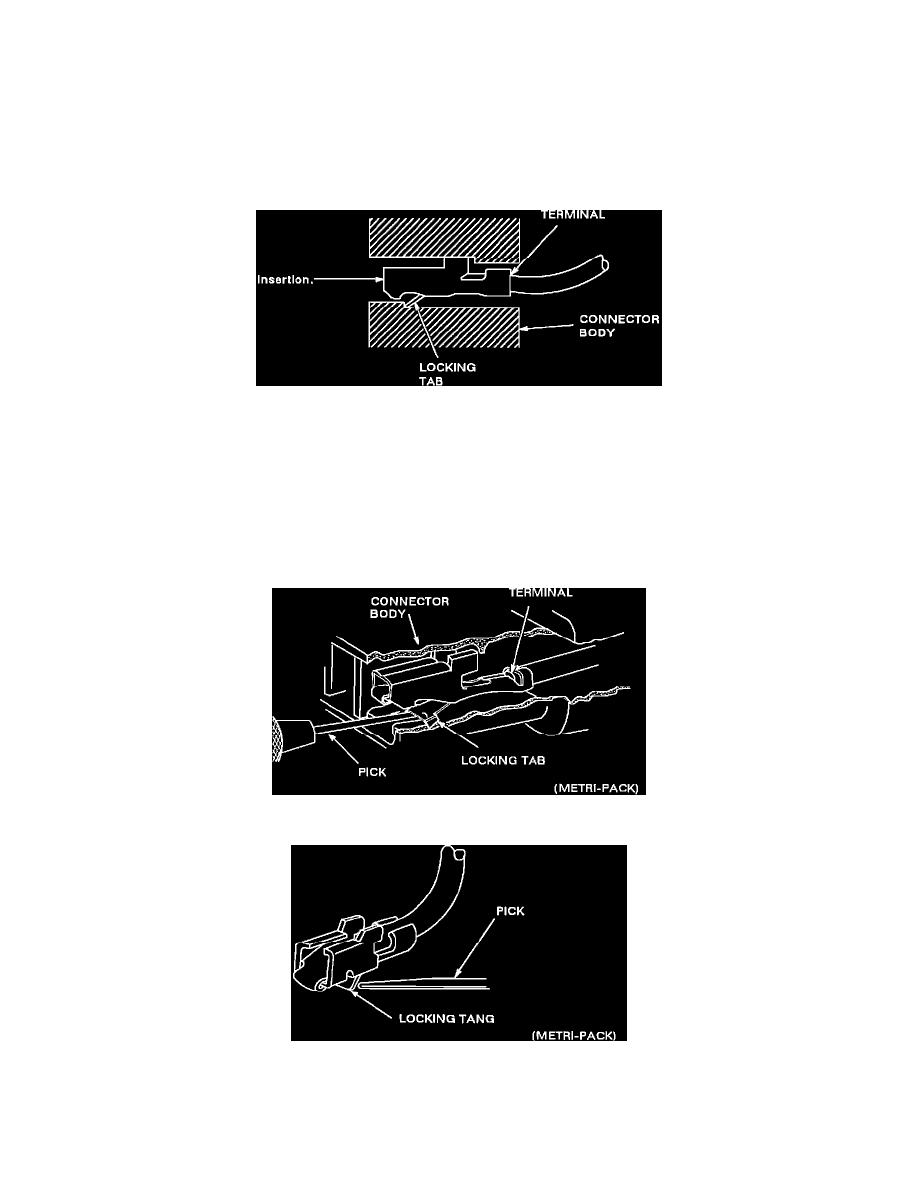
Figure 20 - Typical Pull-To-Seat Connector
Follow the steps below to repair Pull-To-Seat connectors (Figure 20). The steps are illustrated with typical connectors. Your connector may be
different, but the repair steps are similar. Some connectors DO NOT require all the steps shown. Skip the steps that DO NOT apply.
1. Separate connector halves. Using the proper pick or removal tool, remove terminal (see Figures 21 & 22).
a. Pull lead gently.
b. Insert pick from front of connector into canal.
c. Pry tab up with tool.
d. Push lead to remove.
Figure 21
Figure 22