
Alero L4-144 2.4L DOHC VIN T SFI (2000)
7. Remove the wheel nuts securing the rotor to the hub.
8. Install the wheel and tire assembly. Align the index marks that were made during removal.
9. Lower the vehicle.
10. Fill the master cylinder to the proper level with clean brake fluid. Refer to Master Cylinder Reservoir Filling.
11. Bleed the entire brake system. Refer to Hydraulic Brake System Bleeding.
12. Reinspect the fluid level.
13. Retest the brake pedal feel. If brake sponginess is present, refer to Brake Rotor Thickness Variation Check.
Brake Caliper Replacement- Rear
Removal Procedure
1. Remove 2/3 of the brake fluid from the master cylinder.
2. Raise and support the vehicle. Refer to Vehicle Lifting.
3. Mark the relationship of the wheel to the hub and bearing.
4. Remove the tire and wheel assembly.
Reinstall 2 wheel nuts in order to retain the rotor.
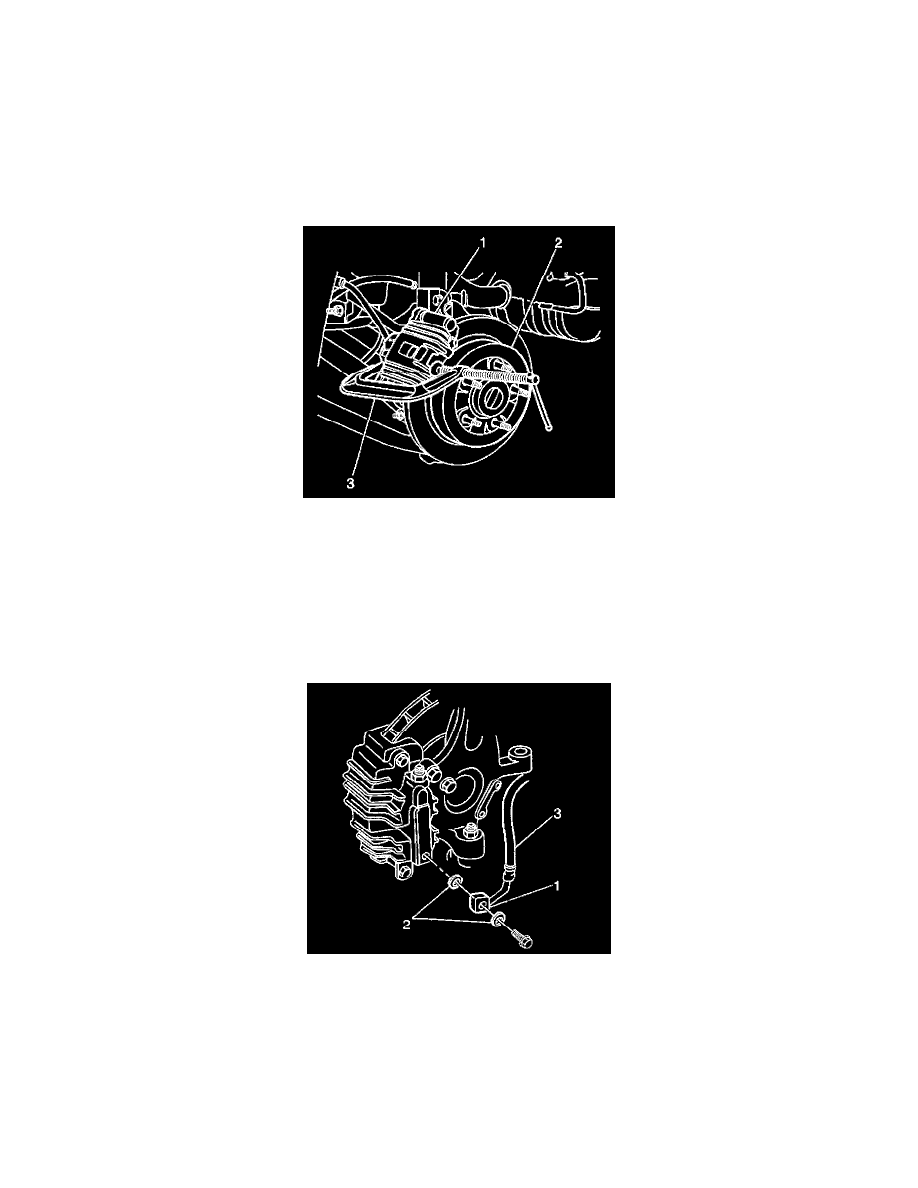
5. Push the piston into the caliper bore in order to provide clearance between the linings and the rotor. Complete the following steps:
5.1.
Install a large C-clamp (3) over the top of the caliper housing (1) and against the back of the outboard pad.
5.2.
Slowly tighten the C-clamp until the piston is pushed into the caliper bore enough to slide the caliper (1) off the rotor. Do not overtighten the
C-clamp.
6. Remove the brake hose bolt and the inlet fitting.
7. Remove and discard the sealing washers (2).
8. Plug the openings in the caliper housing and the hose fitting in order to prevent brake fluid loss and contamination.