
Alero L4-144 2.4L DOHC VIN T SFI (2000)
Notice: Refer to Fastener Notice in Service Precautions.
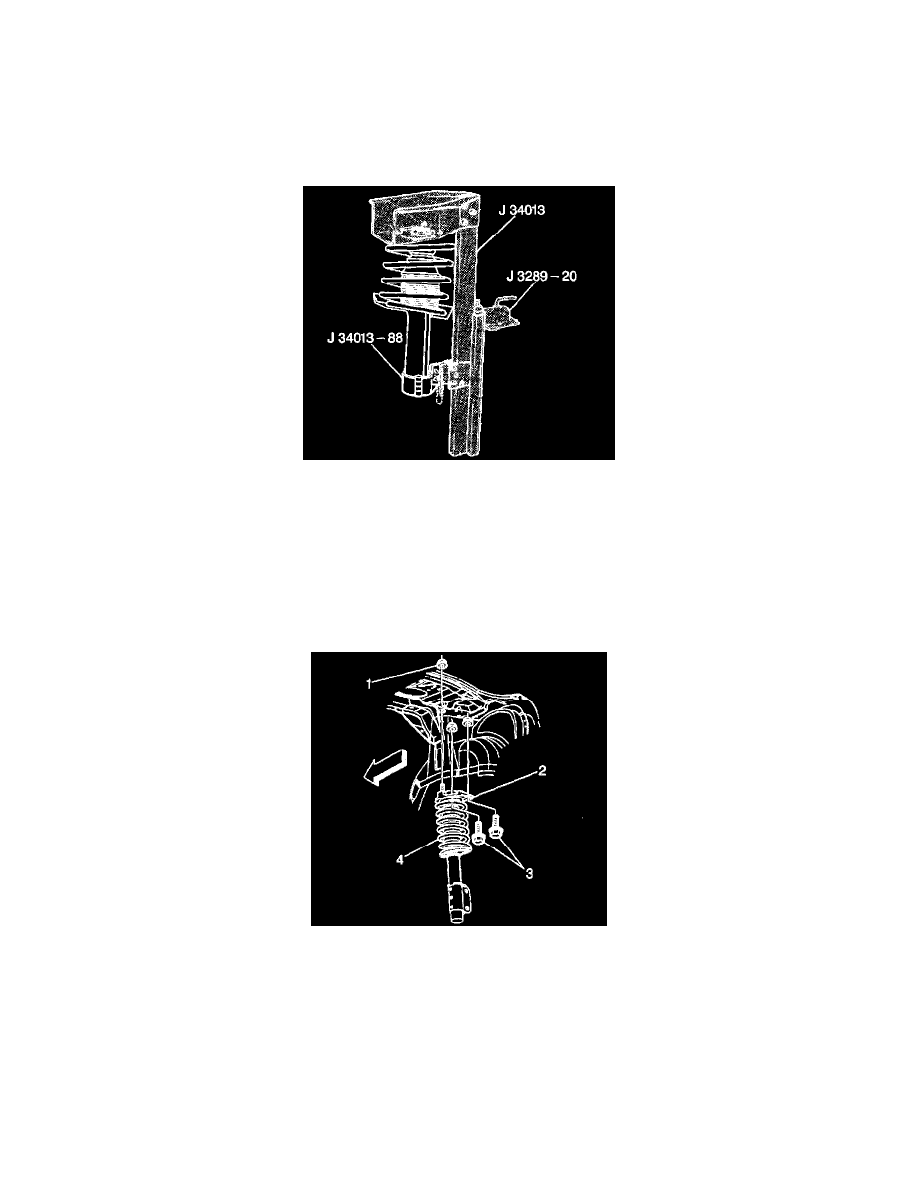
4. Install the strut rod piston nut.
Tighten the strut rod piston nut (2) to 47 Nm (34 ft. lbs.).
5. Pack the strut support with the wheel bearing lubricant GM P/N 1051344, or equivalent.
6. Install the dust cap (1).
7. Release the compressed coil spring (10).
8. Remove the strut from the J 34013-B
9. Install the strut assembly. Refer to Strut Assembly Replacement.
Strut Assembly Replacement
Removal Procedure
The front knuckle is a machined aluminum casting. Do not use a hammer in order to loosen suspension components attached to the knuckle. Do not
pry or hammer on the aluminum knuckle in any way. Following these instructions will avoid damage to parts and systems.
1. Raise and support the vehicle. Refer to Vehicle Lifting.
2. Remove the tire and wheel assembly. Refer to Tire and Wheel Removal and Installation in Wheels, Tires and Alignment.
3. Scribe the strut to the knuckle. Refer to Strut and Knuckle Scribing.
4. Remove the strut mount to body nut (1) in the trunk area.
5. Remove the strut bolts (3) from inside the fender well.