
Alero L4-144 2.4L DOHC VIN T SFI (2000)
Wheel Fastener: Service and Repair
Front
Removal Procedure
^
Tools Required
-
J 6627-A Stud Remover
Important: Use a 36 mm (1.42 in) wheel bolt for front service replacement only.
1. Raise and support the vehicle. Refer to Vehicle Lifting.
2. Remove the tire and wheel assembly. Refer to Tire and Wheel Removal and Installation in Wheels, Tires and Alignment.
3. Remove the brake caliper and bracket. Hang the caliper and the bracket from the vehicle. DO NOT allow the caliper and the bracket to hang by
the brake hose. Refer to Brake Caliper Replacement - Front in Brakes and Traction Control.
4. Remove the brake rotor. Refer to Brake Rotor Replacement - Front in Brakes and Traction Control.
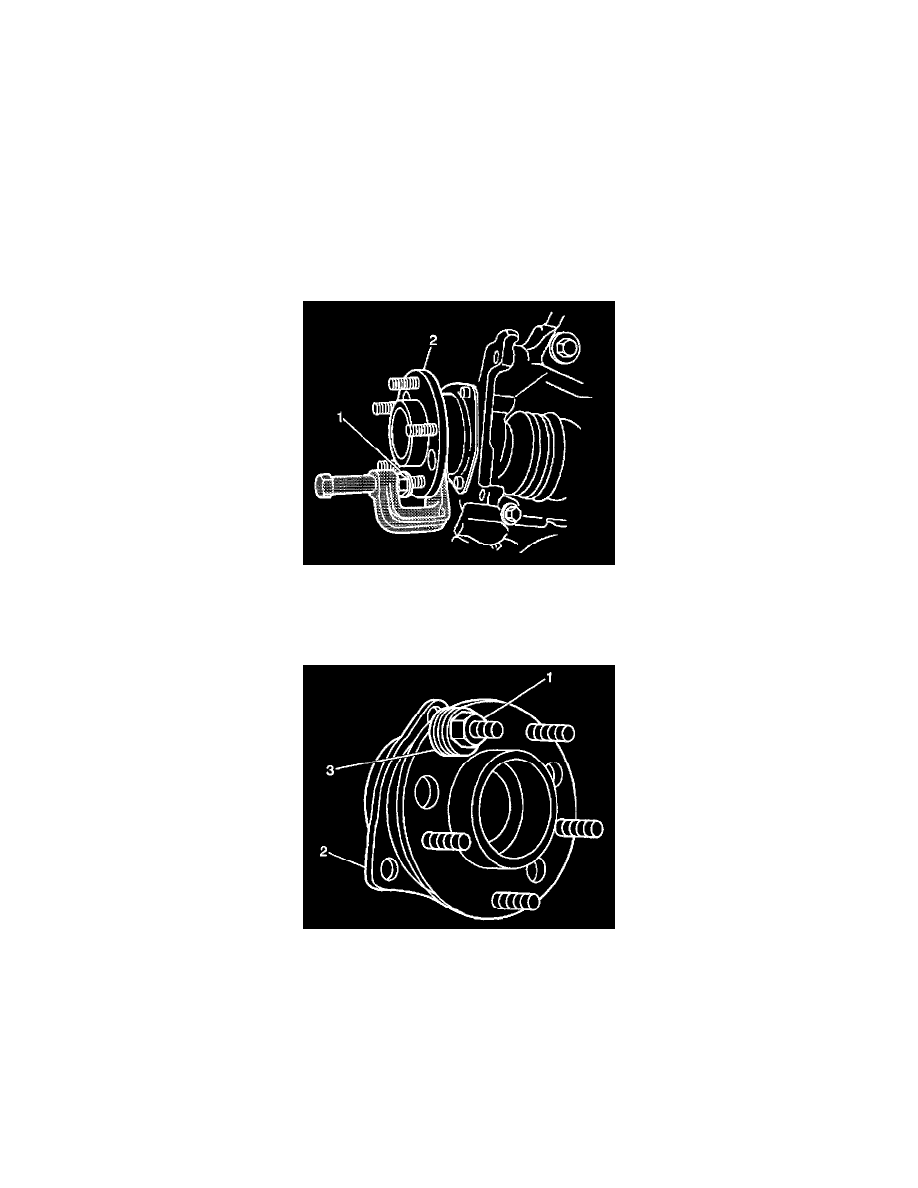
5. Use the J 6627-A in order to extract the stud (1) from the hub (2).
Installation Procedure
1. Install a replacement stud in the wheel hub.
2. Add enough washers (3) in order to draw the stud into the hub (2).
3. Install the wheel nut (1) with the flat side against the washers (3).
Important: Fully seat the wheel stud against the hub flange (2).
4. Tighten the wheel nut (1) until the wheel stud is fully seated against the hub flange.
5. Back off the wheel nut (1) and remove the washers (3).
6. Install the brake rotor. Refer to Brake Caliper Bracket Replacement - Front in Brakes and Traction Control.
7. Install the brake caliper and bracket. Refer to Brake Caliper Replacement - Front in Brakes and Traction Control.
8. Install the tire and wheel assembly. Refer to Tire and Wheel Removal and Installation in Wheel, Tires and Alignments.
9. Lower the vehicle.