
Aurora V6-214 3.5L VIN H SFI (2001)
4.
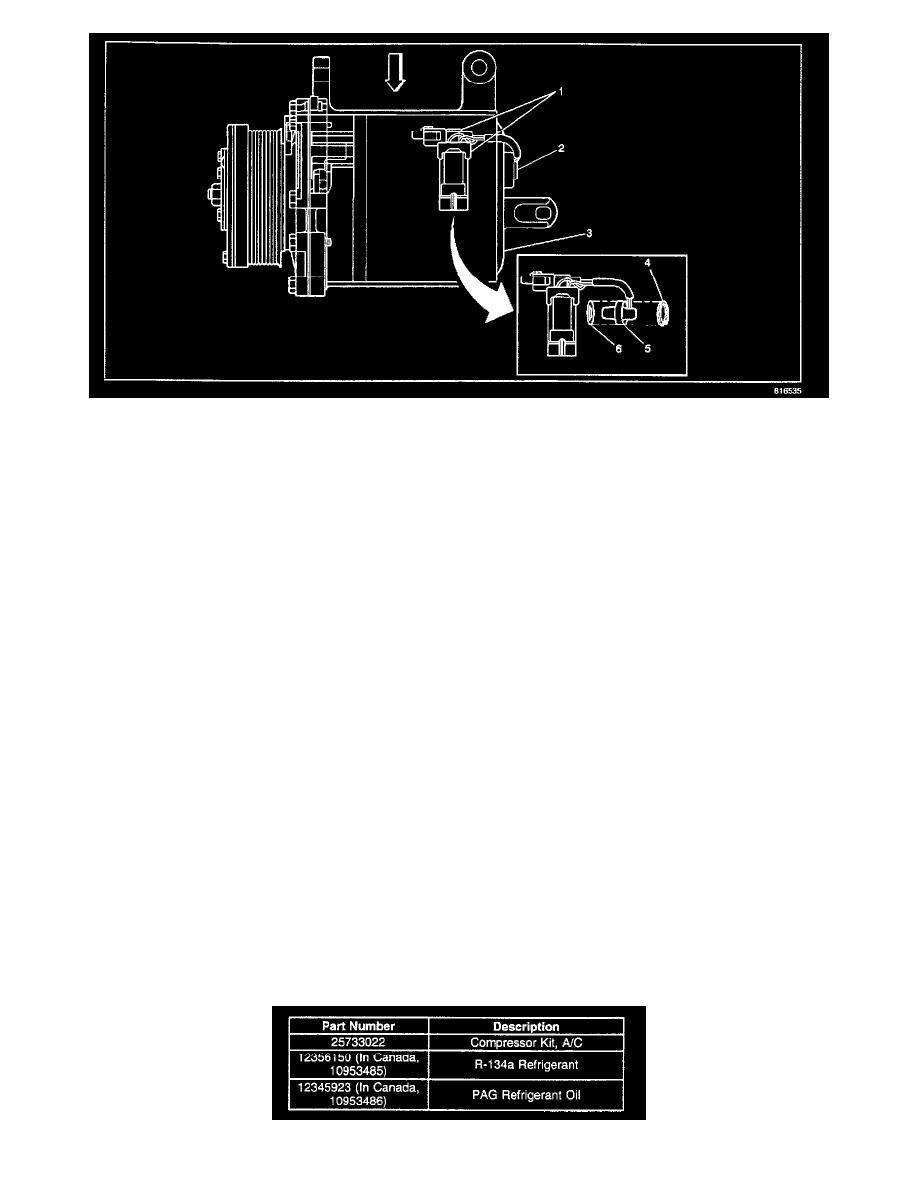
Disconnect the two temperature switch electrical connectors (1) and remove the temperature switch (2) from the compressor (3).
Important:
Position of the snap ring is VERY important.
5.
Install the A/C Compressor Kit, P/N 25733022.
5.1.
Lubricate the temperature switch 0-ring (6) with 525 viscosity mineral oil.
5.2.
Install the 0-ring on the switch (5).
5.3.
Install the new temperature switch (5) into the compressor.
5.4.
Use external snap ring pliers with 90 degree tips to install the retaining snap ring (4) with the "flat" side facing away from the compressor.
5.5.
Connect the two temperature switch electrical connectors.
6.
Install the front air deflector.
Refer to Air Deflector Replacement-Front in the Body Front End sub-section of the Service Manual.
7.
Lower the vehicle.
8.
If all of the refrigerant charge has been lost, add 90 ml (3 fl oz) of new polyalkylene glycol (PAG) synthetic refrigerant oil, P/N 12345923 (in
Canada, use P/N 10953486) to the A/C system using the A/C Oil Injector, J 45037.
Refer to the instructions provided with tool J 45037.
9.
Recharge the A/C system using the ACR 2000, J 43600.
Refer to Refrigerant Recovery and Recharging in the Heating, Ventilation and Air Conditioning sub-section of the Service Manual.
10.
Test the A/C compressor for leaks using the Electronic Halogen Leak Detector, J 39400-A. Refer to Leak Testing in the Heating, Ventilation and
Air Conditioning sub-section of the Service Manual.