
Aurora V8-4.0L VIN C (1996)
Camshaft: Service and Repair
Camshaft Removal/Installation
REMOVAL PROCEDURE
^
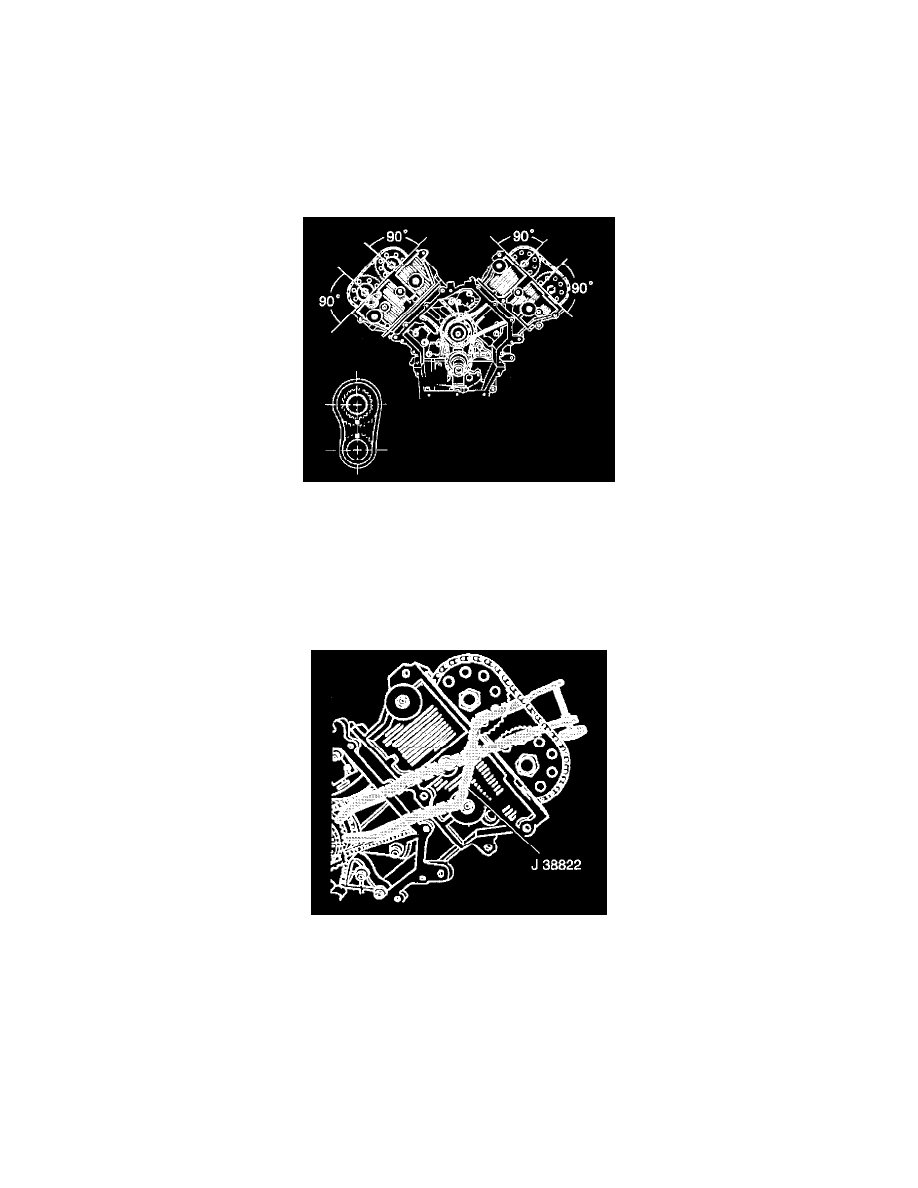
Tools Required
-
J 38822 Cam Chain Tension Holder
IMPORTANT: Do not mix the camshaft bearing caps between positions or between heads. Each cap must be reassembled in the position from which
it was removed and in the original orientation (arrow pointing toward the front of the engine).
1. Remove the camshaft cover. Refer to Camshaft Cover Replacement (Left) and Camshaft Cover Replacement (Right).
2. Set the engine at base timing (top dead center number one piston).
3. Align the timing marks to the correct position. Refer to Setting Camshaft Timing for the correct timing mark alignment.
IMPORTANT: The sprocket-to-chain relationship must be maintained throughout this procedure or the camshaft timing will be lost and require
further engine disassembly for retiming.
4. Secure the camshaft sprocket to the secondary timing chain using tie-straps through the camshaft sprocket holes. Use two tie-straps per sprocket.
5. Working behind the sprockets, install the J 38822 between the chain tensioner and the chain guide. Apply tension by tightening the tool adjusting
screw.
IMPORTANT: When using J 38822 on the right hand cylinder bank, remove the wiper motor in order to gain access for the tool usage.