
Aurora V8-4.0L VIN C (1996)
Fuel Supply Line: Service and Repair
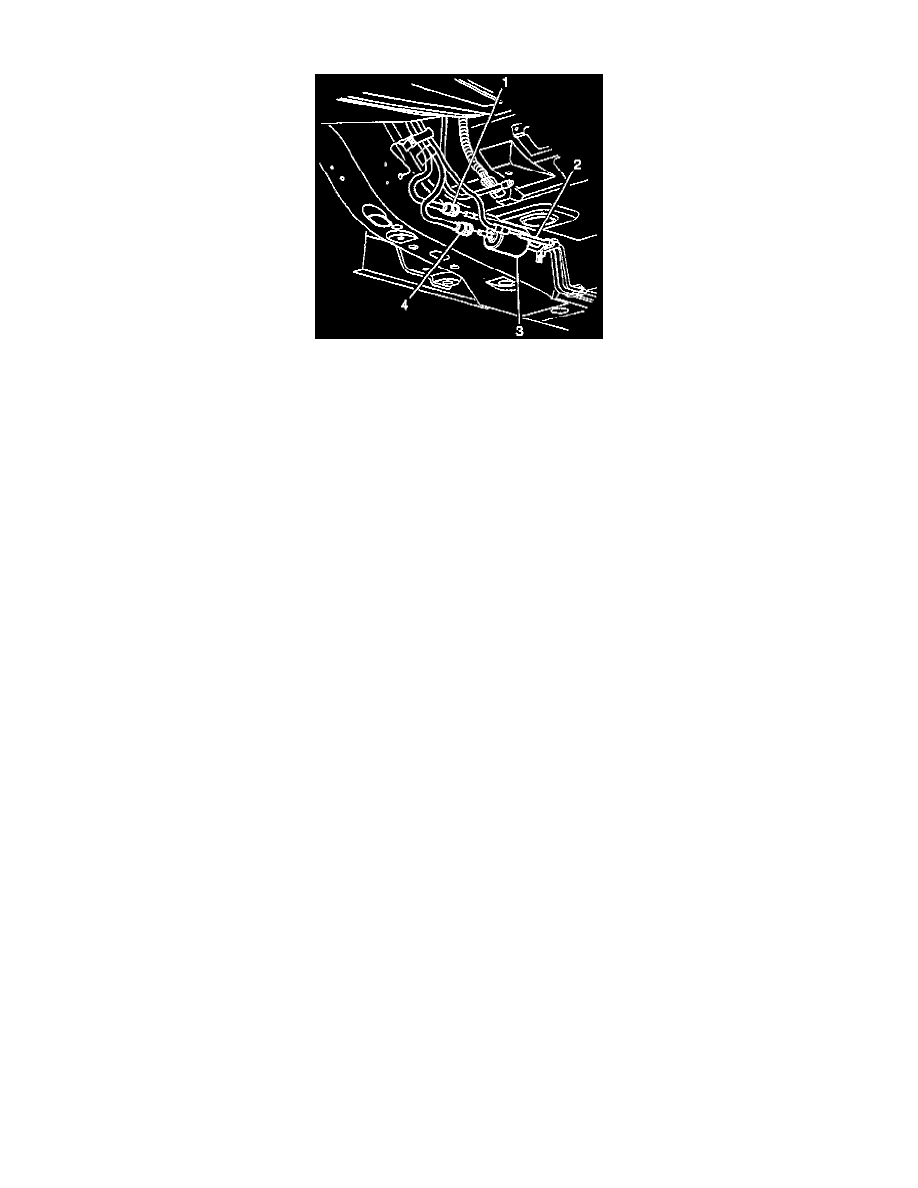
Fuel Filter Location Drivers Side Frame Rail Forward Of The Fuel Tank
Removal Procedure
WARNING: In order to Reduce the Risk of Fire and Personal Injury, Do Not attempt to repair the sections of the nylon fuel pipes. If the nylon
fuel pipes are damaged, they must be replaced.
Notice: If nylon the fuel feed or the return pipes become kinked and cannot be straightened, they must be replaced.
1. Remove negative battery cable.
2. Relieve the fuel system fuel pressure. Refer to Fuel Pressure Release.
3. Drain the fuel tank.
4. Remove the fuel tank.
5. Remove the quick-connect fittings (1), (4), on the fuel sender assembly-side of the in-pipe fuel filter (3)
6. Cap the fuel sender fuel pipes and the in-pipe fuel filter pipes as needed to stop any fuel leakage.
7. Remove the fuel feed, fuel return, and EVAP pipe attaching hardware and the fuel feed, fuel return, and EVAP pipes.
8. Note the position of the fuel and EVAP pipes (2) and the fuel and EVAP pipe attaching hardware for installation.
Installation Procedure
1. Install the new fuel feed, fuel return, EVAP pipes, and the fuel and EVAP pipe attaching hardware as noted during removal.
2. Remove the caps from the in-pipe fuel filter pipes and the fuel sender fuel pipes.
3. Install new plastic connector retainers on the in-pipe fuel filter pipes and on the fuel sender fuel pipes.
4. Install the quick-connect fittings (1) (2).
5. Install the fuel tank.
6. Add fuel and install the fuel tank filler pipe cap.
7. Tighten the fuel tank filler pipe cap.
8. Install the negative battery cable.
9. Inspect for leaks.
9.1. Turn the ignition switch to the On position for 2 seconds.
9.2. Turn the ignition switch to the Off for 10 seconds.
9.3. Turn the ignition switch to the On position.
9.4. Check for fuel leaks.