
Aurora V8-4.0L VIN C (1996)
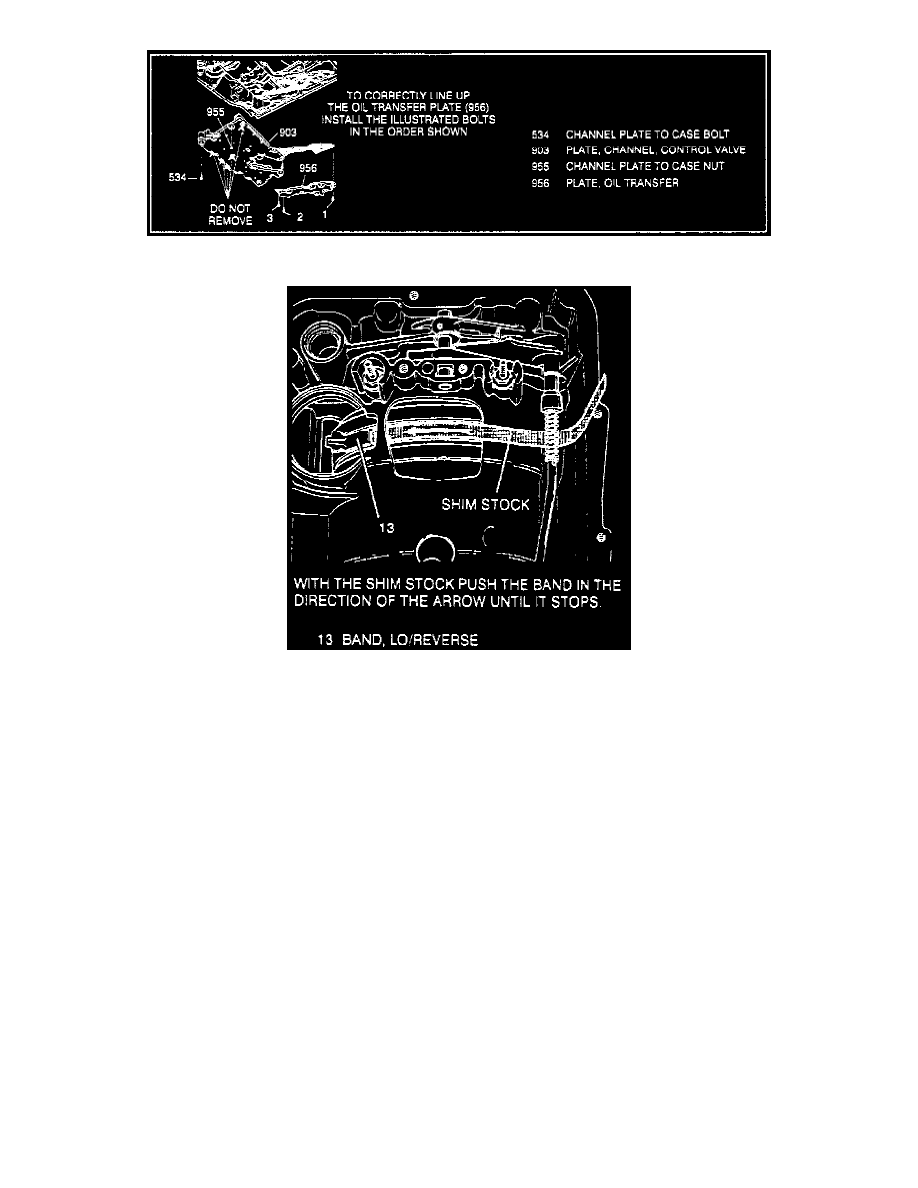
Fig.19 Oil Transfer, Channel And Control Valve Plates
Fig.20 Positioning Low/Reverse Band
Refer to Fig. 17 when servicing lower control valve.
1. Raise and support vehicle, then remove bottom pan, scavenger screens and seals as outlined.
2. Using a small screwdriver, bend back small tabs to disconnect shift solenoids A, B and transaxle pressure switch connectors, Fig. 18.
3. Disconnect manual valve linkage clip with a small screwdriver.
4. Disconnect wiring harness from retaining clips on lower controls assembly.
5. Remove oil transfer plate.
6. Remove bolts, then two nuts using 10 mm socket. Do not remove five bolts in lower channel plate, Fig. 19.
7. Remove lower channel plate, valve and accumulator assemblies from case.
8. Position the low reverse band using a 0.02-0.03 inch shim, Fig. 20.
9. Place lower controls against forward support studs.
10. Hand start bolts into channel plate, then remove shim stock.
11. Place oil transfer plate over open gasket area. Hand start bolts to hold plate in place noting installation order.
12. Install two nuts on forward support studs, then tighten bolts and nuts to specification.
13. Connect manual valve to detent lever. Route harness over spacer plate rib and detent lever and snap into retaining clips on lower controls
assembly.
14. Connect wiring harness to shift solenoids A and B and transaxle pressure sensor.
15. Install scavenger screens, lip seals, bottom pan and gasket.
16. Add transaxle fluid as outlined.
17. Reset transaxle oil life indicator, if a complete fluid change was necessary.