
Bravada V6-4.3L VIN W (1997)
Stabilizer Bar: Service and Repair
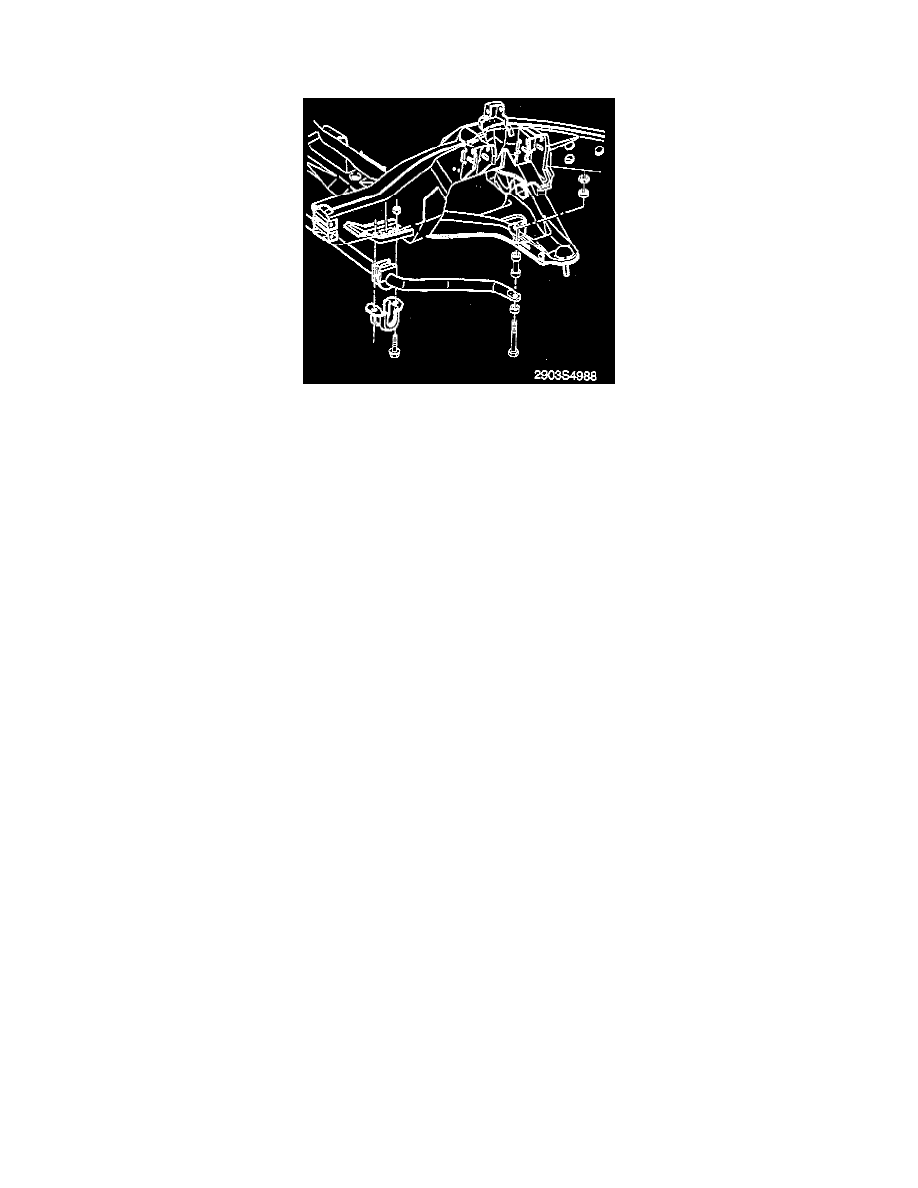
Front Suspension
REMOVE OR DISCONNECT
Raise the vehicle and support it with safety stands.
Important: Be sure to remove parts from the right and left front of the vehicle and keep them separated.
1. Nut from the link bolt from lower control arm.
2. Insulator.
3. Link bolt.
a. Spacer.
b. Insulator.
4. Bolts.
5. Bracket.
6. Stabilizer shaft.
7. Rubber bushings.
INSPECT
-
All parts for wear and damage.
INSTALL OR CONNECT
Unload the torsion bar. Refer to "Torsion Bar and Support Assembly Replacement."
1. Insulators to the stabilizer shaft.
-
Make sure the slit in the insulator faces forward.
2. Stabilizer shaft to the frame and lower control arm.
3. Clamp to the rubber bushings.
4. Bolts to the weld nuts.
-
Tighten bolts to 15 Nm (11 ft. lbs.).
5. Insulator to link bolt.
6. Link bolt through stabilizer bolt holes.
7. Spacer.
8. Link bolt through lower control arm with the parts stacked properly.
9. Insulator.
10. Nut.
-
Lower the vehicle.
Important Adjust the trim height of the vehicle.