
Bravada V6-4.3L VIN W (1997)
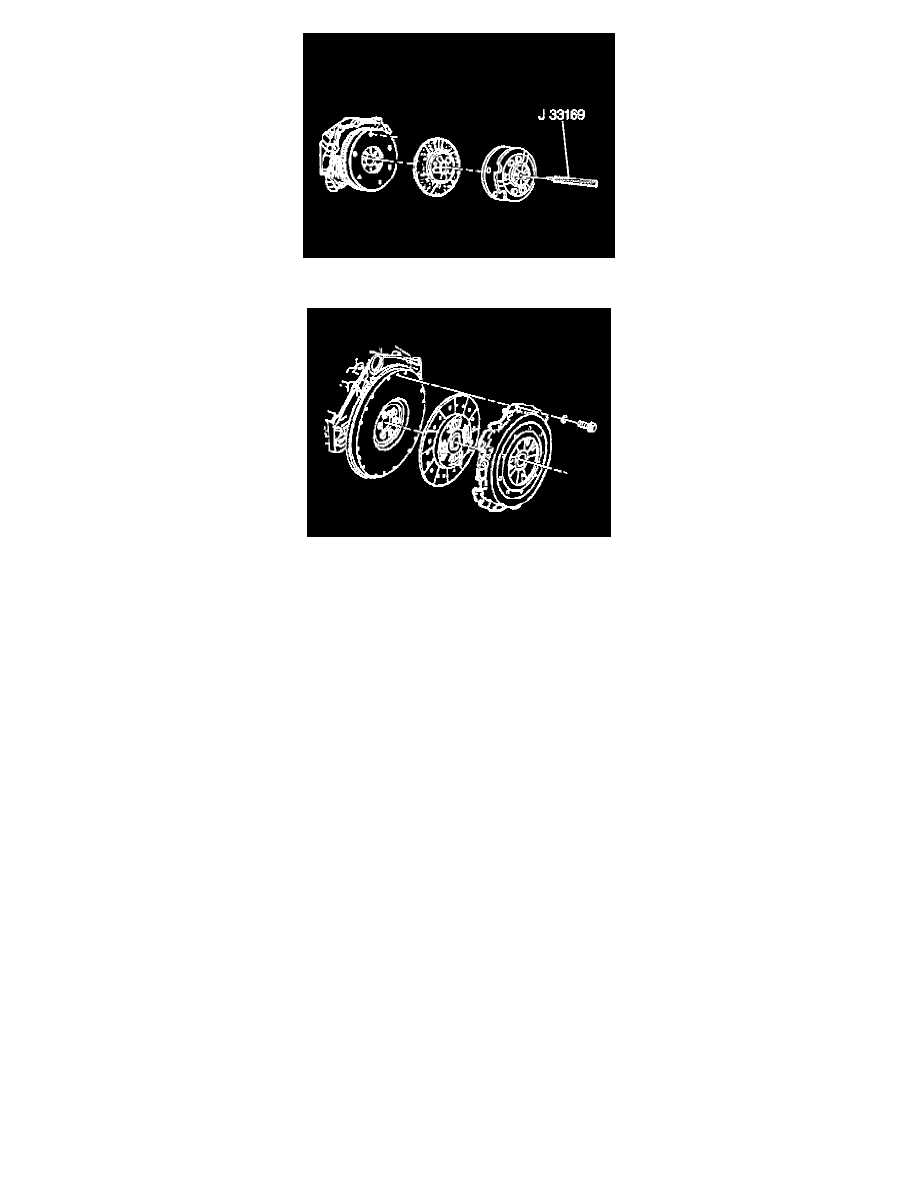
4. Install J 33169 through the cover plate, pressure plate, and into the flywheel for support during plate removal.
5. Remove the bolts and washers securing the clutch pressure plate and cover plate to the flywheel.
6. Remove J 33169 from the plates.
7. Clean all the clutch parts with a clean, water dampened cloth in order to remove any fibers.
8. Inspect all of the clutch parts for the following conditions:
-
Wear and damage.
-
Scoring and flatness with a straight edge.
-
Driven plate runout. The runout must not be more than 0.508 mm (0.020 inch).
-
Scoring, gouges, and loose rivets on the friction pads.
-
Oil soaked friction pads.
-
Nicks, burrs, and sliding fit on all splines.
-
Bending and breaks in the clutch pressure plate cover spring.
INSTALLATION PROCEDURE
1. Using J 33169 for installation alignment, position the pressure plate and cover plate to the flywheel.
2. Secure the plates to the flywheel with bolts and washers. Use the marks made during removal to align the plates.
-
Tighten:
^
Each bolt one turn at a time in order to avoid warping the clutch pressure plate cover. Use a criss-cross pattern for tightening the bolts.
^
The pressure and cover plate bolts for the NV1500 transmission to 45 Nm (33 ft. lbs.).
^
The pressure and cover plate bolts for the NV3500 to 40 Nm (29 ft. lbs.).
3. Remove J 33169 from the clutch plates.
4. Install the transmission.
5. Lower the vehicle.
6. Test the transmission and clutch system for proper operation.
Concentric Slave Cylinder