
Bravada V6-4.3L VIN W (1997)
7. Pinion flange.
-
Have a suitable container in place to catch lubricant.
8. Pinion oil seal by driving it out of the carrier with a blunt punch or drift.
-
Do not damage the carrier.
Inspect
-
Seal surface of the pinion flange for tool marks nicks, or damage, such as a groove worn by the seal.
-
Carrier bore for burrs that might cause leaks around the outside of the seal.
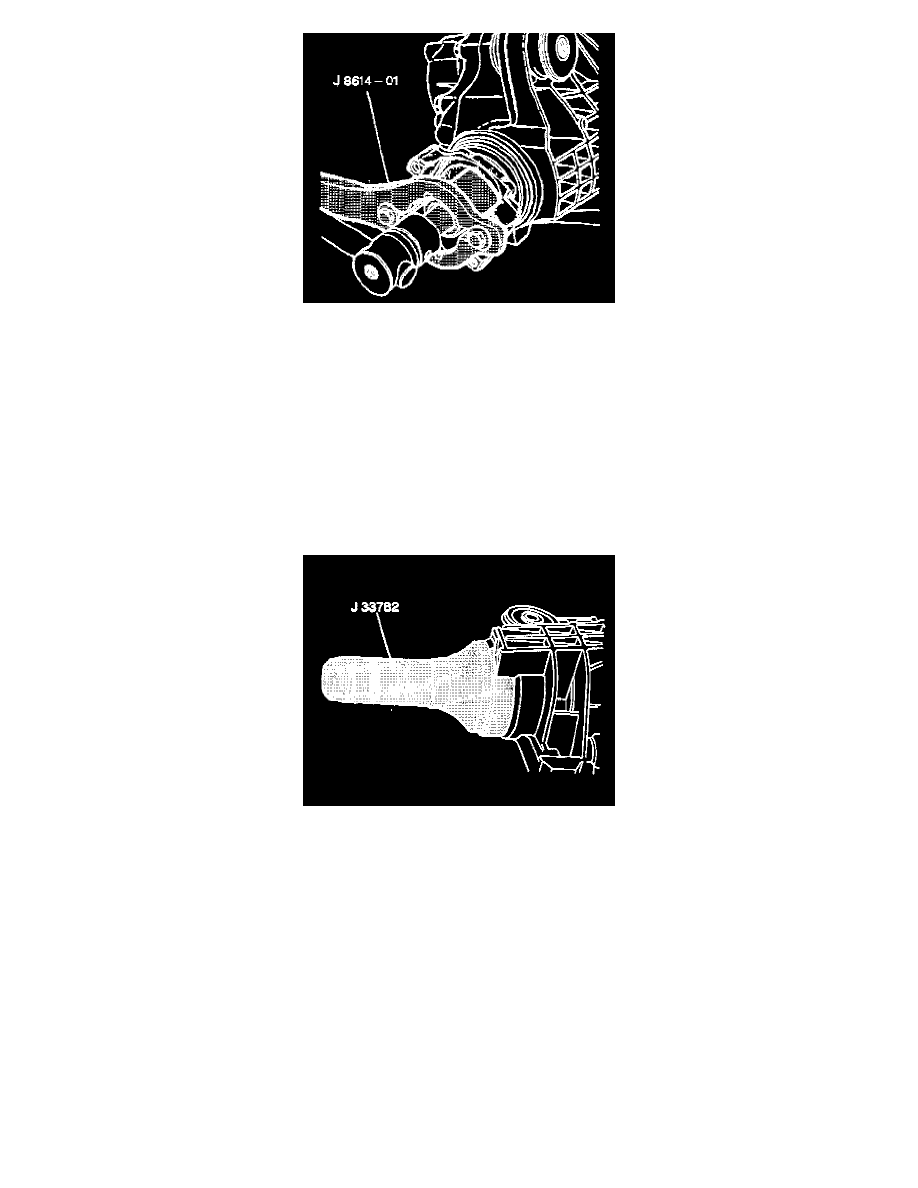
INSTALL OR CONNECT
^
Tools Required:
-
J 8614-01 Pinion Flange Remover
-
J 33782 Pinion Oil Seal Installer
1. New pinion oil seal using J 33782.
2. Special seal lubricant to the outside of the pinion flange and the sealing lip of the new pinion oil seal.
3. Pinion flange in the exact spline relationship as it was removed.
4. Washer and nut using J 8614-01.
-
Tighten nut to the same position as marked during removal, then continue to tighten the nut 10° after the marks.
5. Propeller shaft to the pinion flange.
6. Propeller shaft flange to front axle flange bolts.
-
Align the marks made during removal. Components must be reassembled in the same position.
-
Tighten bolts to 19 Nm (14 ft. lbs.).
Inspect
-
Axle lubricant level and add as necessary.
7. Left front under body shield bracket.
8. Under body shields, if equipped.
Rear Axle