
Bravada 2WD L6-4.2L VIN S (2002)
Headliner: Procedures
REMOVAL PROCEDURE
1. Ensure the ignition switch is in the LOCK position.
2. Remove the cargo net, if equipped.
3. Remove the luggage/cargo shelf assembly, if equipped.
4. Remove the right sound insulator panel.
5. Remove the front door sill plates.
6. Remove the rear door sill plates.
NOTE: Remove the headliner and the headliner harness as an assembly. Do NOT cut or splice the headliner harness. Cutting or splicing the harness
may damage the coax cable, resulting in poor radio performance.
7. Remove the center pillar trim panels.
8. Remove the windshield garnish moldings.
9. Remove the instrument panel (IP) trim pad.
10. Open the IP compartment door and lower the door to the full down position.
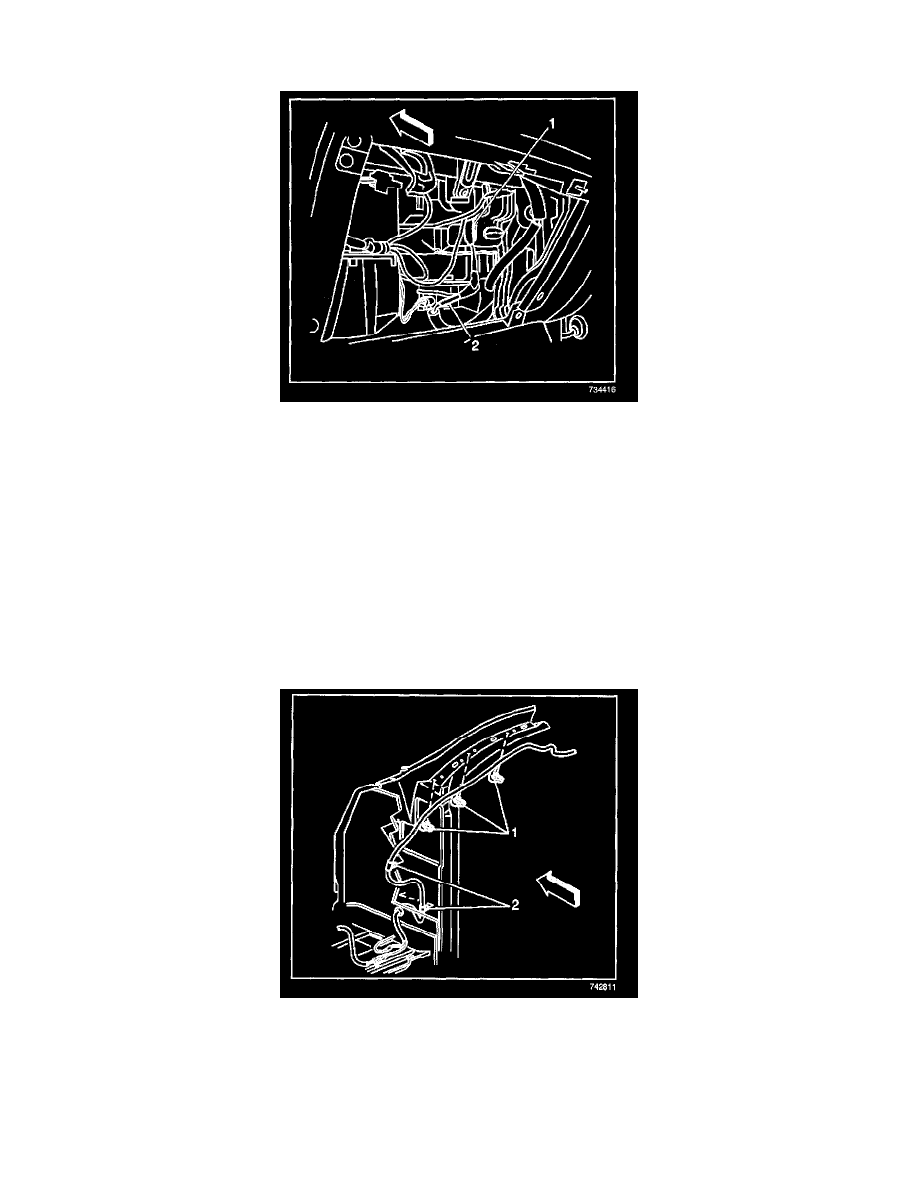
11. Disconnect the coax cable (2) and the headliner harness electrical connector (1), located near the bottom of the HVAC blower motor.
12. Remove the lower rosebud (2) that fastens the headliner harness to the cowl.
13. Remove the 3 clips (1) retaining the headliner harness to the right windshield pillar.
14. Attach a mechanic's wire to the end of the headliner harness.
15. The wire harness is located in the cowl insulation access hole, behind the IP. In order to remove the wire harness, grasp the headliner harness near
the bottom of the windshield and carefully pull upward.
16. Leaving the mechanic's wire positioned behind the IP, remove the headliner harness from the mechanics wire.
17. Remove the video display.
18. If equipped, remove the front and rear overhead console.