
Bravada 2WD L6-4.2L VIN S (2002)
10. Open the IP compartment door and lower the door to the full down position.
11. Disconnect the coax cable (2) and the headliner harness electrical connector (1), located near the bottom of the HVAC blower motor.
12. Remove the lower rosebud (2) that fastens the headliner harness to the cowl.
13. Remove the 3 clips (1) retaining the headliner harness to the right windshield pillar.
14. Attach a mechanic's wire to the end of the headliner harness.
15. The wire harness is located in the cowl insulation access hole, behind the IP. In order to remove the wire harness, grasp the headliner harness near
the bottom of the windshield and carefully pull upward.
16. Leaving the mechanic's wire positioned behind the IP, remove the headliner harness from the mechanics wire.
17. Remove the video display.
18. If equipped, remove the front and rear overhead console. Refer to Overhead Console Replacement - Front, or to Overhead Console Replacement -
Rear.
19. Remove the sunshades from the headliner.
20. If equipped with OnStar(R), perform the following procedure:
1. Disconnect the navigation antenna cable from the communication interface module.
2. Remove the navigation antenna cable from the right side door rocker panel attachments.
3. Remove the navigation antenna cable from the right center pillar.
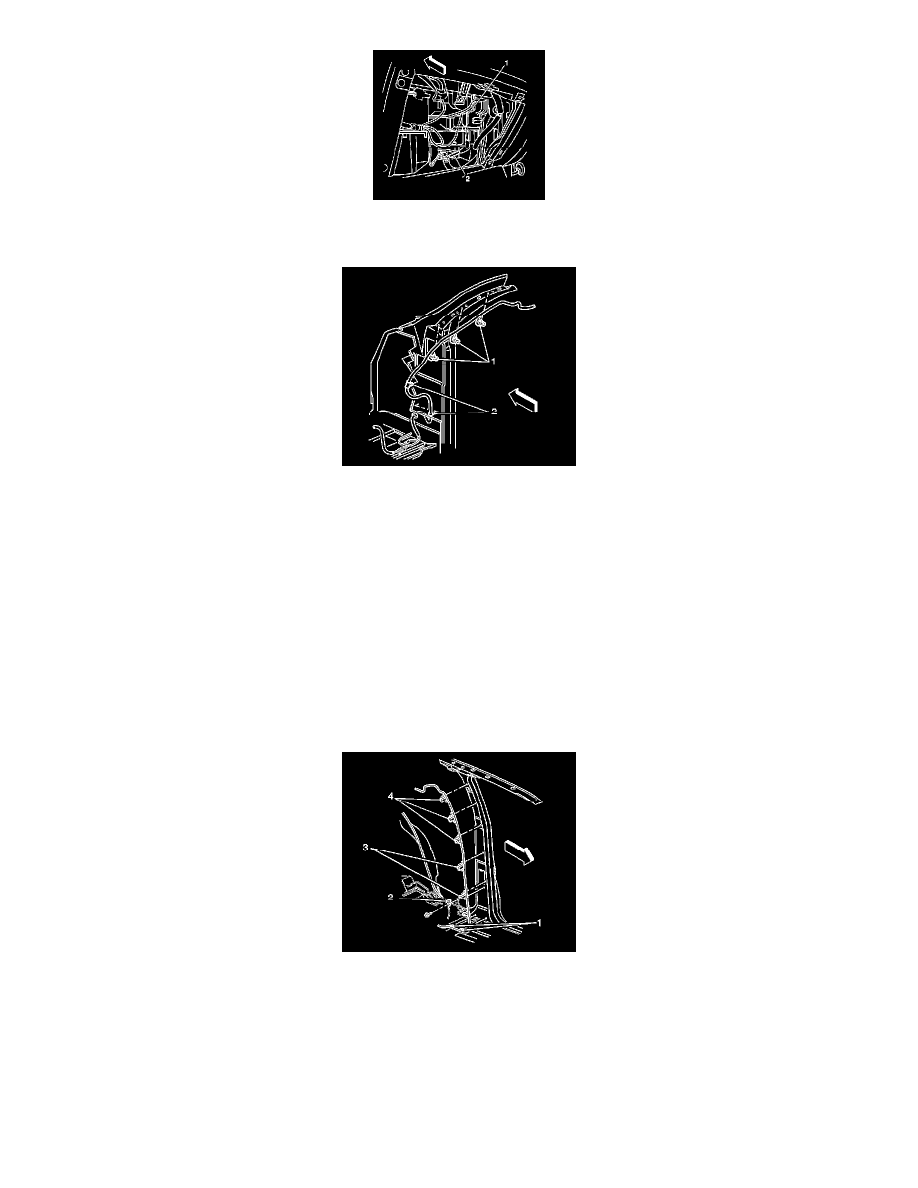
21. Remove the following headliner harness clips from the left center pillar:
*
The center pillar harness clips (4)
*
The center pillar harness clips (3)
*
The center pillar harness clips (1)
22. Remove the center pillar harness ground bolt (2).
23. Remove the harness from the left center pillar.