
Bravada 2WD L6-4.2L VIN S (2002)
4. Connect the heater hoses to the heater core.
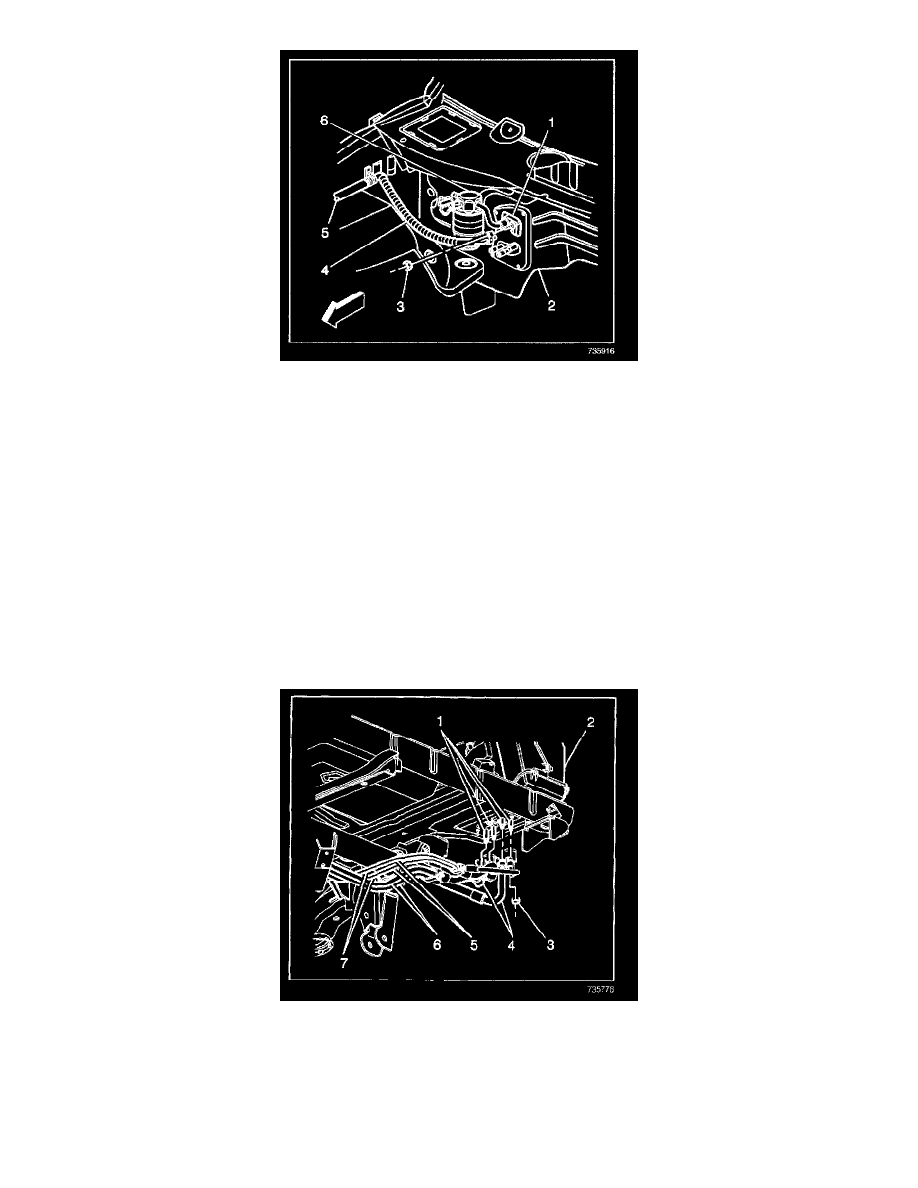
5. Connect the evaporator tube (4) to the evaporator (1).
6. Install the accumulator (6) to the evaporator (1).
NOTE: Refer to Fastener Notice in Service Precautions.
7. Tighten the accumulator retaining nut.
Tighten
Tighten the nut to 4.5 N.m (40 lb in).
8. Install the I/P carrier.
9. Evacuate and recharge the A/C system. Refer to Refrigerant Recovery and Recharging.
10. Leak test the fittings of the components using the J 39400.
11. Refill the engine coolant.
HVAC Module Assembly Replacement - Auxiliary
REMOVAL PROCEDURE
1. Recover the refrigerant. Refer to Refrigerant Recovery and Recharging.
2. Drain the cooling system. Refer to Draining and Filling Cooling System in Cooling System.
3. Raise and support the vehicle. Refer to Lifting and Jacking the Vehicle.
4. Remove the nuts (3) from rear A/C line block fittings.
IMPORTANT: Cap or tape the open A/C refrigerant lines immediately.