
Bravada 2WD L6-4.2L VIN S (2002)
8.
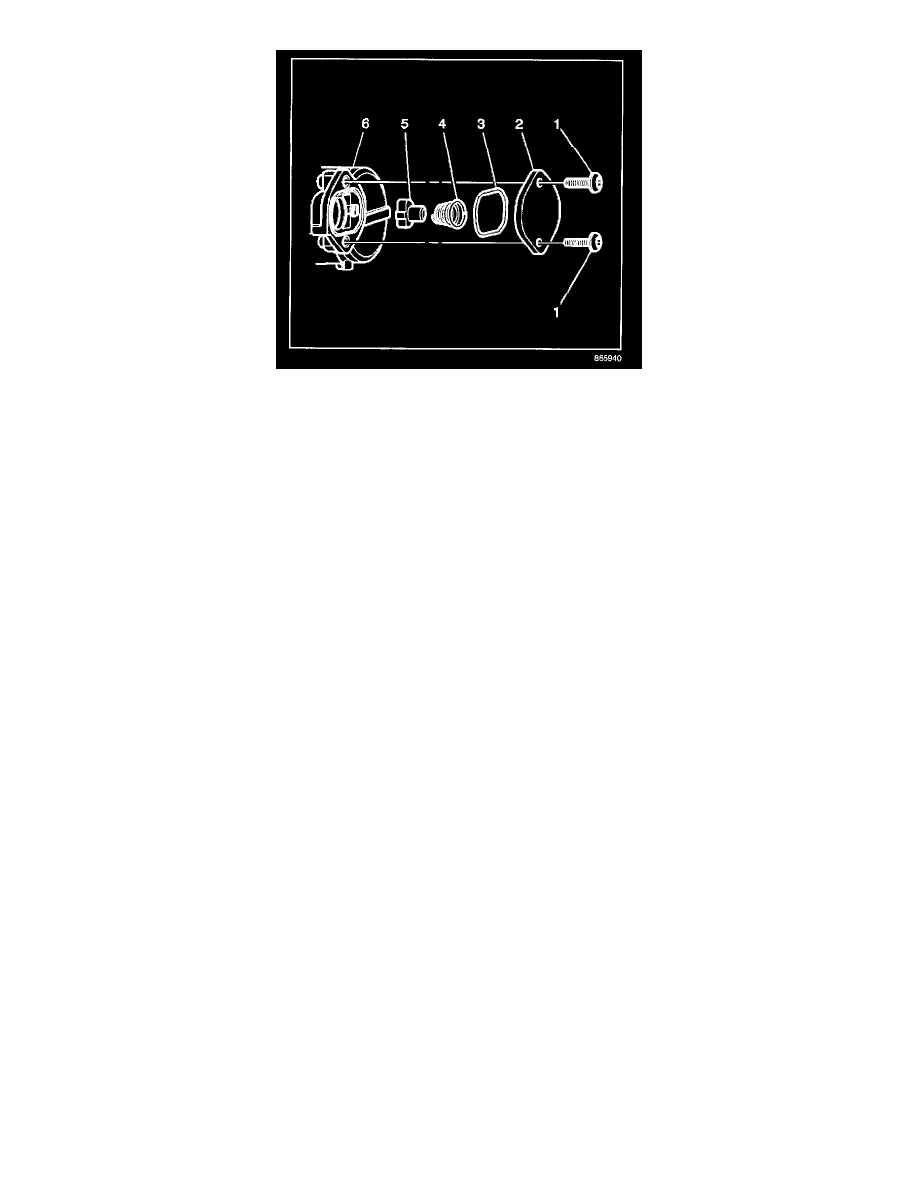
Remove the air compressor valve cylinder head screws (1) using a T25 TORX(R) bit and remove the cylinder head (2).
9.
Remove the 0-ring (3), the spring (4) and the check valve (5).
Important:
DO NOT allow any foreign material to fall into the compressor head.
10.
Clean the old thread locking compound from the aluminum body (6) tapped holes using a M5 x 0.8 thread cleaning tool.
11.
Clean any foreign material away from the sealing area.
Important:
^
The new check valve (5) and 0-ring (3) come pre-greased. DO NOT add additional grease.
^
The groove in the cylinder head (2) must be installed facing the compressor (6) in order to properly retain the 0-ring.
12.
Install the new pre-greased check valve (5), the spring (4), the 0-ring (3), the cylinder head (2) and the screws (1) from the service kit, P/N
15183676.
Tighten
Tighten the cylinder head screws (1) to 5 N.m (44 lb in).
Important:
Ensure that the color on the air supply lines match the color on the air spring compressor for reassembly. The right side line is clear and the left side
line is black. Right and left is also indicated on the compressor.
13.
Install the air supply lines with existing fittings to the air spring compressor.
Tighten
Tighten the air supply line fittings to 2.25 N.m (18.5 lb in).
14.
Connect the air inflator switch electrical connections, the air supply line and the air spring compressor vent hose to the air spring compressor.
15.
Install the air spring compressor to frame mounting bolts.
Tighten
Tighten the air spring compressor to frame mounting bolts to 25 N.m (18 lb ft).
Important:
Inspect the rear air springs for proper seating before inflating the rear air springs.
16.
Lower the vehicle.