
Calais FWD L4-151 2.5L (1985)
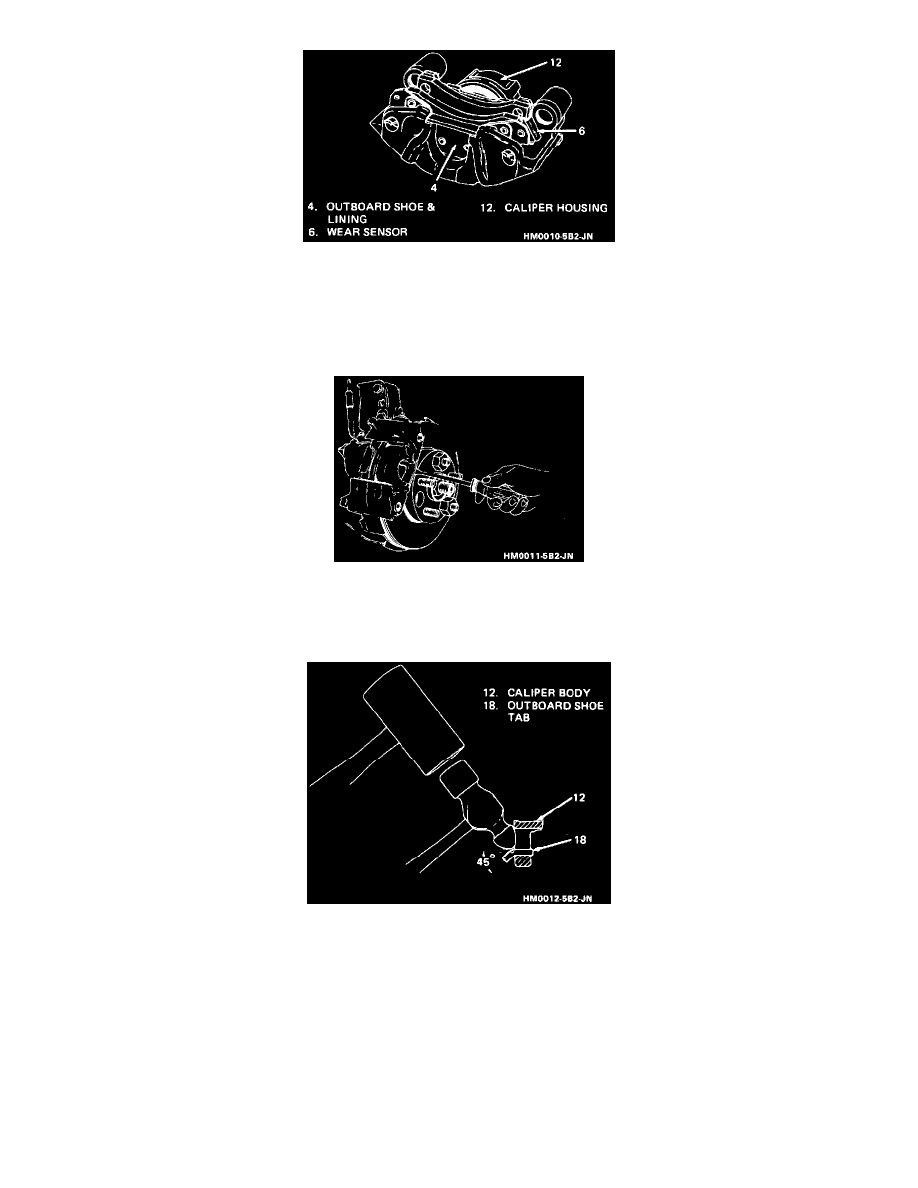
Installing Outboard Shoe And Lining
4.
Install outboard shoe and lining with wear sensor at leading edge of shoe during forward wheel rotation.
5.
Install Caliper.
6.
After installation of calipers, perform clinching procedure as described below:
a. Apply approximately 175 lb. of force three times to brake pedal to ensure caliper piston is extended and shoes are fully seated.
Clinching Procedure ( Step 1 )
b. Wedge a large flat blade screwdriver between outboard shoe flange and hat section of rotor. Pry up on outboard shoe.
c. Hold outer shoe against caliper with suitable clamp or by applying moderate pressure on brake pedal.
Clinching Procedure ( Step 2 )
d. Position a ball peen hammer on outboard shoe tab, then using a larger brass hammer, lightly tap the ball peen hammer to bend the outboard
shoe tab. Tabs must be bent around casting to approximately 45°.
e. After both tabs have been bent, pressure should be released and the outboard shoe should be locked into position. If the shoe is loose, repeat
steps a. through d.
NOTE: If an outboard shoe is removed from the caliper, or the tabs unclinched for any reason, then it will be necessary to replace the shoe and
lining assemblies. Do not re-clinch outboard shoe locking tabs after having removed shoe from caliper.
.