
Cutlass L4-138 2.3L VIN A FI HP (1990)
Brake Light Switch: Adjustments
*** UPDATED BY TSB # 90-T-78 DATED MAY 1990
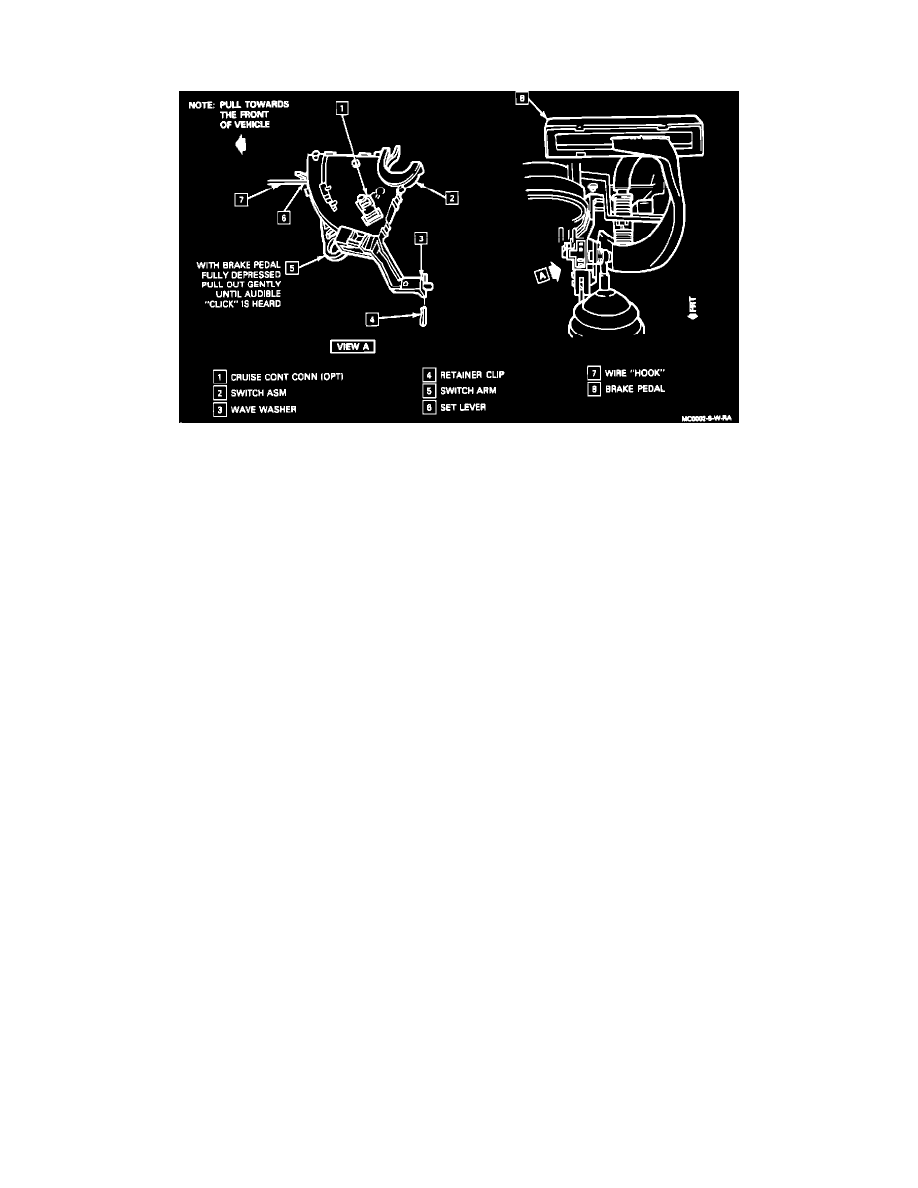
Figure 1 - Stoplamp Switch
Remove or Disconnect
-
Left side sound insulator panel
Adjust
-
Stoplamp switch
a.
Depress brake pedal as far as possible and hold.
b.
Using a stiff wire with a hooked end, gently pull the switch set lever forward (toward front of vehicle), and listen for an audible click that indicates
release of the automatic adjuster.
IMPORTANT:
If no click is heard, release brake pedal and repeat above procedure.
C.
After release of the automatic adjuster, pull brake pedal all the way rearward. Listen for the switch to ratchet into the set position (setting the
stoplamp switch). At least three (3) clicks of the ratchet should be heard.
Inspect
Operation of stoplamps
a.
Stoplamps should light at maximum brake pedal travel of 32 mm (1-1/4 in.) and throughout its travel.
b.
If stoplamps do not light, repeat switch adjustment procedure one more time. If the switch still fails to activate the stoplamps, refer to "
Stoplamp Switch Adjustment Check" attached.
Install or Connect
-
Left side sound insulator