
Cutlass L4-138 2.3L VIN A FI HP (1990)
Brake Bleeding: Service and Repair
Hydraulic System Bleeding
Manual Bleeding
PROCEDURE
1. Make sure vehicle ignition is off
2. Depressurize Powermaster III Unit, refer to Antilock Brake System / Service and Repair.
3. Clean and remove reservoir cover and diaphragm assembly.
4. Fill reservoir with DOT 3 brake fluid to the correct level and install reservoir cover.
5. Raise vehicle and suitably support.
NOTE: If the Powermaster III Unit being bled is a replacement part or there is difficulty when trying to bleed the front master cylinder sections,
make sure all air is removed from the master cylinder body by opening the brake pipe tube nuts on the Powermaster III Unit (front two only)
approximately 2 turns or until fluid begins to bleed.
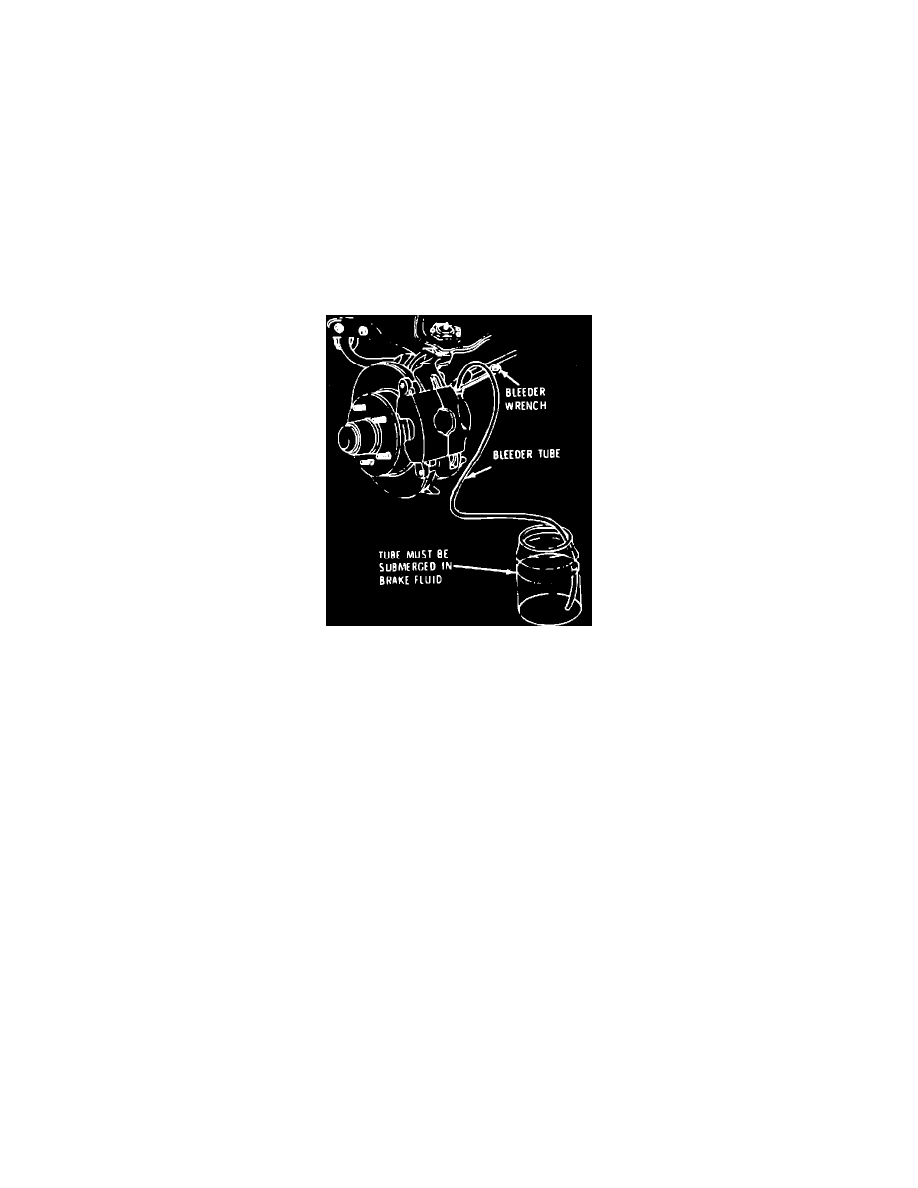
(Figure 1) Bleeding Brakes
6. Bleed right front wheel brake:
^
Attach bleeder hose to bleeder valve and submerge opposite end in a clean container partially filled with brake fluid.
^
Slowly depress brake pedal.
^
Open bleeder valve.
^
To assist in freeing trapped air, tap "lightly" on caliper castings with a rubber mallet.
^
Close bleeder valve.
^
Release brake pedal.
^
Check fluid level and add new brake fluid as necessary.
7. Repeat step 6 until brake pedal feels firm at half travel and no air bubbles are observed in the bleeder hose.
8. Repeat steps 6 and 7 on the left front wheel brake.
NOTE: Turn the ignition off if pump motor runs for more than 60 seconds, refer to Pump, Brake Fluid / Testing and Inspection.
9. Turn ignition to the "Run" position without starting the vehicle. Allow the pump motor to run to pressurize the accumulator.
10. Bleed right rear wheel brake:
^
Attach bleeder hose to bleeder valve and submerge opposite end in a clean container partially filled with brake fluid.
^
Open bleeder valve.
^
With ignition on, slowly depress brake pedal part way, until brake fluid begins to flow from bleeder hose. Allow brake fluid to flow for 15
seconds. Do not fully depress brake pedal.
^
To assist in freeing trapped air, tap "lightly" on caliper castings with a rubber mallet.
^
Close bleeder valve and release brake pedal.
^
Repeat preceding two substeps until no air bubbles are seen in the bleeder hose.
^
Check brake fluid level and add new brake fluid as necessary.
^
Fill the rear chamber to approximately 25 mm (1 in.) below full mark at this intermediate stage with system charged.
^
Repeat steps 9 and 10 on the left rear wheel brake.
^
Lower vehicle.