
Cutlass L4-138 2.3L VIN A FI HP (1990)
NOTICE:
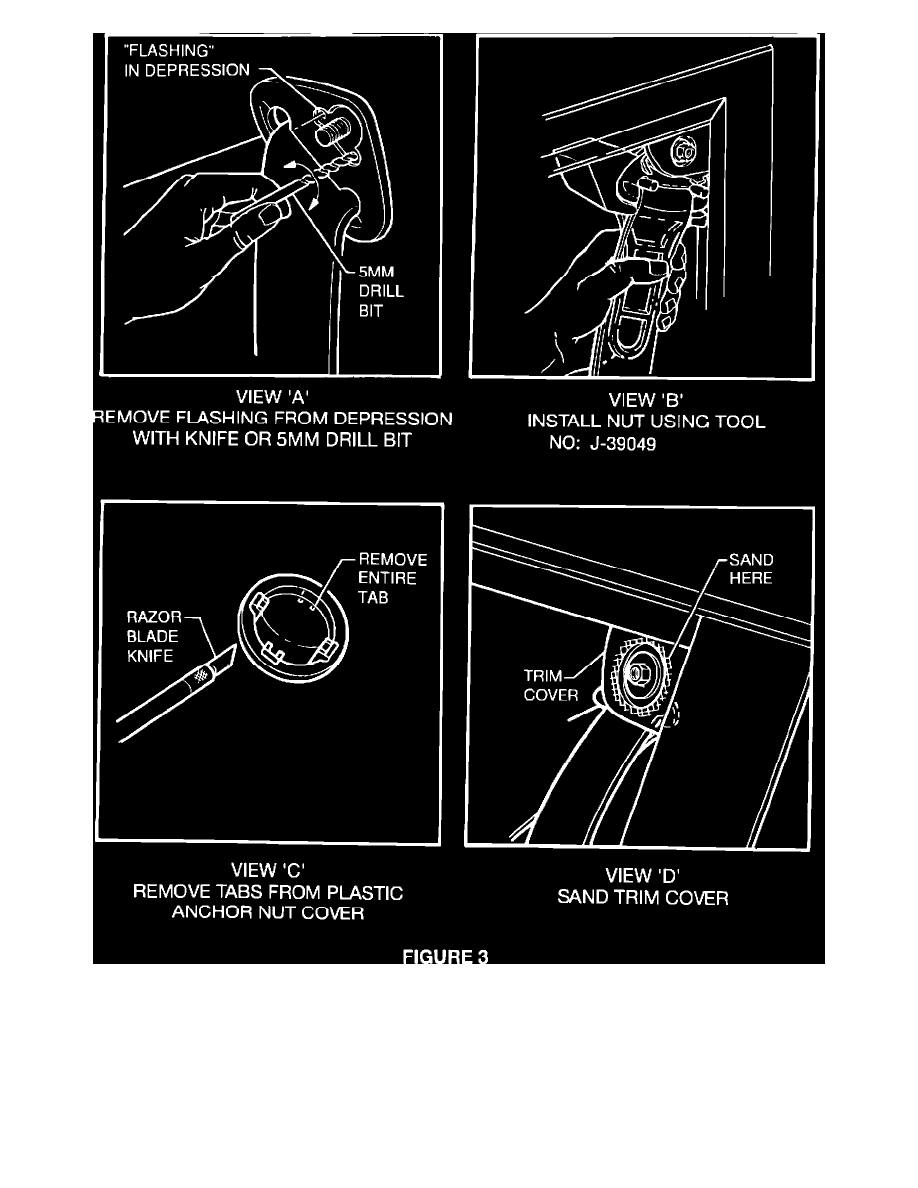
If the depresslons in the back of the shoulder belt guide loop have plastlc "flashings" in the holes from the molding process, it will be necessary to
remove these "flashings" with a drill bit (5 mm) or a knife. This allows the bracket to sit flat against the shoulder belt guide loop. If a drill bit is used for
this procedure, turn the drill bit by hand. Do NOT drill through the front of the guide loop (Figure 3, View "A").
5.
Insert a new, larger diameter nut (with plastic silencer) through the anchor plate and reinstall the rubber washer over the shoulder of the nut
(between anchor plate and the guide loop with the bracket installed).
6.
Put the guide loop with bracket into place and thread the new nut onto the guide loop stud (Figure 3, View "B"). Torque the nut to 28 N-m (21
lb.ft.).