Cutlass L4-138 2.3L VIN A FI HP (1990)

opposite), and a guide loop reinforcement kit must be installed on both sides of the vehicle (for appearance reasons).
If the first guide loop inspected does not have a crack, perform steps 1 through 5 on the opposite front door guide loop to determine if that guide
loop is cracked. DO NOT REINSTALL GUIDE LOOP UNTIL BOTH SIDES HAVE BEEN INSPECTED.
6.
Remove all traces of dust from the guide loop(s) and from the Magnetic Inspection/Drilling Fixture by brushing or blowing.
CAUTION:
PROPER EYE PROTECTION SHOULD BE WORN TO PROTECT EYES FROM DUST.
7.
If cracks were NOT found, reinstall the guide loop rubber washers and install NEW guide loop nuts (to be ordered separately).
Torque the nuts to 28 N-m (21 lb.ft.).
NOTICE:
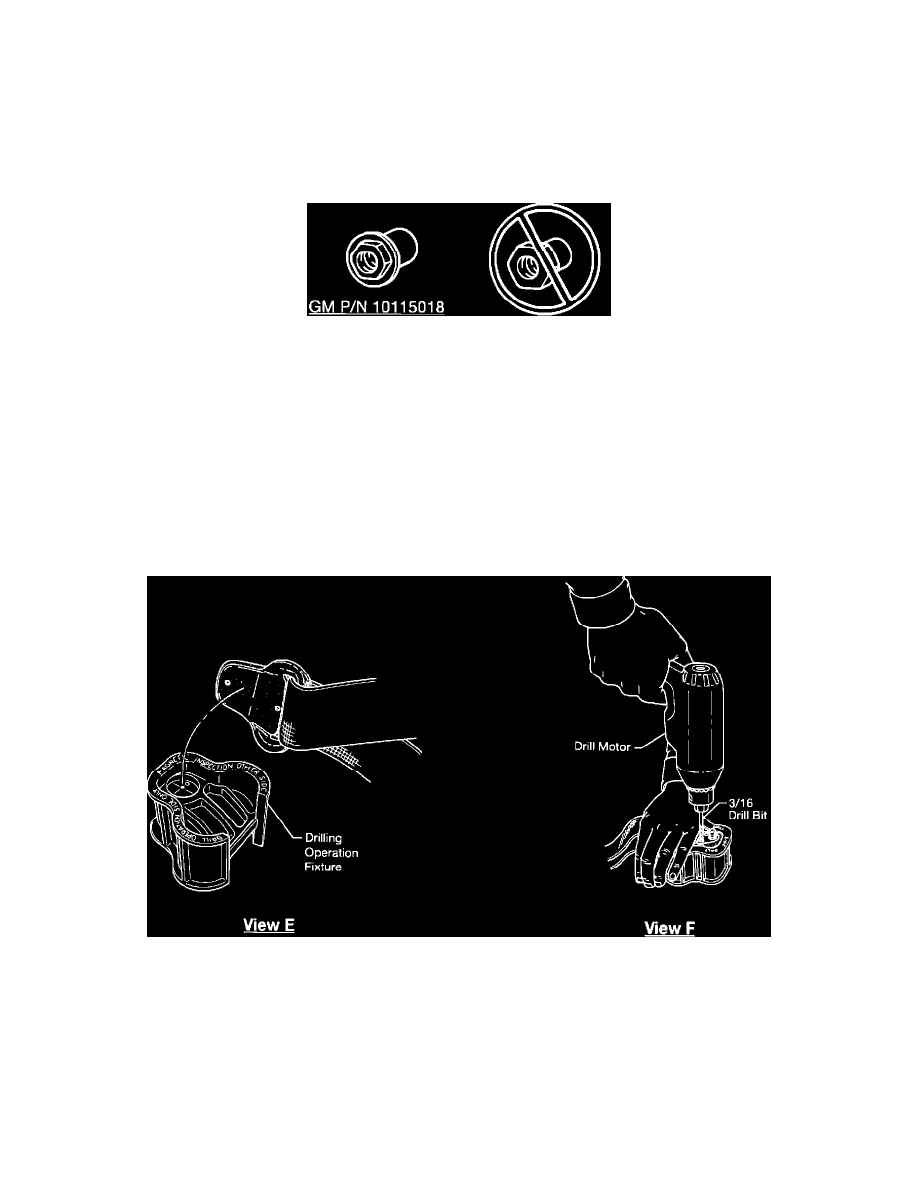
USE ONLY NEW P/N 10115018 GUIDE LOOP NUTS. DO NOT SUBSTITUTE OR REUSE OLD NUTS.
Reinstall the nut covers and install a Campaign Identification Label.
8.
If cracks were found on either guide loop, reinforcement plates must be installed on both sides following the "INSTALLING REINFORCEMENT
PLATES" instructions.
Installing Reinforcement Plates
(To be performed on BOTH front door guide loops when EITHER front door guide loop is cracked)
1.
Using the "DRILL OPERATION" side of the Magnetic Inspection/Drilling Fixture J 39425-4, place the guide loop in fixture (see View E).
2.
Locate two holes in the guide loop late on either side of the threaded stud. While holding the guide loop in the fixture with palm, use a 3/16" drill
bit to drill through the black plastic material (see View F).
