
Cutlass L4-138 2.3L VIN A FI HP (1990)
Fuel Gauge Sender: Service and Repair
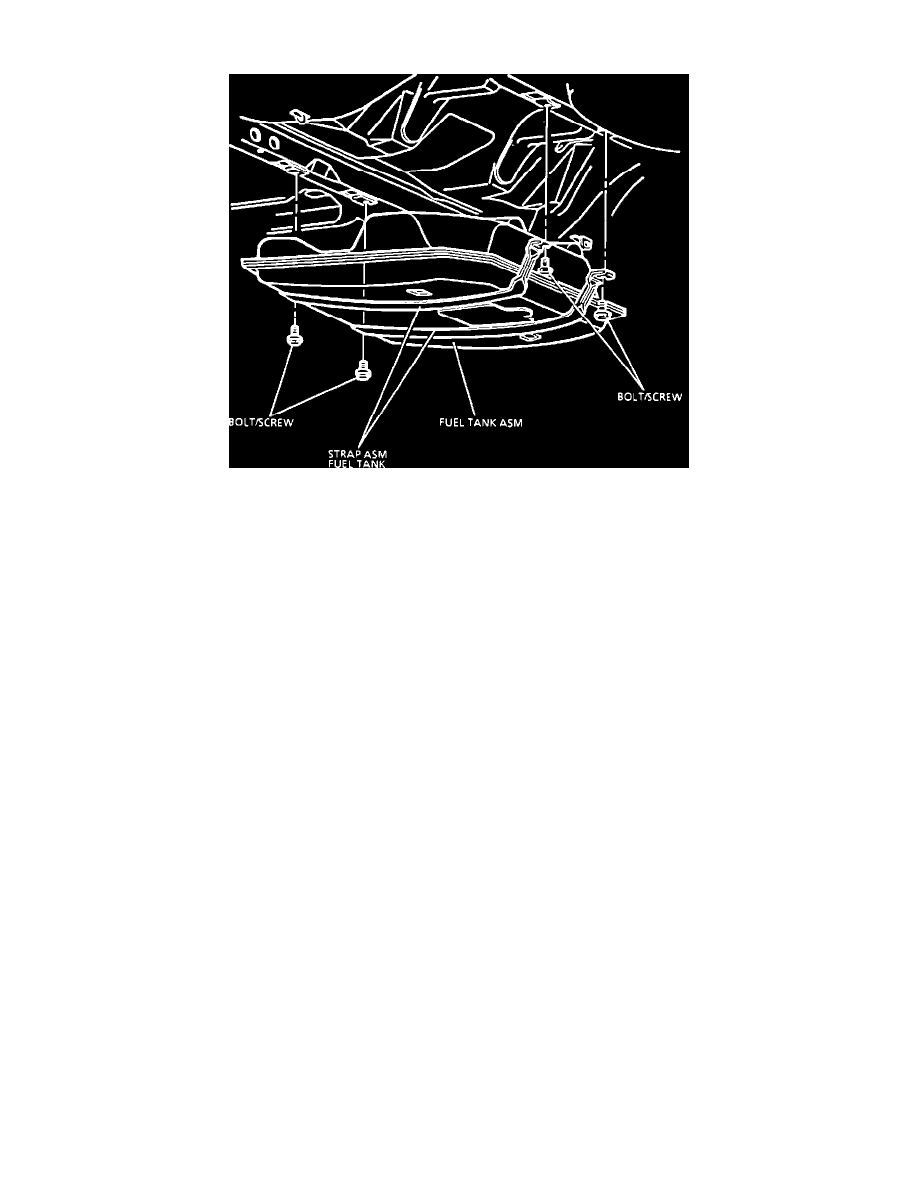
Fuel Tank Assembly
WARNING: To help avoid personal injury when a vehicle is on a hoist, provide additional support for the vehicle on the opposite end from
which components are being removed. This will reduce the possibility of the vehicle falling off the hoist.
FUEL TANK REMOVAL:
1.
Disconnect the negative battery cable.
2.
Relieve the fuel system pressure, see MAINTENANCE PROCEDURES/FUEL SYSTEM PRESSURE RELIEF.
3.
Raise the vehicle.
4.
Remove all fuel from the fuel tank, see MAINTENANCE PROCEDURES/DRAINING FUEL TANK.
5.
Disconnect the fuel filler hose and the vent hose assembly at the fuel tank.
6.
Disconnect the fuel feed pipe at the fuel filter inlet and move aside.
7.
Disconnect the fuel return pipe at the braided hose connection and move aside.
8.
Disconnect the vapor purge hose at the connection in front of the tank.
9.
Disconnect the rubber exhaust pipe hangers to allow the exhaust system to drop slightly.
10.
Remove the exhaust pipe heat shield bolts and heat shield.
11.
Disconnect the fuel tank sender unit electrical connector (located next to the fuel filler pipe).
12.
Support the fuel tank and disconnect the front fuel tank retaining strap bolts.
CAUTION: Do not bend the fuel tank straps as this may damage the straps.
13.
Lower the tank enough to disconnect the fuel sender harness retaining clips.
14.
Disconnect the fuel tank vent hose from the sender.
15.
Disconnect the vapor purge hose from the vapor tubing.
16.
Remove the tank from the vehicle.
17.
Remove the fuel tank sender unit from the tank using tool J 24187 or equivalent.
INSTALLATION:
1.
Install the fuel tank sender unit using a new O-ring seal.
NOTE: Care should be taken not to fold over or twist the strainer when installing the sending unit, as this will restrict the fuel flow. Also, make
sure that the strainer does not block the full travel of the float arm.
2.
Install the insulator pads on top of the tank to reduce rattle and other annoying noises. Peel off the release paper and apply the insulators to the
tank. Apply tape to the front insulator, using one 330 mm or two 130 mm pieces of tape.
3.
Position the fuel tank under the vehicle and partially raise and support the tank.
4.
Connect the vapor purge hose to the vapor tubing.