
Cutlass V6-191 3.1L VIN M SFI (1998)
Connecting Rod: Service and Repair
REMOVAL PROCEDURE
CAUTION: Refer to Battery Disconnect Caution in Service Precautions.
1. Disconnect the negative battery cable.
2. Depressurize the fuel system. Refer to Fuel System Pressure Relief in Engine Fuel.
3. Drain the cooling system. Recover the cooling system. Refer to Draining, Flushing and Filling the Cooling System in Cooling and Radiator.
4. Remove the cylinder head. For the left side, refer to Cylinder Head Replacement (Left Side). For the right side, refer to Cylinder Head
Replacement (Right Side).
5. Remove the oil pan. Refer to Oil Pan Replacement.
6. Mark the piston with the number of the cylinder from which it is being removed.
7. Mark the connecting rod and the rod cap so that they can be assembled correctly.
8. Turn the crankshaft to bottom dead center.
9. Clean the carbon from the top end of the cylinder.
10. Remove the connecting rod cap.
INSTALLATION PROCEDURE
^
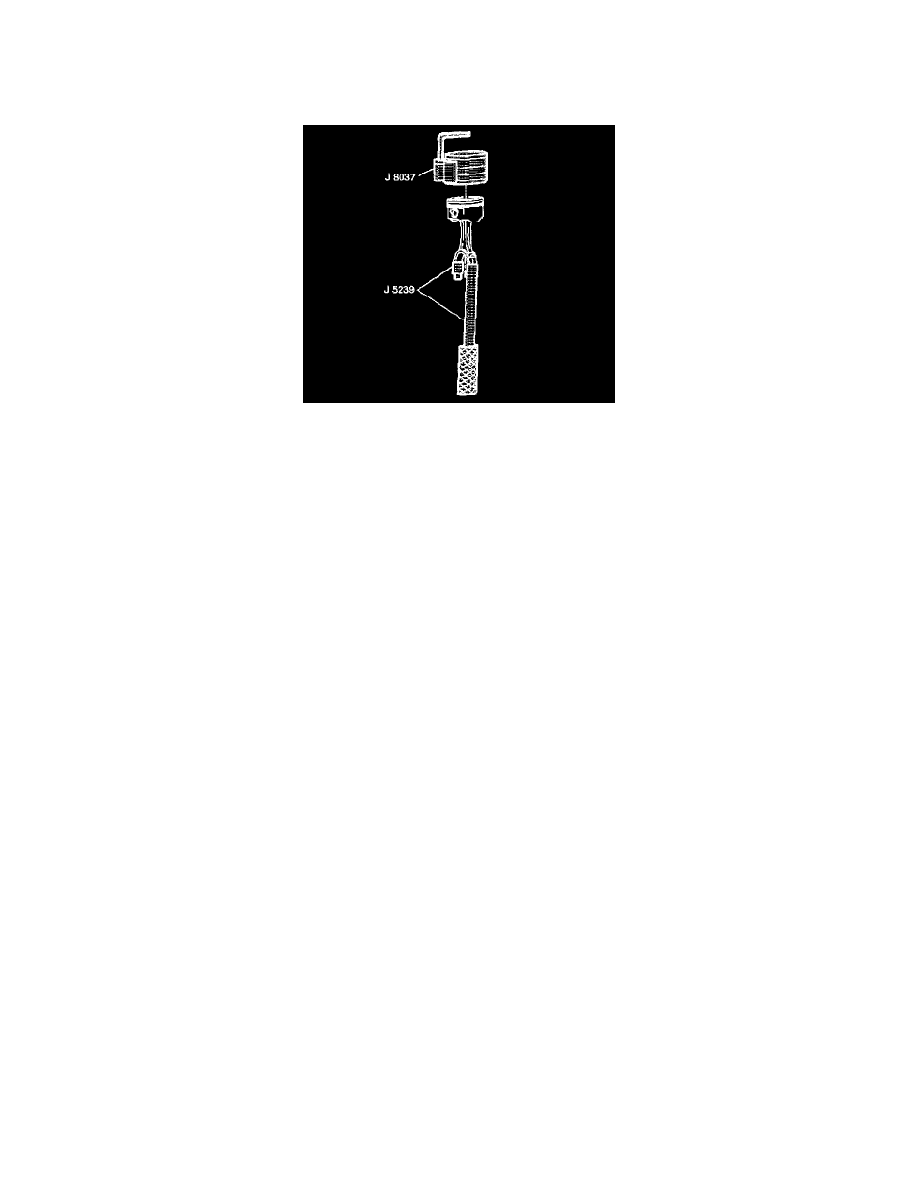
Tools Required
-
J 8037 Universal Piston Ring Compressor
1. Lubricate the cylinder wall. Lubricate the piston rings. Use clean engine oil.
2. Turn the crankshaft to bottom dead center.
3. Install the connecting rod stud thread protector.
NOTICE: Guide the lower connecting rod end carefully to avoid damaging the crankshaft journal.
4. Install the J 8037.
IMPORTANT: Ensure that the arrow on the top of the piston faces towards the front of the engine.