
Cutlass Ciera Cruiser L4-151 2.5L (1985)
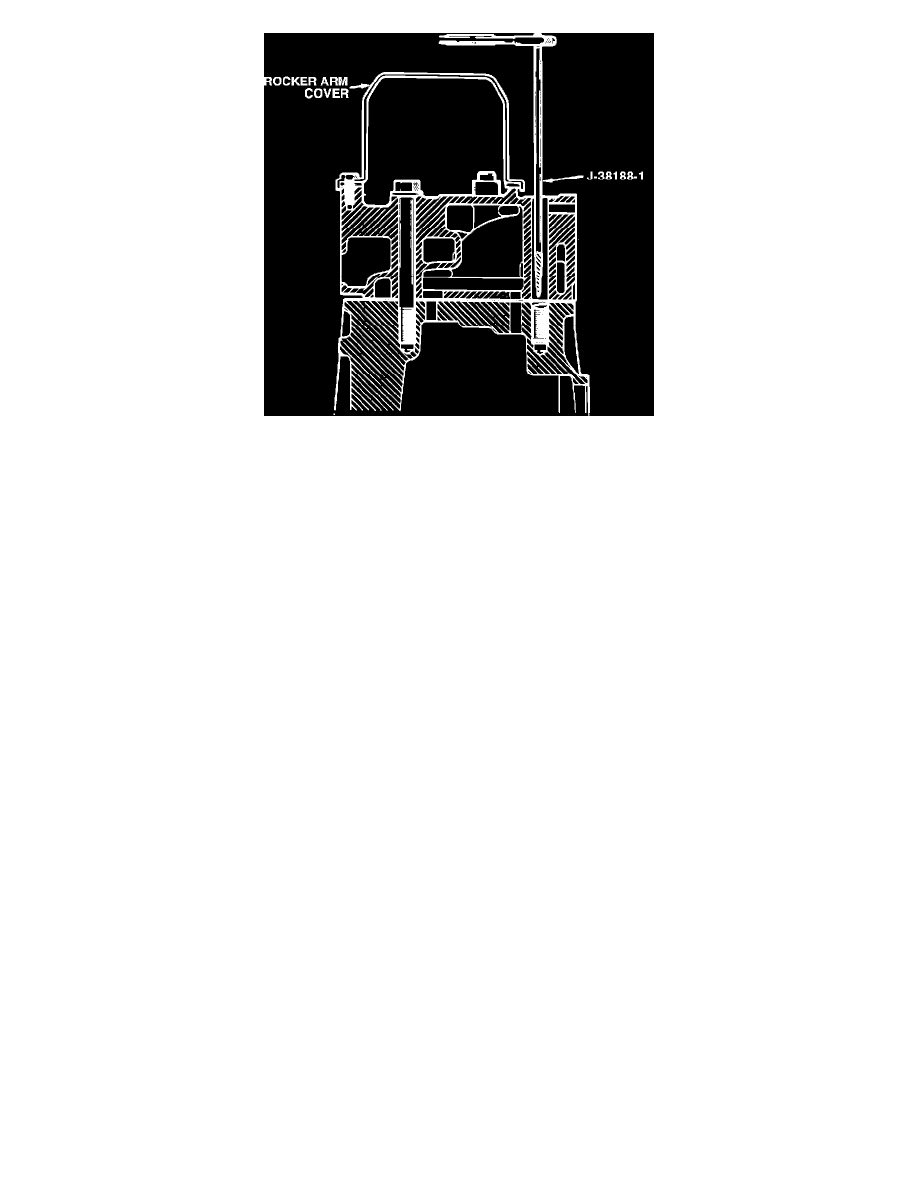
Figure 4
10.
Using tool J-38188-1, carefully extract the bolt from the block, see FIGURE 4.
IMPORTANT:
BLOW DEBRIS OUT OF BOLT HOLE FOLLOWING BOLT EXTRACTION.
11.
Install a new bolt as selected tom the "Application Table".
IMPORTANT:
APPLY ENGINE OIL (e.g. 5W-30) TO BOLTS BEFORE INSTALLATION.
12.
Using tool J-36660, torque the bolt to 30 N-m (22 lbs.ft.), then rotate the bolt 60 degrees.
13.
Replace the remaining two unbroken bolts (of bolts # 2, # 3, or # 6) with new ones as selected from the "Applicatlon Table".
NOTICE:
CYLINDER HEAD BOLTS SHOULD BE REPLACED ONE A TIME. REMOVAL OF MORE THAN ONE HEAD BOLT AT
A TIME CAN CAUSE UNWANTED INTERNAL AND/OR EXTERNAL COOLANT LOSS. INTERNAL COOLANT LOSS
CAN CONTAMINATE OIL
14.
Repeat Step 12 when fastening the bolts.
15.
If any other head bolt is broken or needs to be replaced, a new bolt should be installed as selected from the "Application Table".
16.
Following head bolt replacement, the coolant system should be pressure tested per the Service Manual - Section 6B.
17.
If no leakage is evident, the condition has been corrected.
18.
If leakage is evident, the cylinder head gasket must be replaced. Install the appropriate gasket as shown below.
Head Gasket
VIN Engine Code
Part Number
Calais
U
10101783
Cutlass Ciera
R
10101784
19.
Reinstall cylinder head and replace all head bolts with new ones per the "Application Table".
20.
Refer to the Service Manual - Section 6A1 for the fastening procedure and torque specifications when replacement & all head bolts is necessary.
APPLICATION TABLE
HEAD BOLT
NEW BOLT
MODEL
MODEL YEAR
POSITION
PART NUMBER
Cutlass Ciera
1986-87
1-8
10044566