
Cutlass Ciera Cruiser V6-3100 3.1L MFI VIN M (1994)
With remote control door outside mirror, the remote control mirror cable must be disengaged from the door trim assembly to permit trim assembly
removal.
Trim Panel Map Pocket
The trim panel map pocket is plastic and an insert type.
Trim Panels
Trim Panel Removal & Installation
Tool Required:
J 38778 Door Trim Pad and Garnish Remover
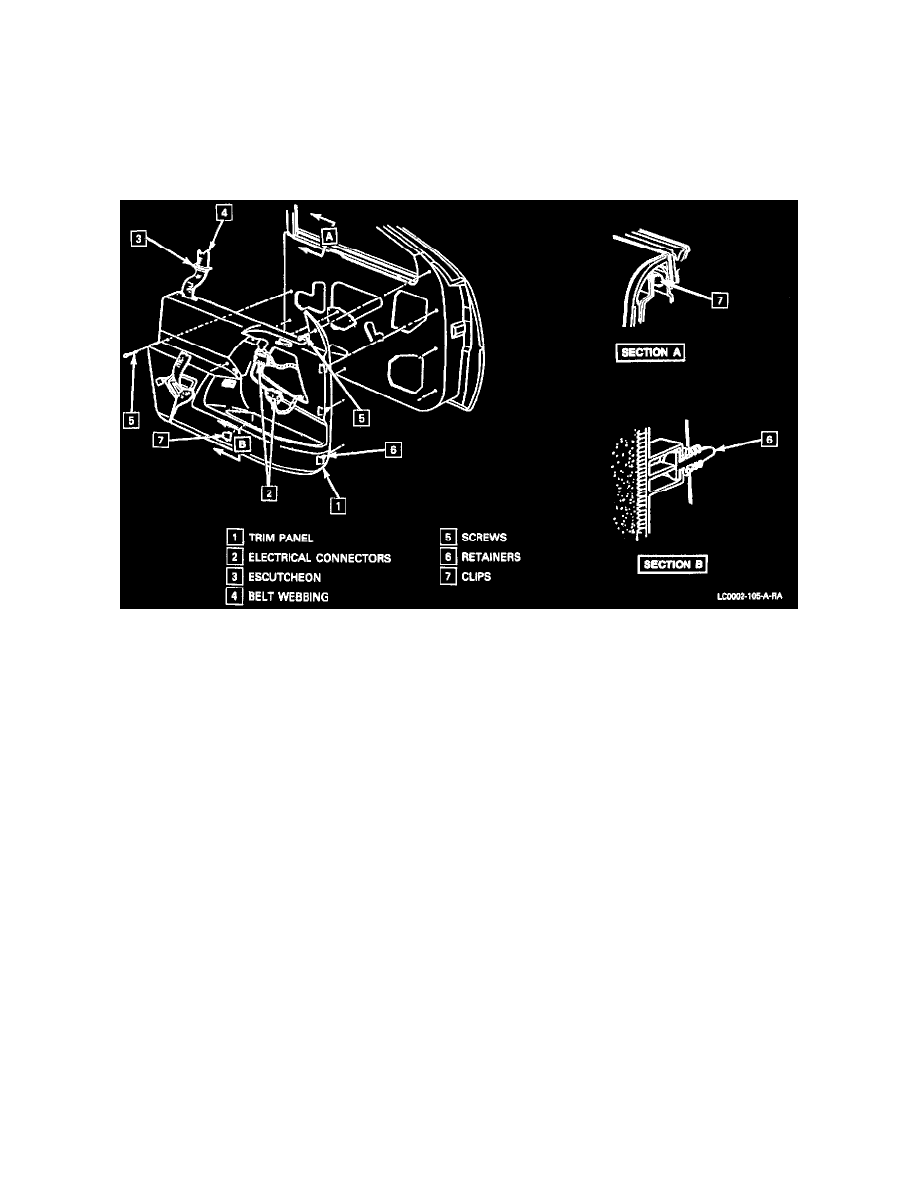
The one-piece trim panel hangs over the door inner panel across the top and is secured by retainers down the sides and two clips at the split line. It is
retained by screws located in the areas of the top front of panel assembly and armrest.
Remove or Disconnect
1. All door inside handles.
2. Door inside locking rod knob.
3. Screws inserted through door armrest into door inner panel or armrest hanger support brackets.
4. Mirror escutcheon and disengage end of mirror control cable from escutcheon.
5. On styles with power window controls located in door trim assembly, disconnect wire harness at switch assembly.
6. Remove control handle escutcheon screws.
7. Screws, plastic retainers and clips from perimeter of door trim pad using J 38778 and a screwdriver.
8. Escutcheon from trim panel.
9. Pass belt webbing through upper and lower slits in door trim panel.
10. To remove trim panel, push trim panel upward and outboard to disengage from door inner panel at the beltline.
11. On styles with courtesy lamps located in lower area of trim panel, disconnect wire harness at lamp assembly.
Install or Connect
NOTICE: Before installing door trim panel, check that all trim retainers are securely installed to the panel and are not damaged. Where required,
replace damaged retainers per step 1.
1. Start retainer flange with 6.3 mm (1/4 inch) cutout into attachment hole in trim panel. Rotate retainer until flange is inside the attachment hole.
2. Electrical components where present.
3. Pull door inside handle inward. Position trim panel to inner panel, inserting door handle through handle hole in panel.
4. Position trim panel to door inner panel so lower front locator and trim retainers and clips are aligned with attaching holes in panel. Tap retainers