
Cutlass Ciera Cruiser V6-3300 3.3L (1989)
1.
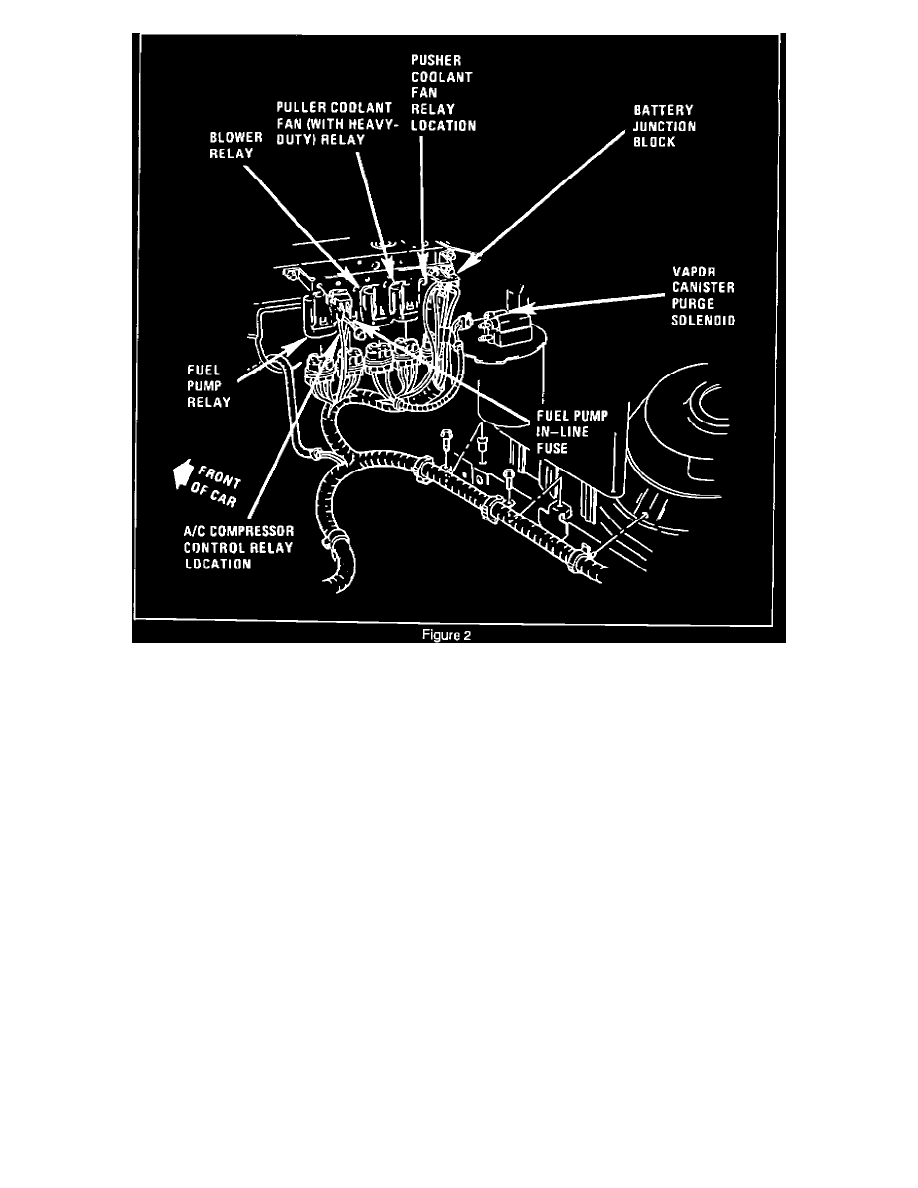
Loosen fender brace above cooling fan relay bracket and move brace to gain access to the relays. (See Figure 2).
2.
Remove relay bracket and flip relays upside down to access the wiring.
IMPORTANT:
The proper way to splice wire is shown in Section 8A of the Service Manual. Use splice clips, solder, and electrical tape or heat shrink tubing to
create a splice that will withstand the environment.
3.
Cut LT GRN/BLK (536) wire coming from the pusher fan relay.
4.
Splice a new black ground wire with a ring terminal on the LT GRN/BLK wire coming from the pusher fan relay end of wire.
5.
Attach the ring terminal to ground screw located on the radiator support next to the relay bracket.
6.
Tape the other end of the LT GRN/BLK wire leading to the ECM.
7.
Cut BRN/WHT (250) wire coming from the pusher fan relay.
8.
Splice in a .8 mm (18 ga.) BLK/PNK wire to the wire coming out of the relay.
9.
Splice the other end of this new BLK/PNK wire onto the BLK/PNK (533) wire at the puller coolant fan relay. (The pusher fan relay also has a
BLK/PNK wire, do not splice there.) The BLK/PNK (533) wire at the cooling fan relay should not be cut, the new wire should be spliced onto it.
10.
Tape the other end of the BRN/WHT wire leading to the ECM.
WARRANTY INFORMATION:
Labor Operation Number:
T1534
Labor Time:
.7 Hours